TABLE OF CONTENTS
- 1. Introduction
- 2. Adding new team members
- 3. Roles within the Team and Access Rights
- 4. Standard subscription users
- 5. Team and Enterprise subscriptions
- 6. Panel Participation
- 7. Editing team members’ details
- 8. Removing a team member

1. Introduction
As GRADEpro is a collaborative tool, you can invite others to join your project so you can work together. You can invite new members of your team and manage them in the Team section of the project.

2. Adding new team members
While the exact mechanism of adding new team members differs for the free Standard GRADEpro subscriptions and the Team/Enterprise subscriptions, the general rules are that:
- new project members can be added in the Team section of the project
- only the project Admin can add new project members
- for someone to be invited as an Admin or as a Researcher, they need to have a GRADEpro account
In all cases, new project members can be invited with various levels of access rights for the project, described in detail below. They can also additionally be Panel Members and take part in Questions Generation, Outcomes Generation and PanelVoice.
3. Roles within the Team and Access Rights
When you add a team member to your project, you have to assign them specific Access rights, which depend on what type of input this person will have in the project. In this article, we will explain various access rights as well as the roles in the project they are related to.
Admin | Researcher | No access | |
| Needs to have a GRADEpro account | yes | yes | no |
| Can access the project | yes | yes | no |
| Can access and edit evidence tables (SoFs) and Evidence to Decision tables | yes | yes | no |
| Can access Team Management tab | yes | no | no |
| Can be a Panel Member | yes | yes | yes |
3.1 Admin
This person can access and edit the project, e.g. evidence tables or Evidence to Decision tables. They can also manage the Team, so add and remove team members. An Admin can also delete the project. Usually, Admin would be the head of the project and/or their closest collaborator.
3.2 Researcher
This person can access and edit the project, e.g. evidence tables or Evidence to Decision tables. They cannot access the Team management section. Therefore, they cannot add or remove team members. They are also unable to delete the project. Usually, a Researcher is a regular member of the project team.
3.3 No access
A person with no access cannot enter the project, view it, or change it in any way, nor can they manage the Team or delete the project. Usually, No access is granted to Panel Members, described below.
3.4 Panel Member
Panel Member is not an access right but a role someone can be assigned in the project. A Panel Member can have Admin or Researcher access as well as No access. This role is important for using the PanelVoice feature.
A panel member does not necessarily need to have a GRADEpro account (unless they need to be also an Admin or a Researcher). They are only sent special forms via email. In these forms, they assess the Evidence to Decision tables and provide their feedback on the tables and the recommendation.
4. Standard subscription users
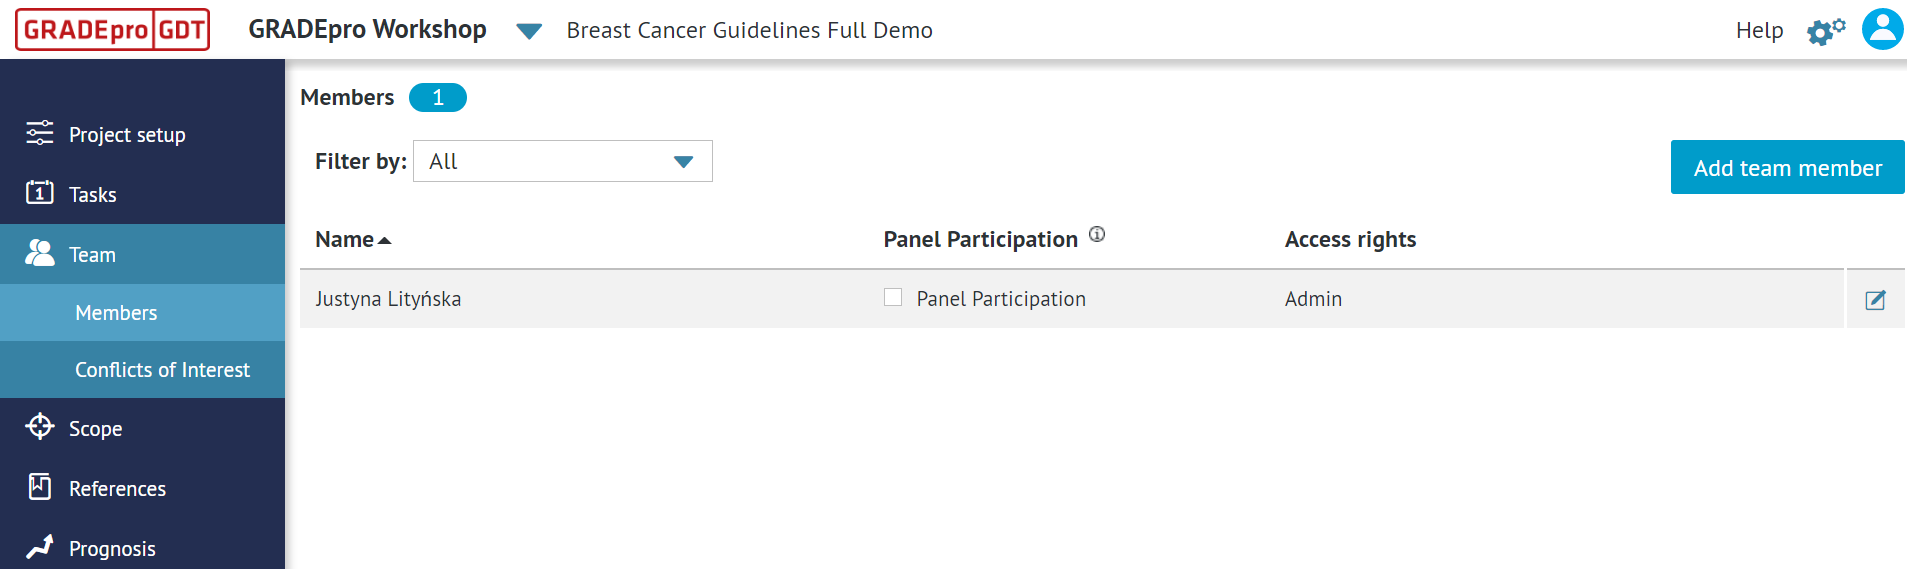
To add a Team member, you need to first go to the Team tab of your project:
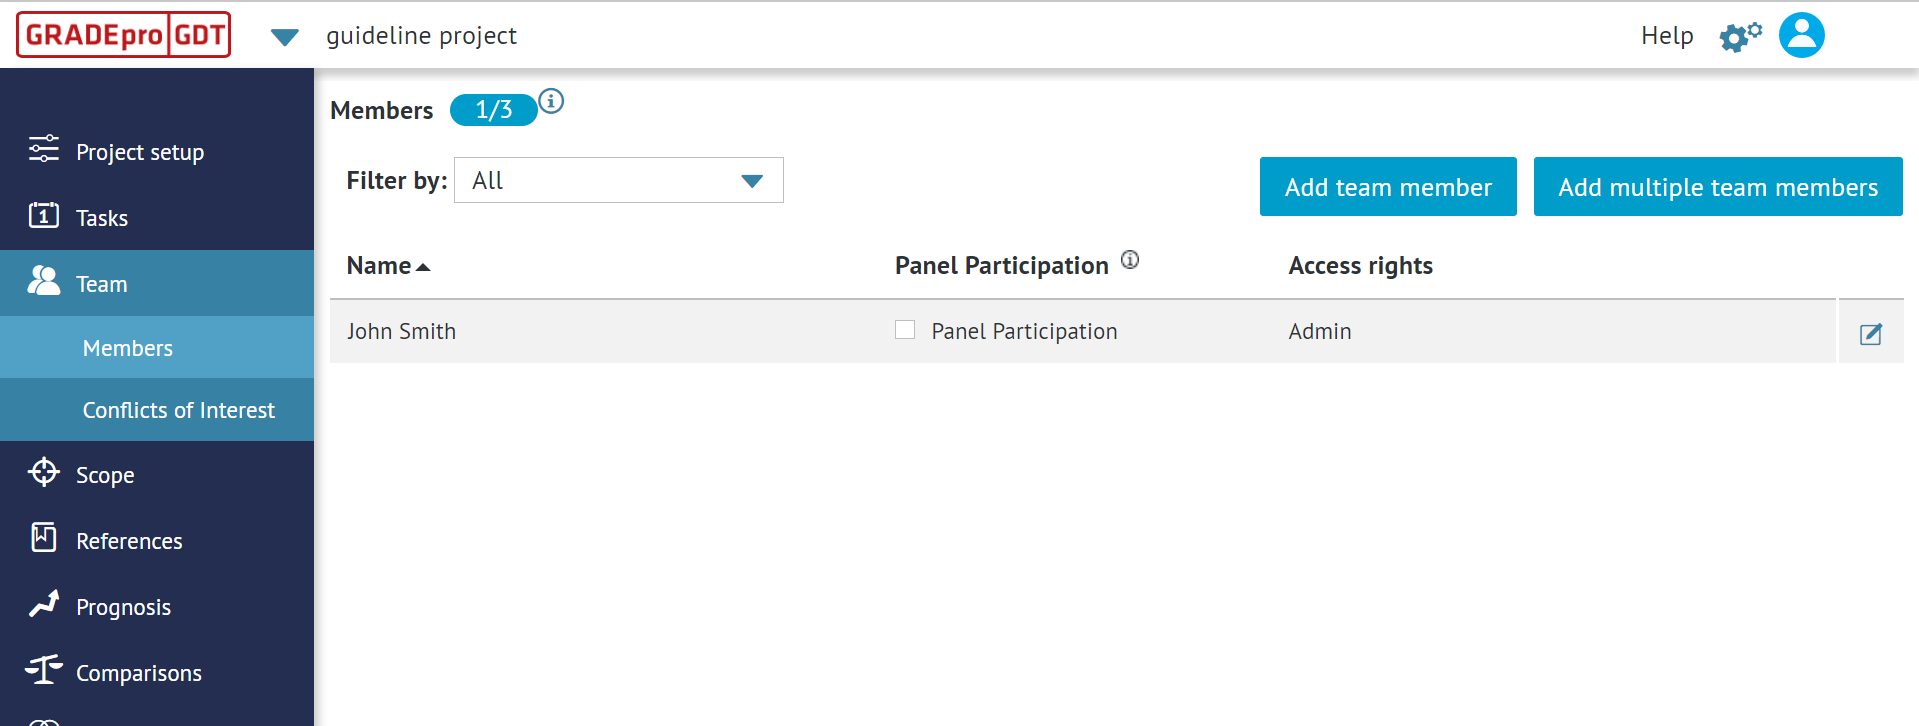
You will see there yourself with the access rights of an Admin. For the free Standard subscription, you can add only 2 more users apart from yourself. To do that, you can use either the Add team member or the Add multiple team members button.
 If you add just one person, you can pick “Add team member”. You will then see a new window where you can enter the details of such a person.
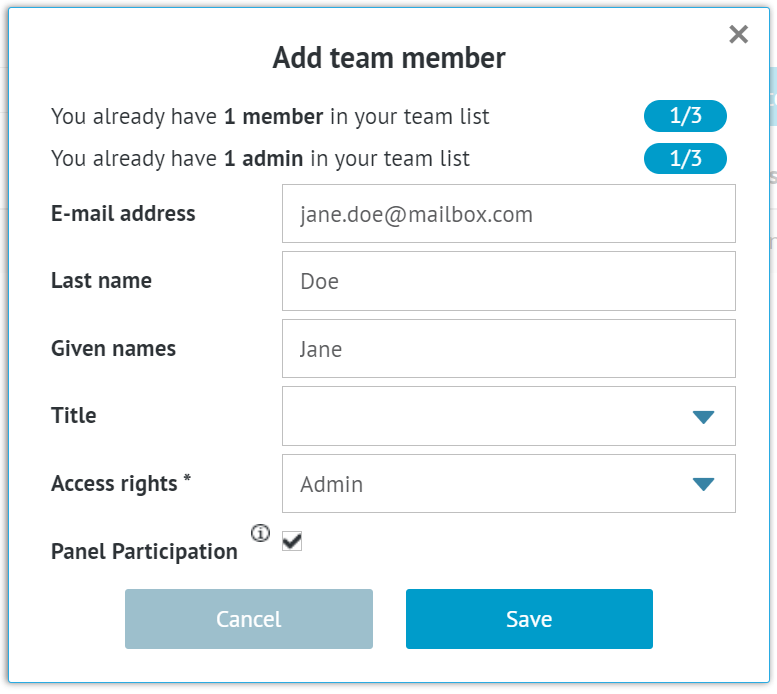
You can choose from a variety of titles. As for access rights, you can choose between Admin, Researcher and No access, described earlier in this article.
Remember: If you want to give the person the access rights of an Admin or a Researcher, they need to have a GRADEpro account first.Once you fill in all the details, you simply click “Save” and you will see the updated Team members list.
If you choose the Admin or Researcher rights, next to that person, there will be a note “pending invitation”.

Remember: This invitation will not arrive via email. Instead it will be seen as a notification on the main GRADEpro screen of that user. 4.1 Add multiple members
If you choose the “Add multiple members” option, a different window will appear:
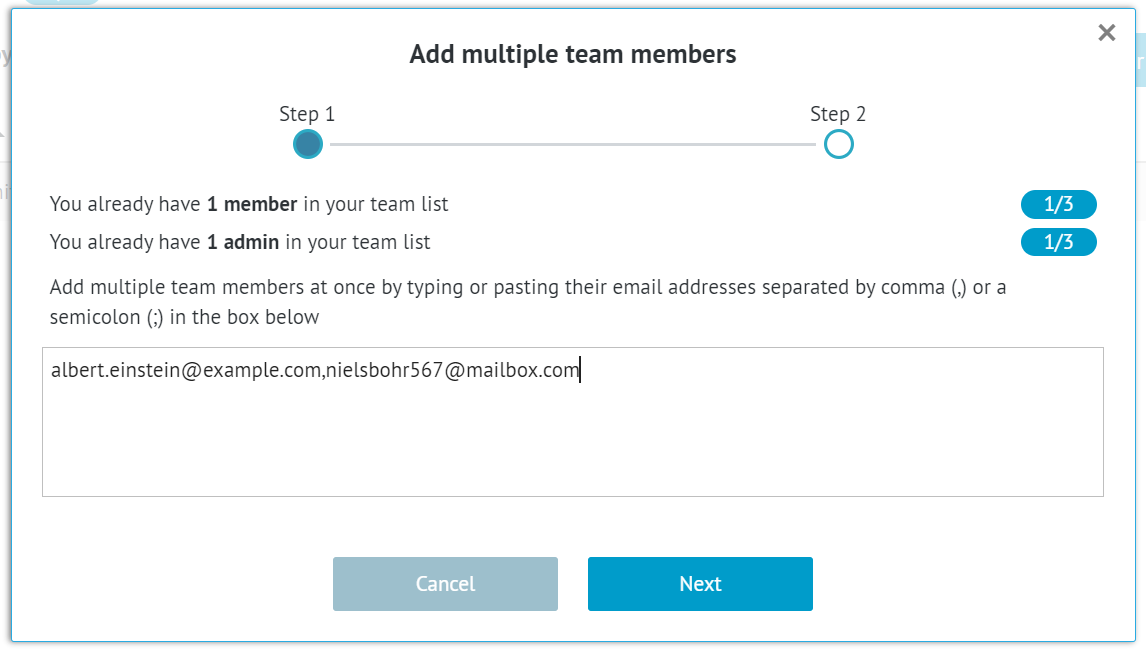
The addresses should be separated by a comma (,) or by a semicolon (;), as the instruction states. You can enter as many addresses as you wish.
Once you enter all the emails, click on the “Next” button.
The next window will show a draft of the list of your project members:
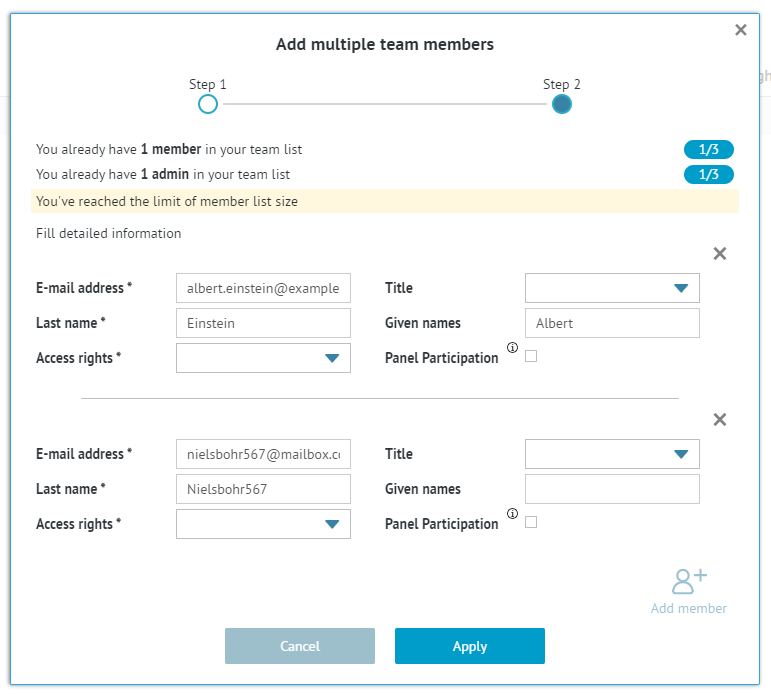
There will be their email addresses. Names and surnames should be sourced from the email. However, sometimes they need to be edited or entered manually, especially when the email address doesn't contain a name, contains numbers or other special characters. You can also add a title to any person, but it's not necessary. If you change your mind about adding somebody, you can delete them using the “x” button.
Restriction: In the Standard subscription you cannot add more than two members apart from yourself.Once you have completed all the details, you can click “Apply”.
Similarly to singular member entry, the people you invite will have to confirm the invitation to join your project.
5. Team and Enterprise subscriptions
For the Team subscription, you can add up to 14 members to a project apart from yourself (unless an individual agreement is applied).
For the Enterprise subscription, you can add up to 30 members to a project, including yourself.
In both cases, Panel members are included in the users' limit.
People that you want to add to your project as Admins or Researchers must have GRADEpro accounts and be a part of your organisation workspace. If you have the Enterprise subscription, new members can be added to your organisation workspace by the organisation admin. If you have the Team subscription, you will need to contact support@evidenceprime.com
To add a member to your team, first, you must go to the Team tab of your project.
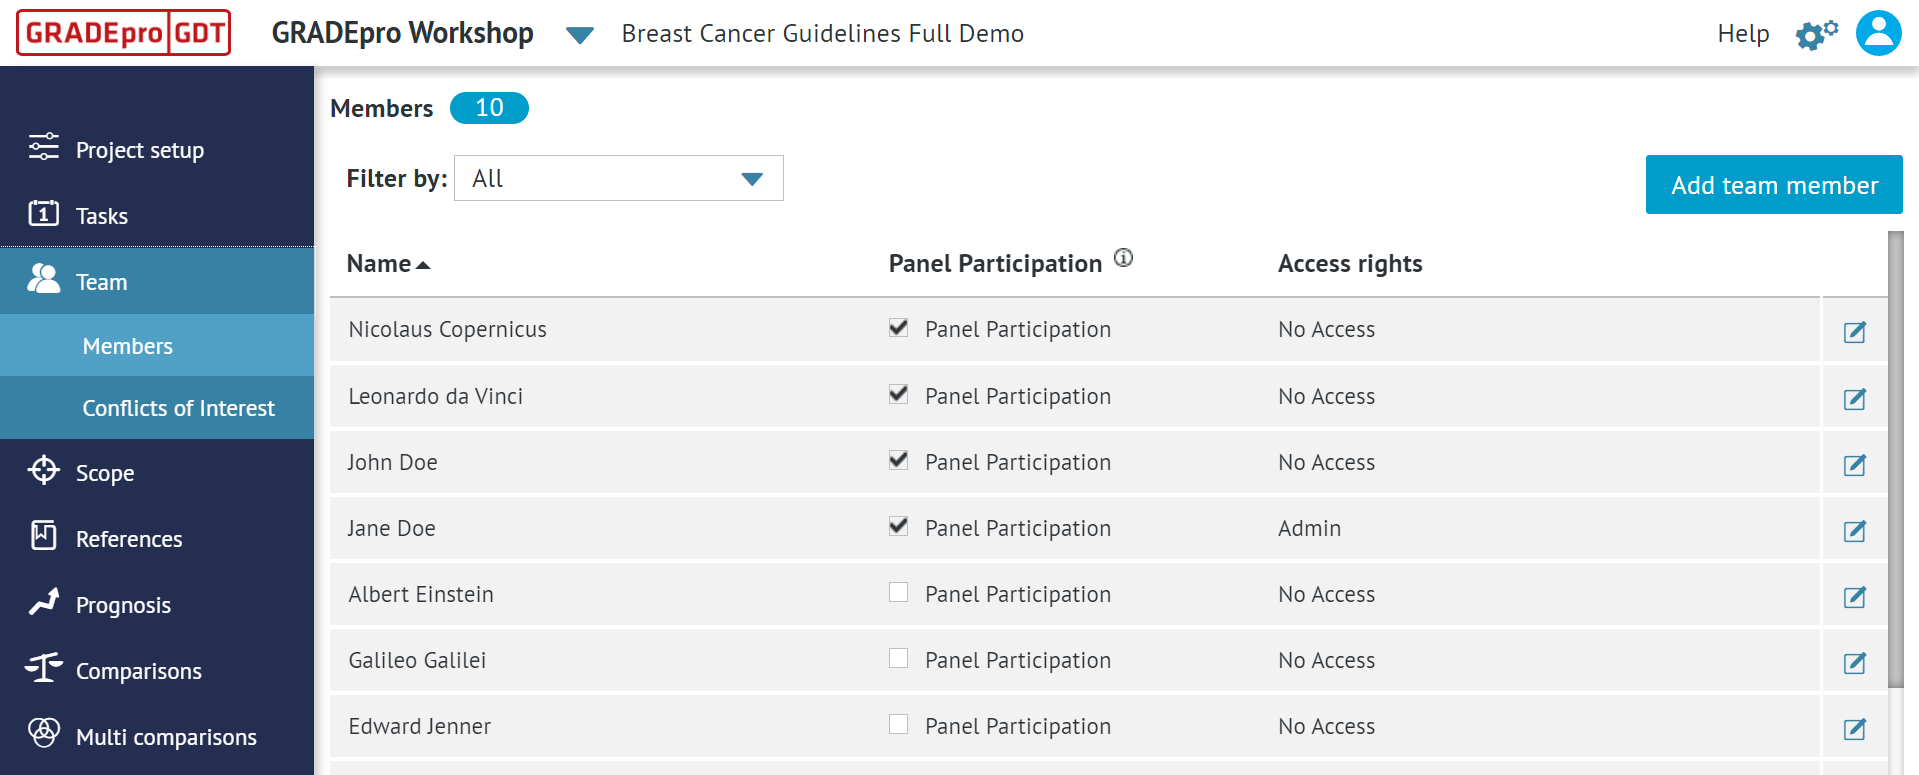
Once you click the “Add team member” button, you will see a list of all the members of your organisation workspace who aren’t yet assigned to this project.
You can choose those you want to add simply by ticking them.
Restriction: If the people you want to add are not on the list it means either they're already members of the project or they haven't been yet added to the organisation workspace. To get project access, they must be members of the workspace. New members can be added to that list by the organisation admin for Enterprsie subscription or by the GRADEpro Support team (support@gradepro.org) for Team subscriptions.Then you can move to the next step.
Now you have to choose the access rights of that member and whether they will participate in PanelVoice. Then it’s enough to apply.
You will see the updated Team members list
If you choose the Admin or Researcher rights, next to that person, there will be a note “pending invitation”.
Remember: This invitation will not arrive via email. Instead it will be seen as a notification on the main GRADEpro screen of that user. You can check our troubleshooting articles if you have problems sending the invitation or if the member reports that they're not getting the invitation.6. Panel Participation
Panel Members can be added to your project in a few ways, all of which are described in detail below. A Panel Member does not need to have a GRADEpro account (unless they need to have Admin or Researcher access rights as well (all access rights are described in detail earlier in the article).
In all cases, you need to go to the Team tab of your project first.

Restriction: The features, which include Panel Members' participation (PanelVoice, Questions Generation and Outcomes Generation) are only available for paid subscriptions.6.1. Adding a Panel Member with no GRADEpro account
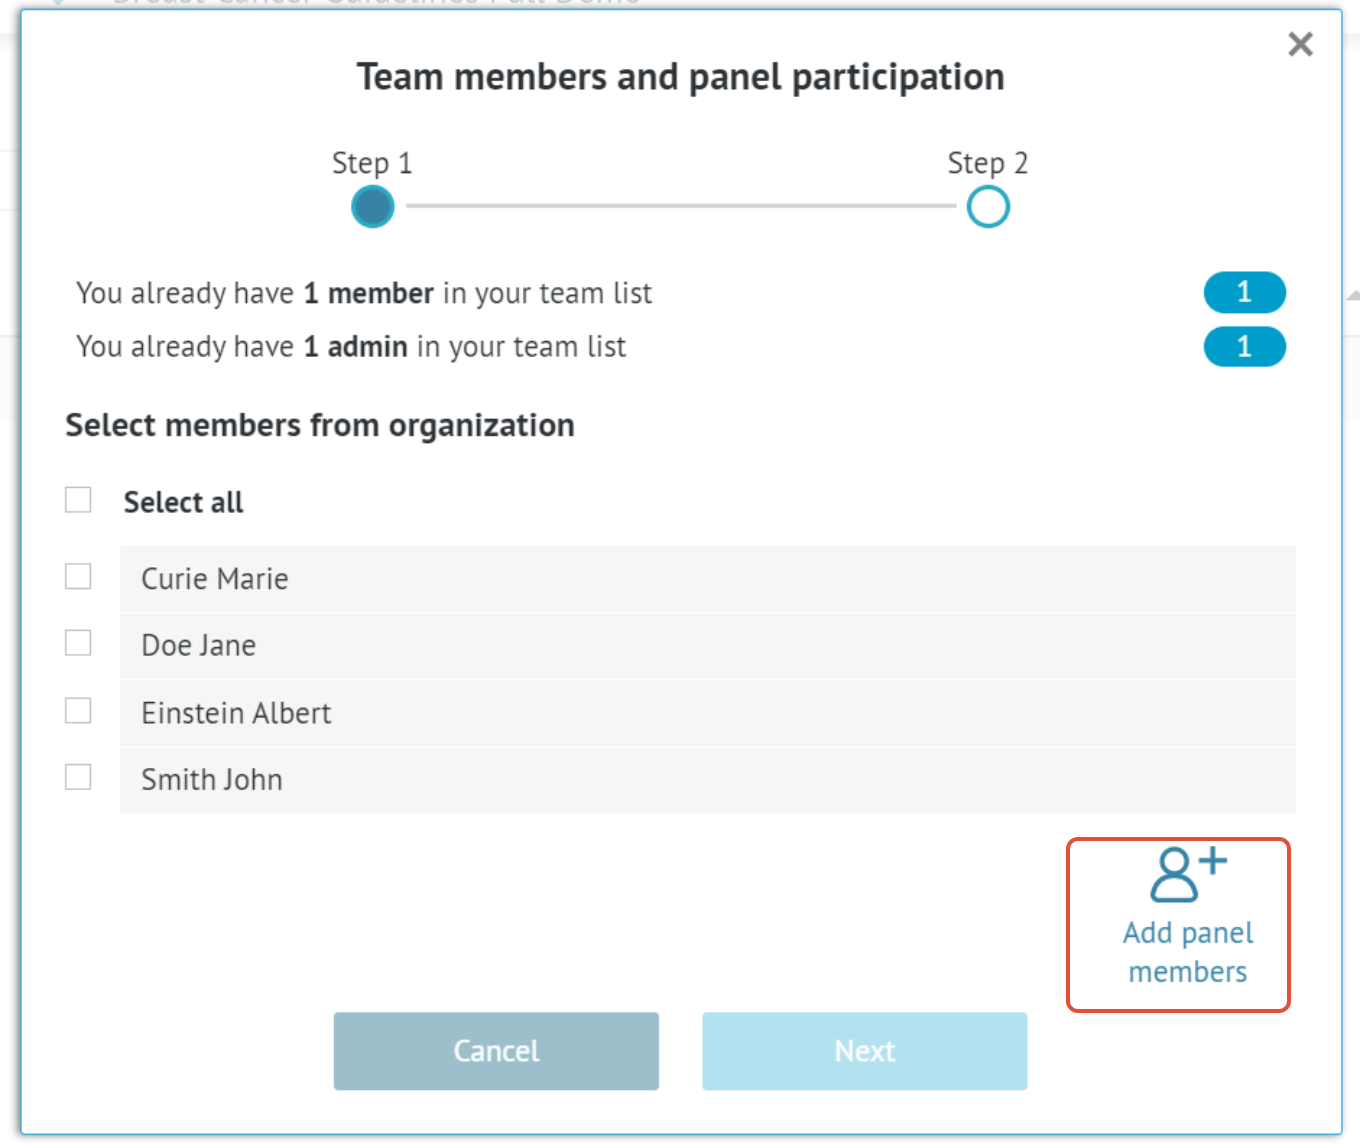
To add a person with no GRADEpro account as a Panel Member, you need to click on the “Add team member” button in the top right corner.
A new window will open. Please click on the “Add panel members” button in the bottom right corner:
The window will expand. You will be able to type in or paste in the email addresses of your panellists. They don't need to possess GRADEpro accounts. The addresses should be separated by a comma (,) or by a semicolon (;), as the instruction states. You can enter as many addresses as you wish (as long as you keep to your subscription user limits).
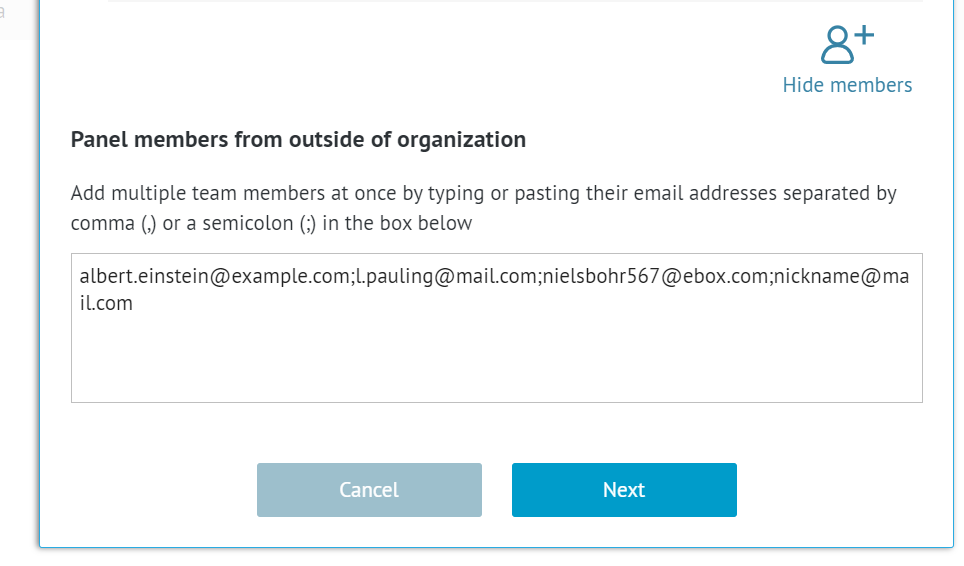
Tip: This needs to be done for each project separately. If you have multiple projects, where the panel experts are the same, we suggest that once you enter all the email addresses while adding panel members to the first project, you could copy them and save somewhere, e.g. in a word file and then simply paste each time you repeat it for next projects.Once you enter all the emails, click on the “Next” button.
The next window will show a draft of the list of your panellists:
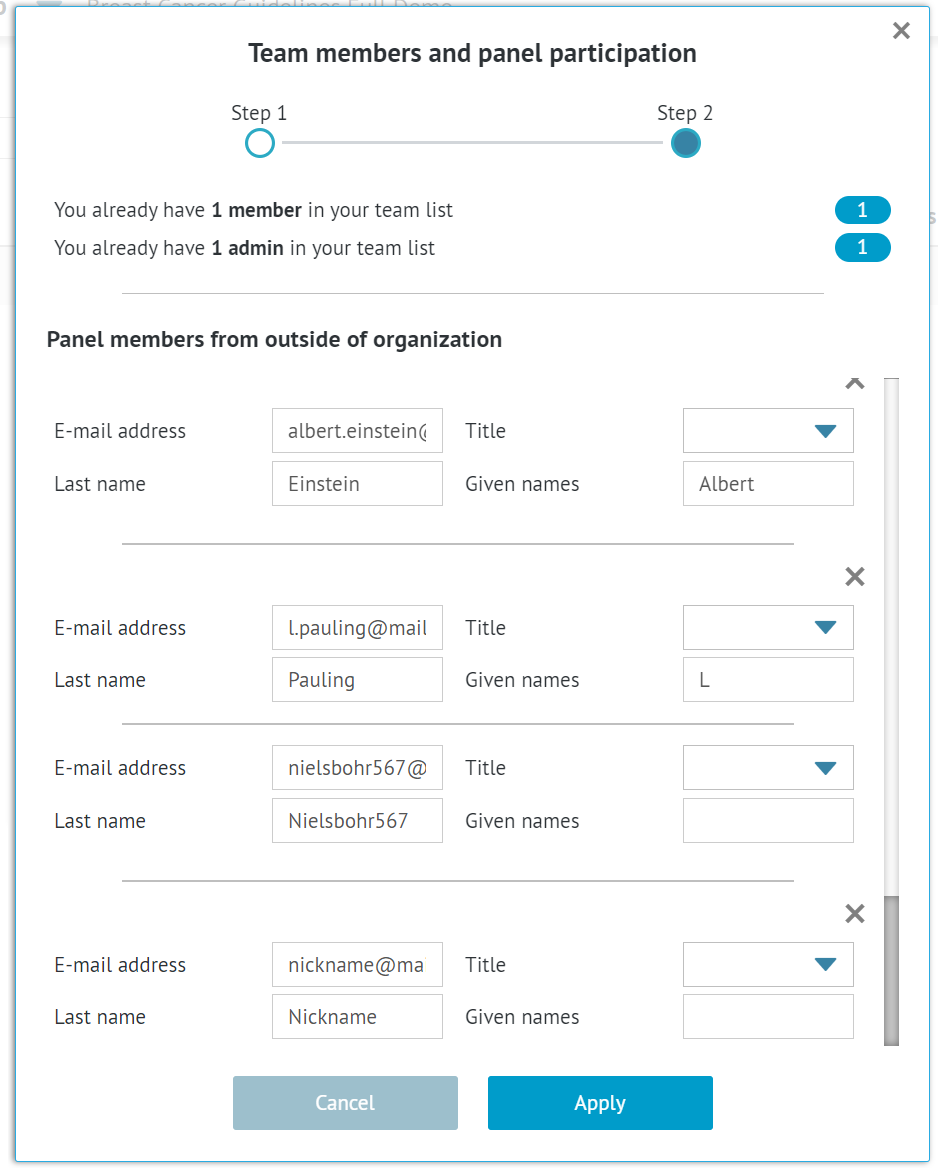
There will be their email addresses. Names and surnames should be sourced from the email. However, sometimes they need to be edited or entered manually, especially when the email address doesn't contain a name, contains numbers or other special characters. You can also add a title to any person, but it's not necessary. If you change your mind about adding somebody, you can delete them using the “x” button.
Once you are satisfied with all the names and surnames, please click "Apply".
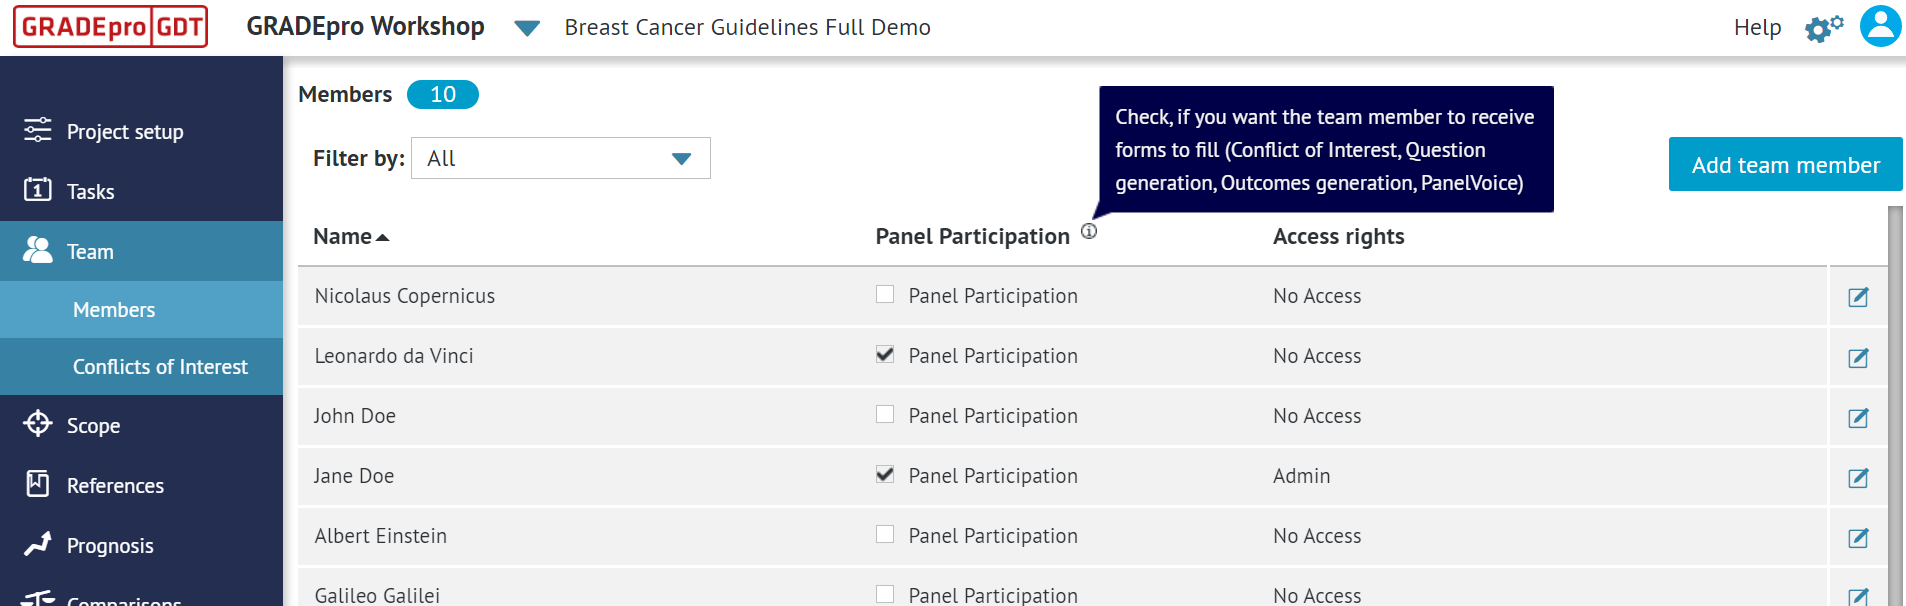
You will then see a modified list of your project members:
 Please note all panellists will be marked "No Access" as they won't have access to the GRADEpro project itself. They will only be sent survey links by you. Also, all panellists should be marked for "Panel Participation" so they can receive the emails later on.
6.2. Adding a member of your organisation as a Panel Member
If your team uses a Team or Enterprise subscription, you have your own organisation workspace in GRADEpro. You can then add Panel Members using a list of your organisation members.
To do this, you need to click on the “Add team member” button in the top right corner.

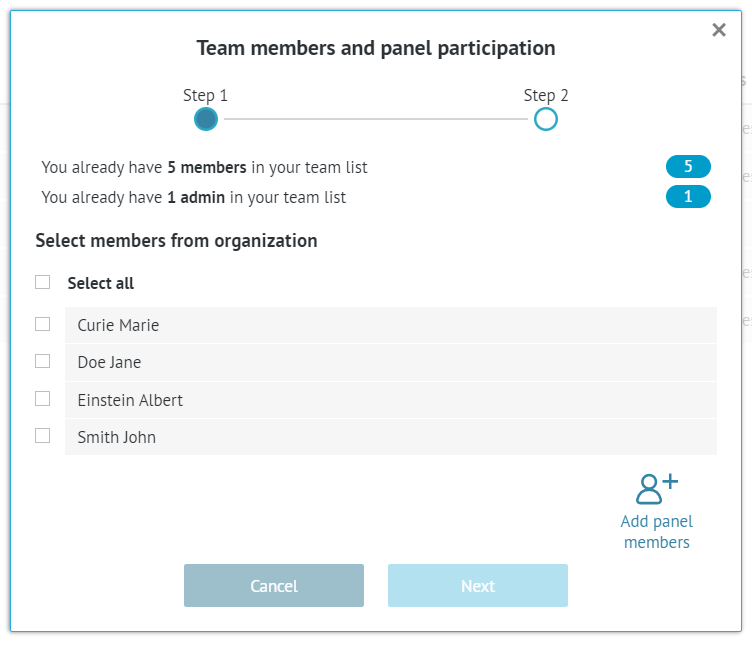
A new window will open with the list of your organisation members.

You can select any of the people on the list and proceed to the next step.
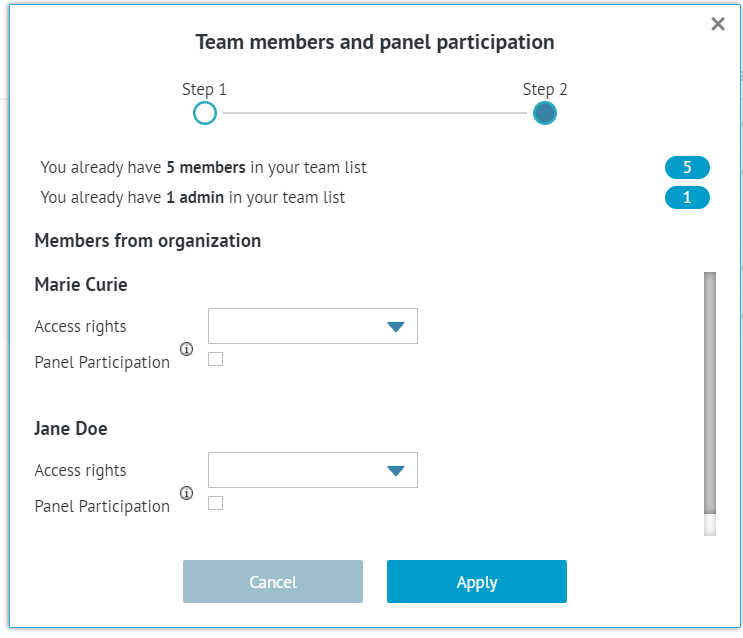
Then you will be able to select the access rights and, more importantly, whether or not that person should be a Panel Member, in which case the Panel Participation box should be ticked.
 Then it is enough to apply.
6.3. Marking existing team members as Panel Members
If there are already people added to your project, you can simply tick the Panel Participation box next to their name to add them to your panel.
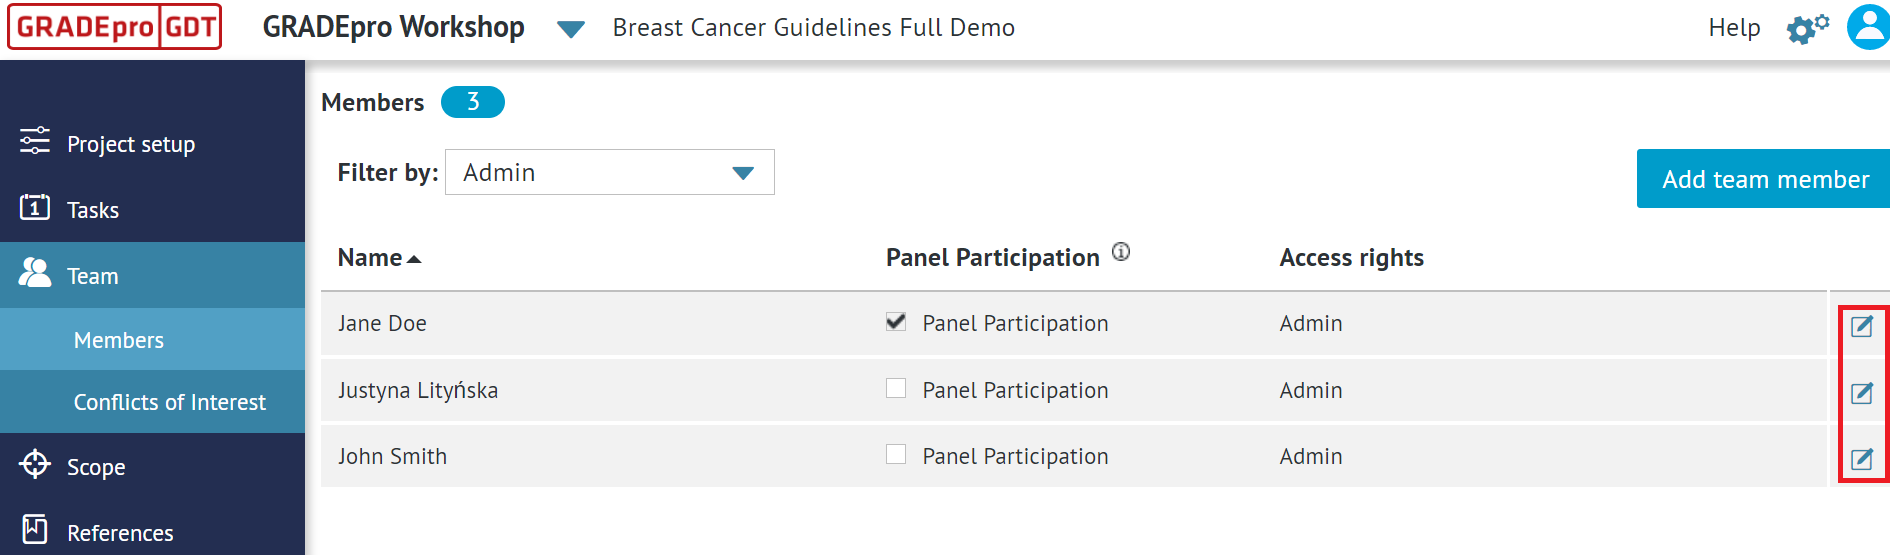
7. Editing team members’ details
Once you add a member to your team, you can edit their details and access rights.
To do that, you have to click the editing button (marked red) next to the user you want to edit.
 You will see in detail the member’s panel.

There you will be able to edit their:
- Name
- Surname
- Title
- Email address - note that this will only have an effect on emails sent from this point onward. Also, if you change the email address to one of another user, this will not mean the users were changed. To change a user, you have to remove one user and add the other user. We advise against changing the email address unless for the purpose of correcting a typo.
- Access rights - note that while editing, you cannot override your limits, so if you already have the maximum number of Admins and Researchers, you will not be able to change somebody’s access rights to Admin or Researcher unless you remove those rights from somebody else. Also, once you give Admin/Researcher rights, they will have to be accepted by the user. The user will see this invitation as a notification on their GRADEpro main screen.
Restriction: If you change someone's access rights to Admin/Researcher, but they immediately revert to "No Access" it means that person must be added to the organisation workspace first. This can be done by the organisation admin for Enterprsie subscription or by the GRADEpro Support team (support@gradepro.org) for Team subscriptions.Once you have finished editing, you can save by clicking on the floppy disc icon on the right-hand side.
8. Removing a team member
Regardless of your subscription type, the process of removing a team member looks the same.
In the Team section you have to click the editing button (marked red) next to the user you want to remove.
Then you should press the trash can symbol on the right hand side. If you changed your mind or clicked on the wrong person, you can close this view by clicking the saving icon (floppy disc symbol).

If you clicked on deleting button, you will be asked to confirm.
 Once you confirm, the member will be deleted from your team.
RELATED ARTICLES
Was this article helpful?
That’s Great!
Thank you for your feedback
Sorry! We couldn't be helpful
Thank you for your feedback
Feedback sent
We appreciate your effort and will try to fix the article