TABLE OF CONTENTS
- Introduction
- Sign-up screen
- Login screen
- Workspaces list
- Header
- Project

Introduction
In this article, you can learn about GRADEpro's structure and navigation step-by-step. The screens will be presented in order that would naturally occur in real-life use (first signup, then logging in, then using the software), and then the structure of GRADEpro project (from the default screen and then according to the side menu order). The order of the features also reflects the guideline development process (from the project management and team formation through evidence management to publication). We will briefly mention options available at each screen, but more detailed information can be found in the relevant articles we will link to throughout this article.
Notice: Items marked with an asterisk (*) may be unavailable for free subscriptions or may need to be enabled on demand by the GRADEpro Support Team.
Sign-up screen
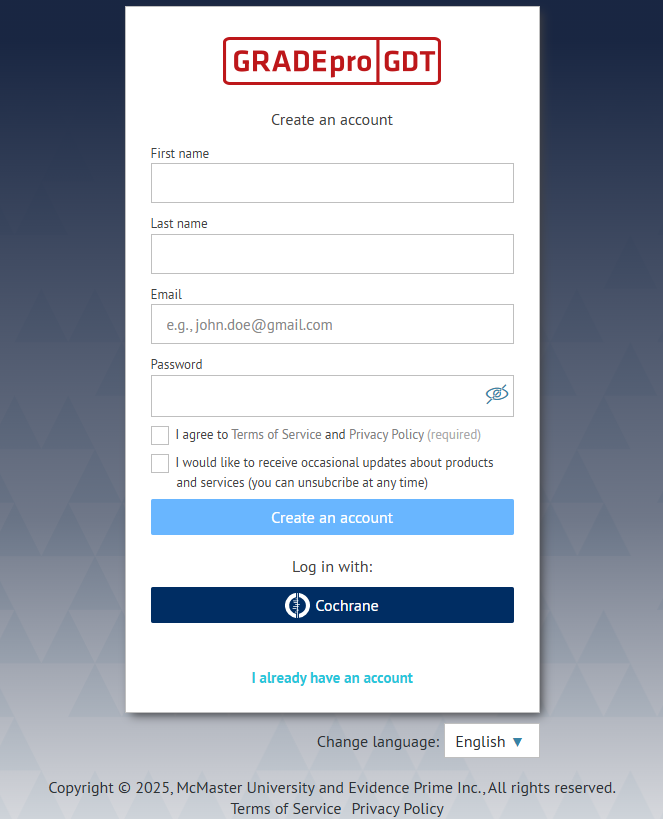
This is the screen you see when you go to gdt.gradepro.org/app/ for the first time on the device. You can create your account here, either by entering your details or by using your existing Cochrane account. If you already have a GRADEpro account, you can move to the login screen by clicking on the "I already have an account" option.
Login screen
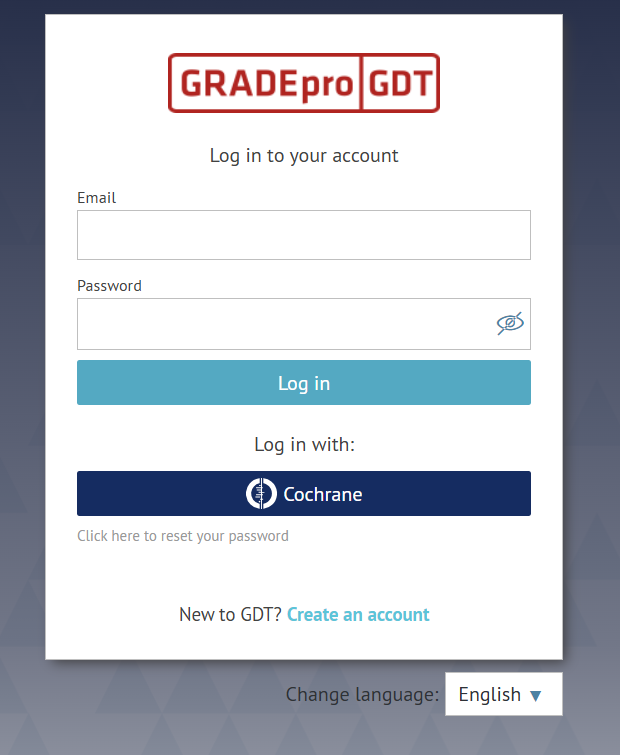
This is the screen you see when you visit gdt.gradepro.org/app/ again on your device. You can log in to your existing GRADEpro account here either by entering your email and password or by logging in using your Cochrane account. If you don't have a GRADEpro account yet, you can create it by clicking on the "Create an account" option at the bottom.
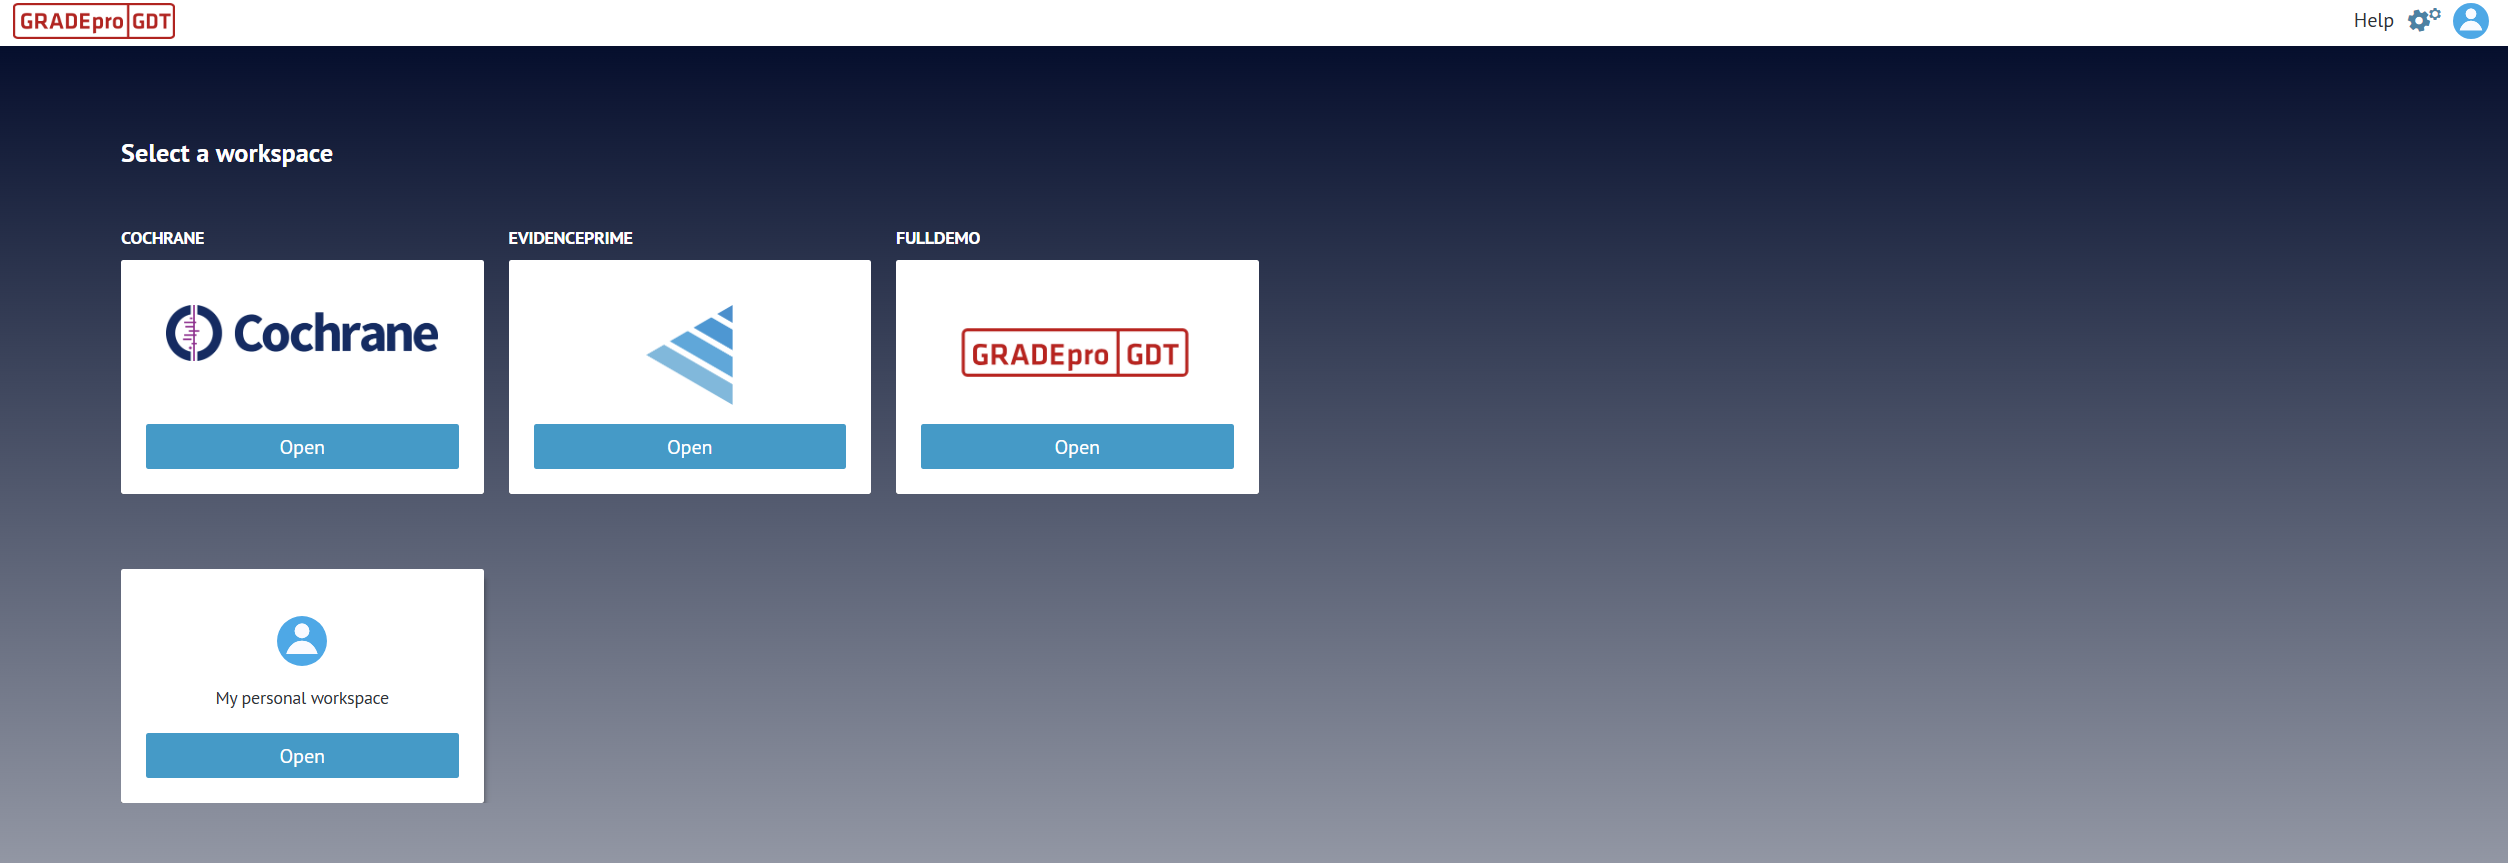
Workspaces list
This is the screen you see once you log in to your GRADEpro account, if you have more than one workspace. If you only have a free account, not connected to Cochrane, you go straight to the projects list when you log in.
Otherwise, you will see the workspaces list. There are three types of workspaces in GRADEpro:
- Personal workspace - the space for the free use of GRADEpro, which any GRADEpro member can access. You can create unlimited projects there and invite up to 2 people to collaborate with you.
- Cochrane workspace - the space for online integration with RevMan Web. Projects cannot be created directly in Cochrane workspace, they are created from within RevMan Web.
- Organisation workspace - if you are a member of a paid GRADEpro subscription, the subscription-related projects can be accessed in that workspace. The workspace is usually named after the organisation/team/project related to the guideline. The limits depend on the subscription terms. Other details can be found here.
Header
The header at the top of the website contains helpful options listed below. On its left-hand side is the GRADEpro logo, which you can always use to return to the project list screen from within a project.

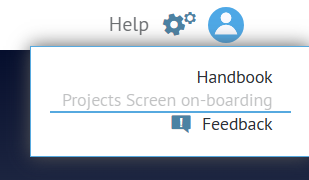
Help
The Help button allows you to access the GRADE Handbook (which describes GRADE methodology), the Project Screen on-boarding (which describes basic GRADEpro functionalities), and the Feedback option (which you can use to send an error report to our Support Team).
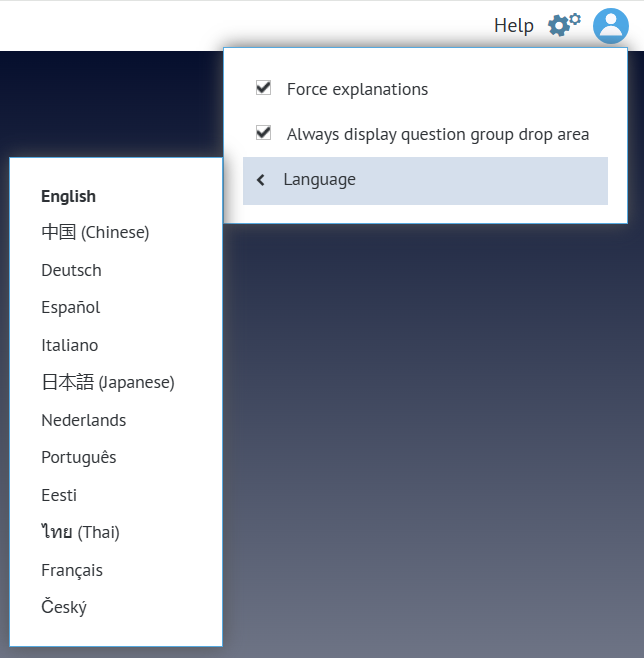
Settings
The Settings (cog wheel) button allows you to decide on system-wide options: whether adding explanations after downgrading certainty level is forced, how questions can be organised in the project, and what language the system should be displayed in.
Note: The language settings don't refer to the Evidence to Decision table - language of the EtD is set separately.
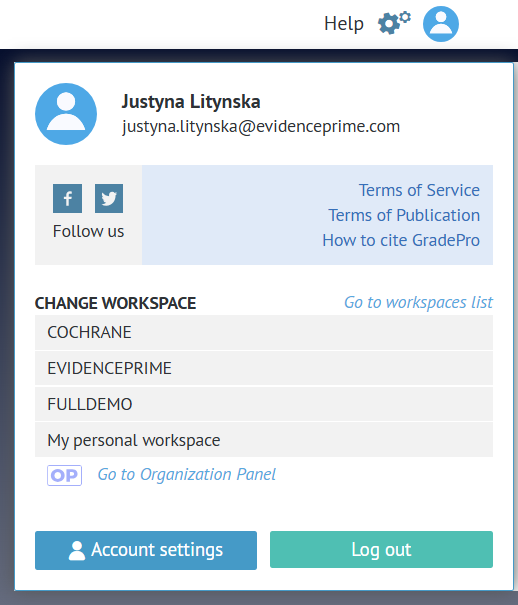
User menu
In the user menu, you can check the email address related to your account, access helpful resources, such as How to cite GRADEpro, move to another workspace, or go to the workspace list. Workspace admins can additionally access the Organisation panel. You can also access Account settings, where you can link your GRADEpro account to your Cochrane account. You can also log out.
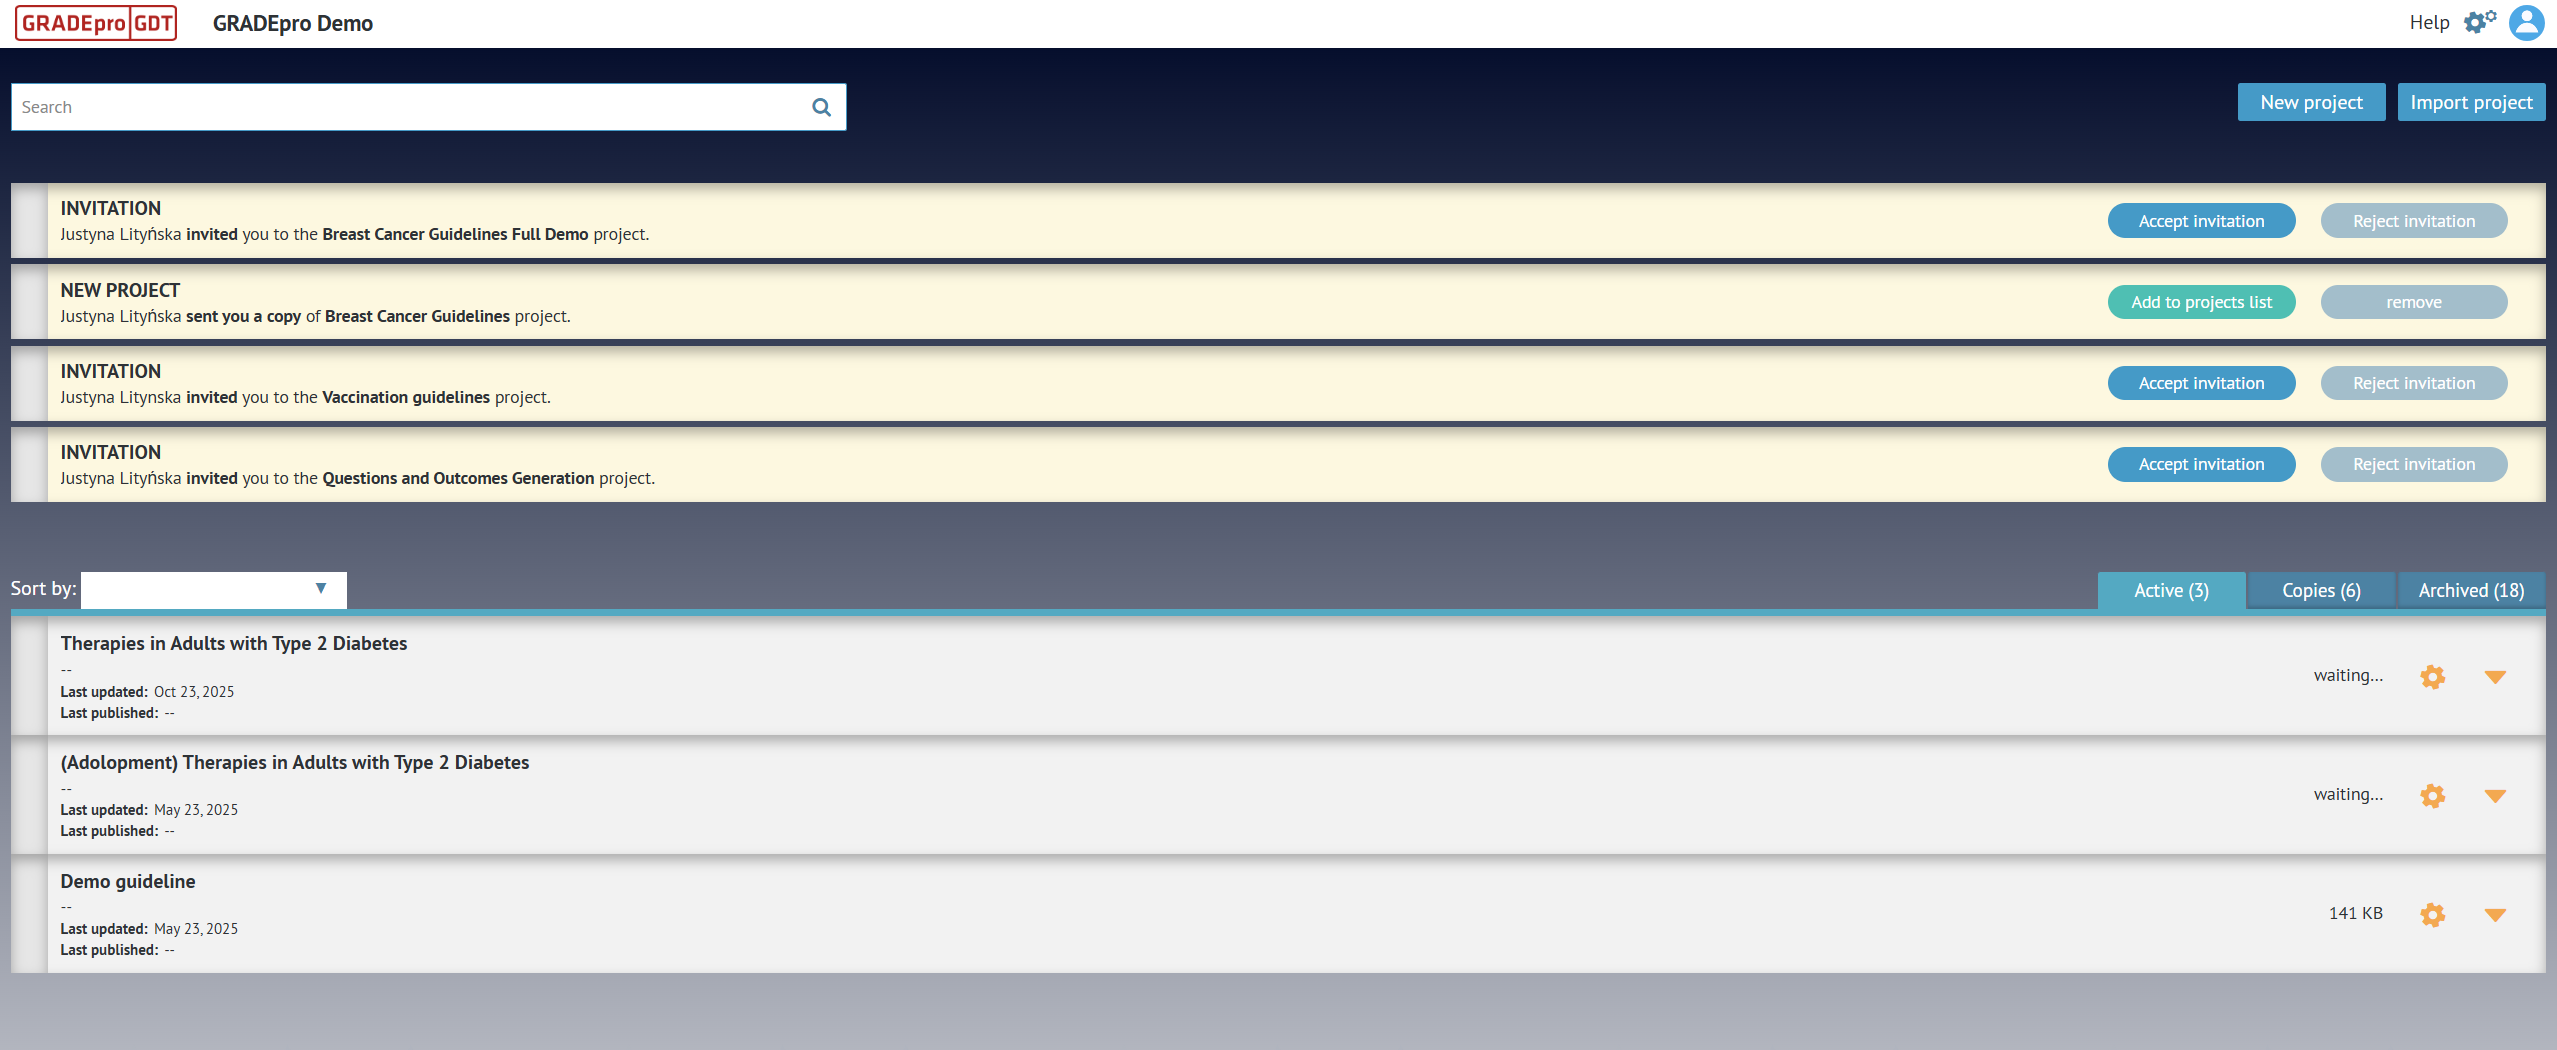
Notifications
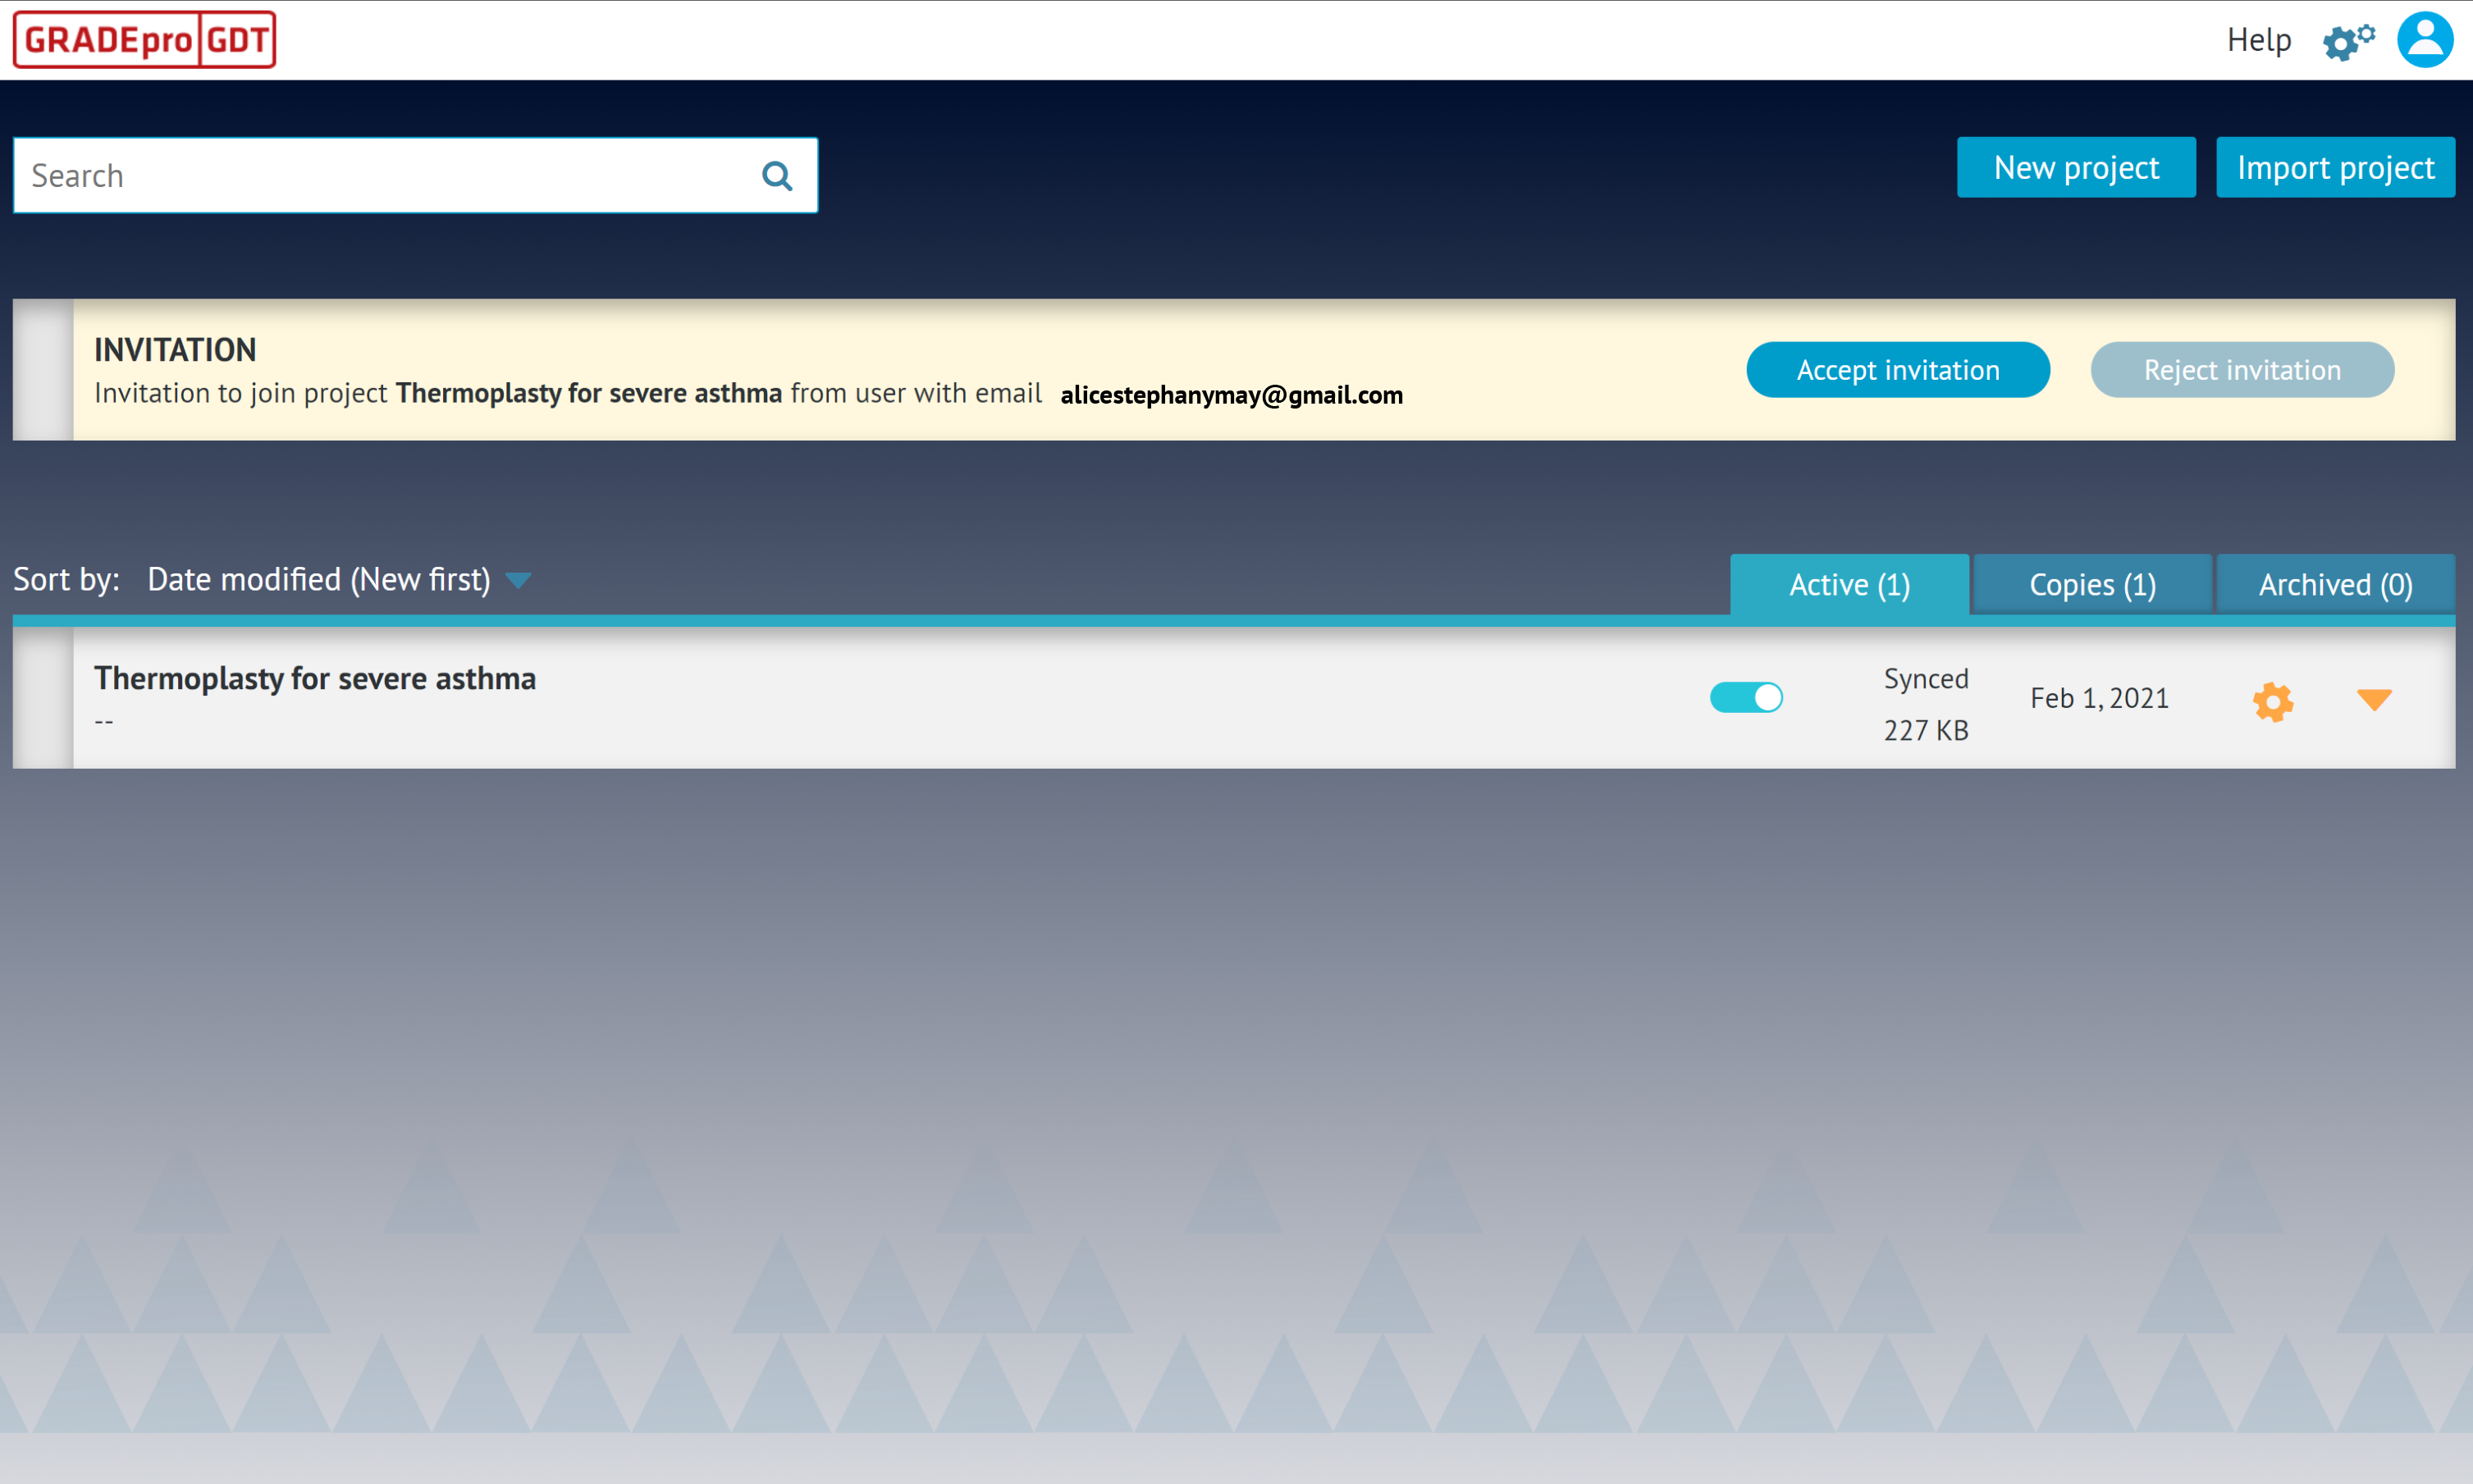
Once you enter a workspace, you can see various GRADEpro notifications.
Project invitation
This notification comes when someone invites you to join their GRADEpro project.
Note: The project invitation never arrives via email. You must enter a workspace to access the notification.
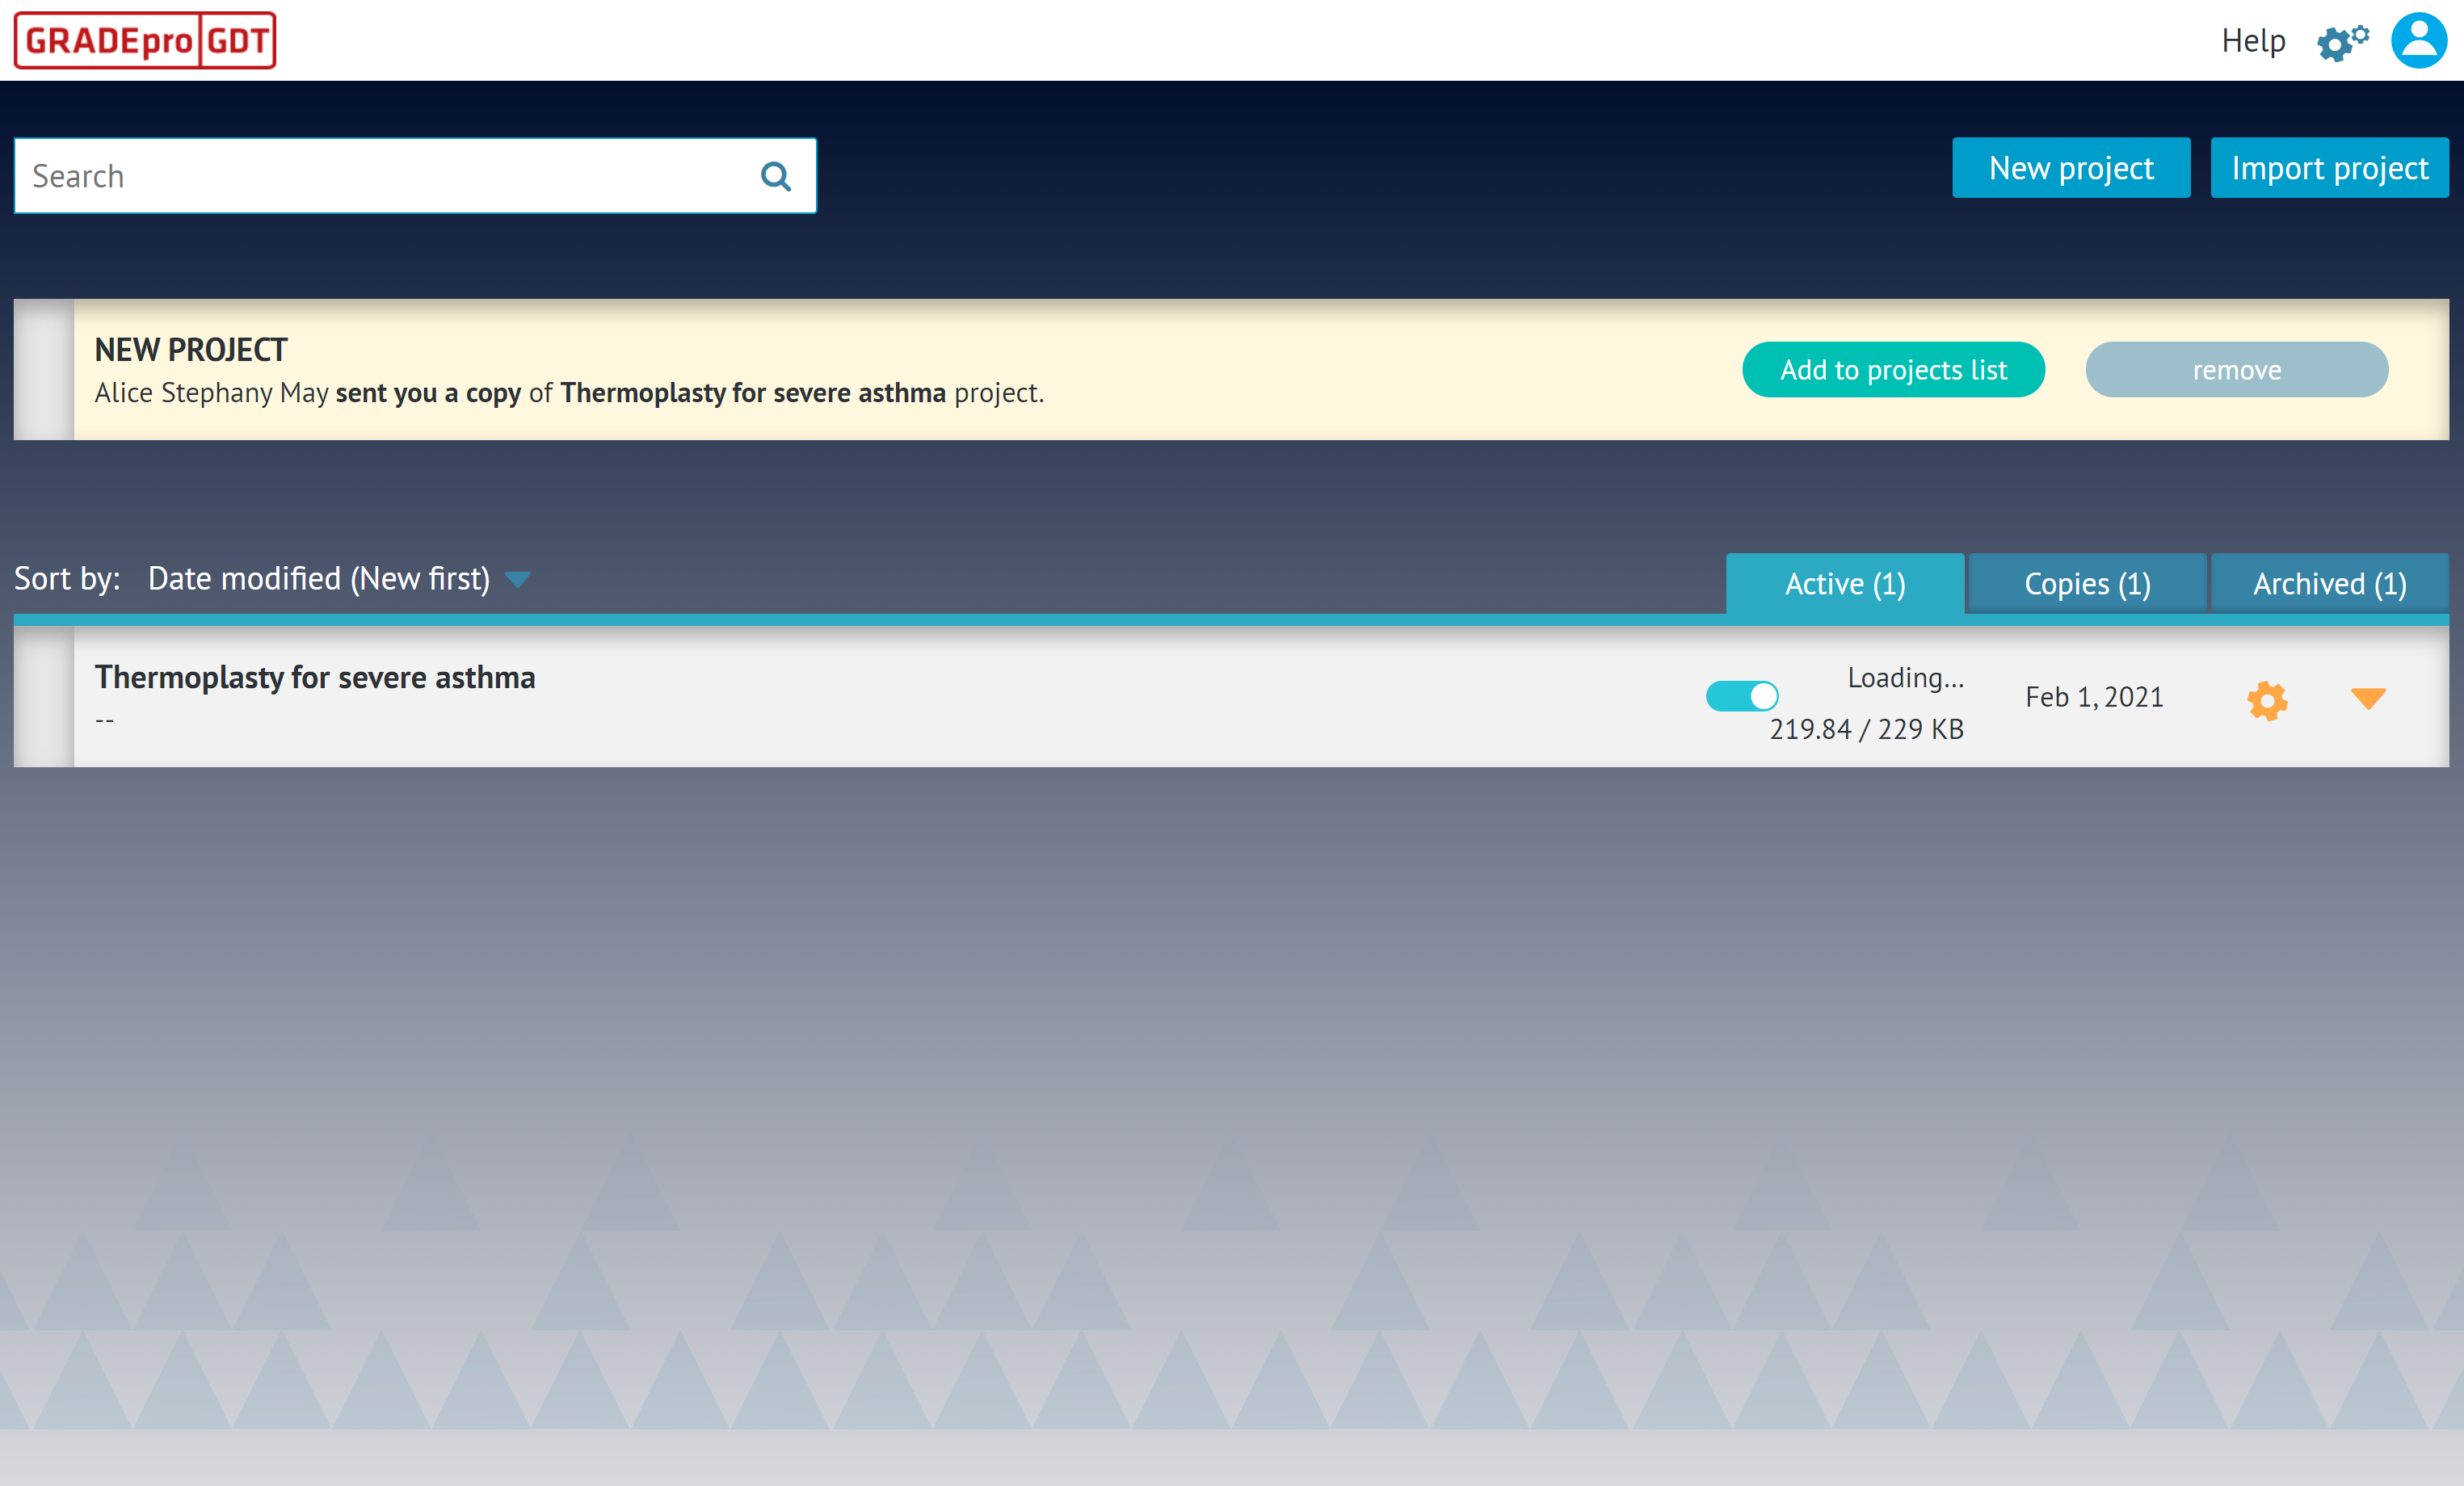
Project copy shared
This notification comes when someone sends you your own personal copy of their project. You can add this project to your list.
Email confirmation
This is the notification that you can see after your account is created. It won't disappear until you confirm your email address by clicking on the link that was sent to you via email. If you cannot find the original email message or the confirmation link has expired, you can resend the verification email by clicking on the notification.

GRADEpro update
This notification appears after each GRADEpro update. Updates include adding new functionalities and bug fixes. We recommend updating GRADEpro as soon as the notification appears.

Projects list
Projects list is the main dashboard of each workspace. It includes a search bar at the top that you can use to search for projects. You also have options to create or import a project in the top right corner.
Projects list can be sorted based on project title or the last edit date. Next to each project you can see its synchronisation status with the central database. There is also a cog wheel icon that allows you to access project options. Projects can be found in three tabs
Active, which are the currently open projects
Copies, where previously made project copies can be found
Archive, where you can find archived projects.
Project
In GRADEpro, a project is equivalent to a guideline. The project menu is available on the left-hand side. Project modules are described in detail below.
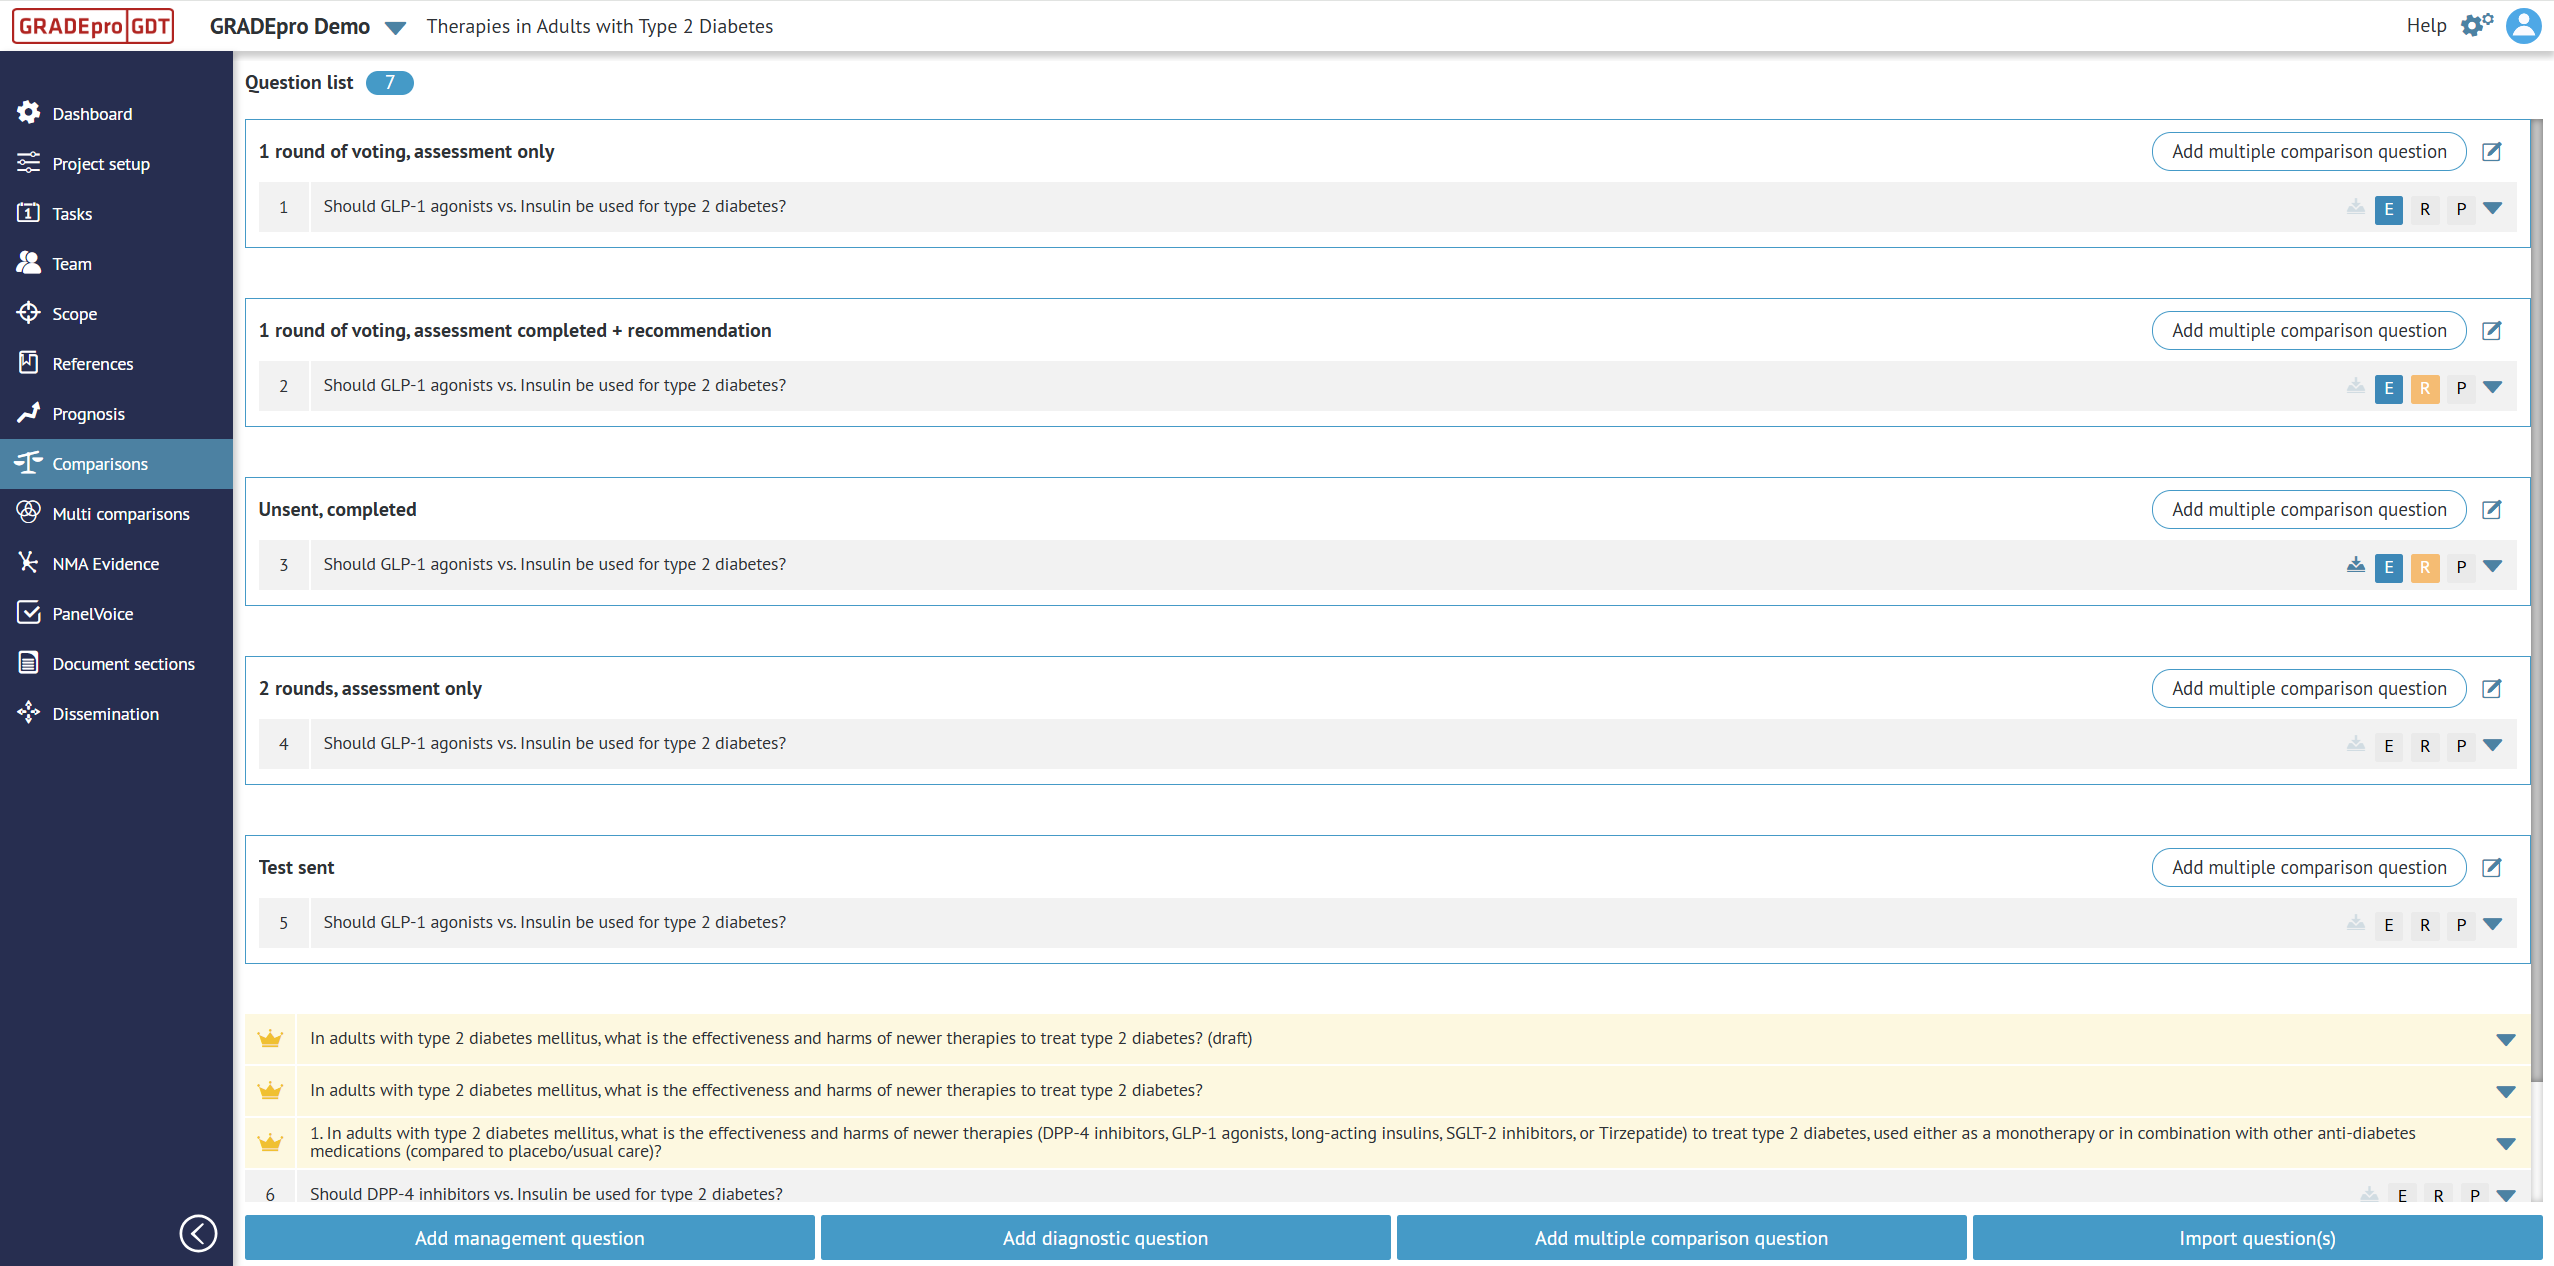
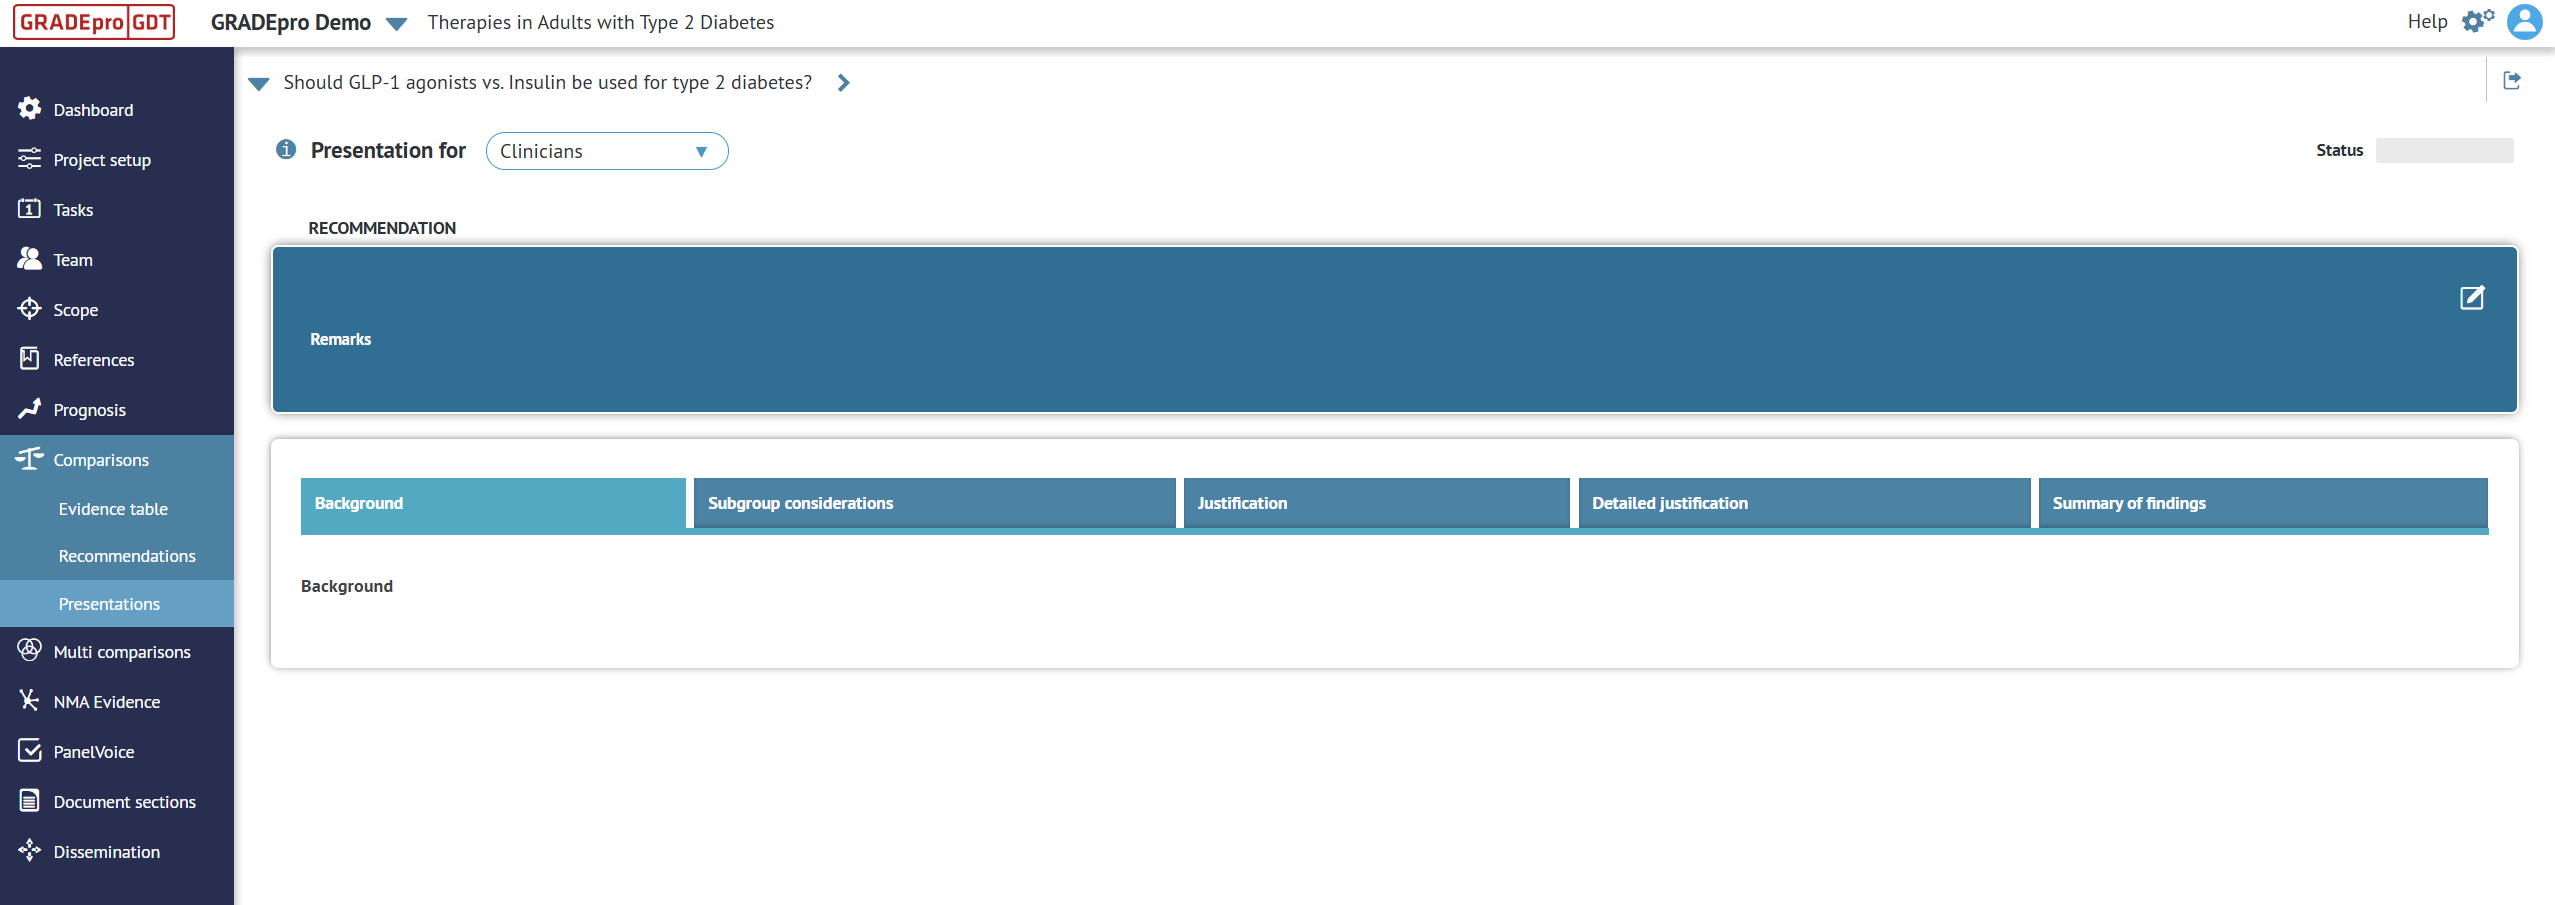
Comparisons
Comparisons is the main dashboard of a project. It contains questions, which in GRADEpro are equivalent to recommendations. Using the buttons at the bottom, you can add different kinds of questions. Each question contains an evidence (SoF) table, an Evidence to Decision table, and a Presentation of the recommendation.
Questions on the list can be organised into groups by dragging and dropping. Coloured labels can help you track progress in the project.
To enter any of the questions, you just need to click on it.
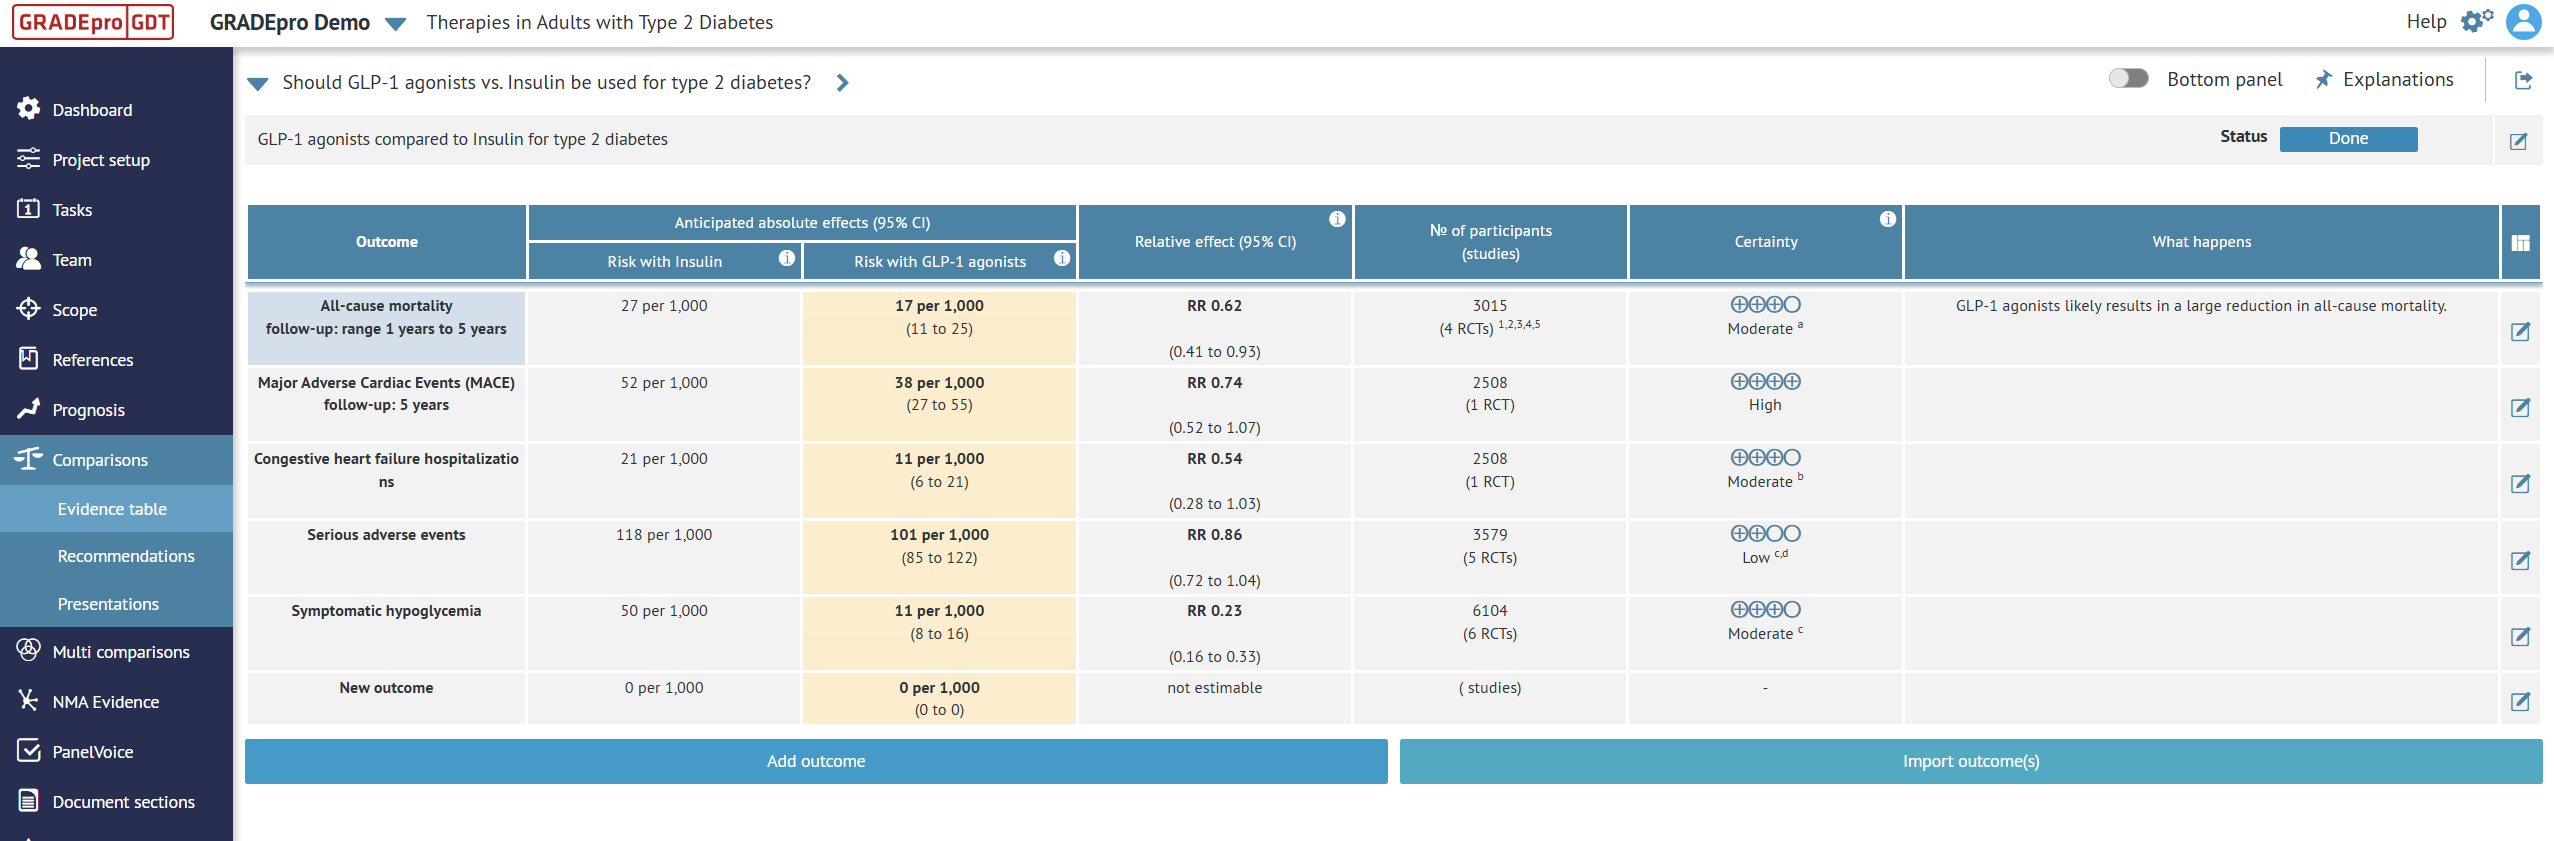
Evidence table
This is the first tab of any question, in which you can enter the evidence, both for management and diagnostic questions.
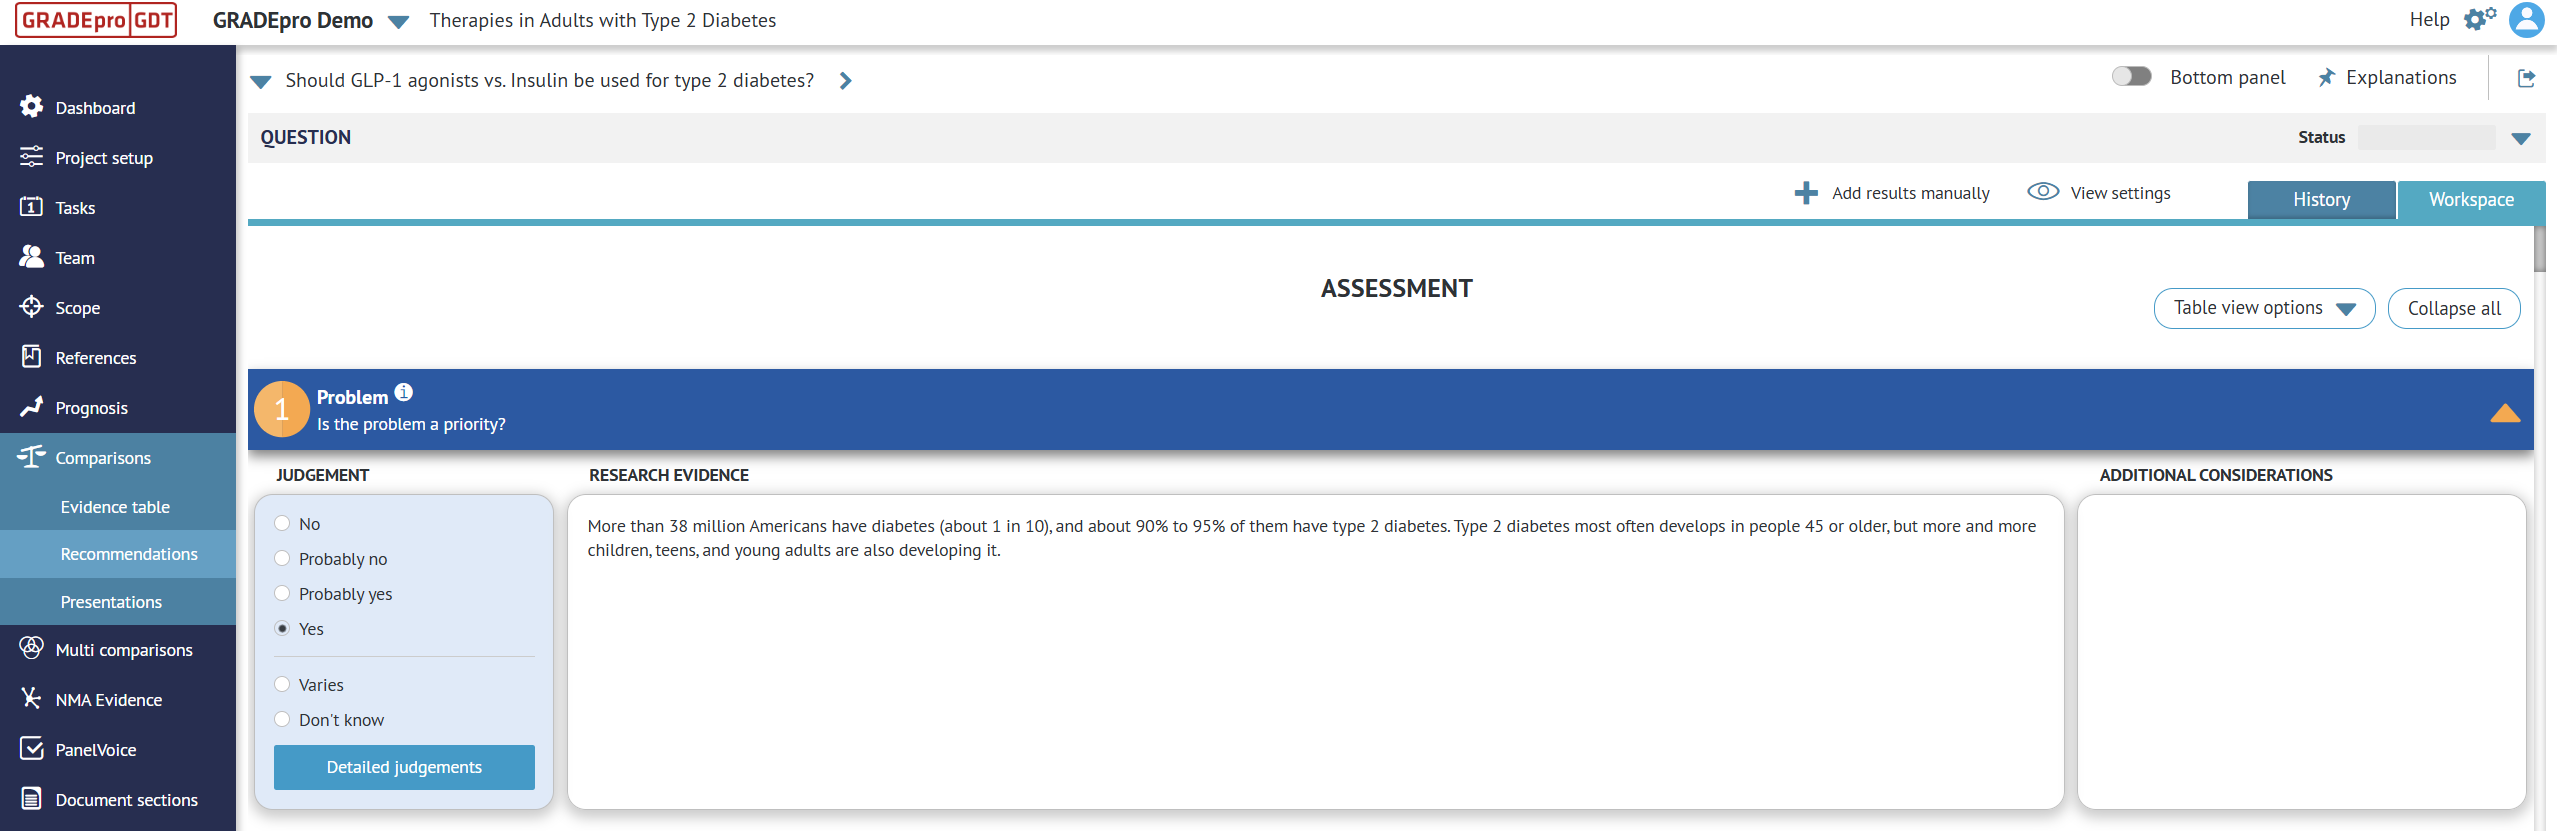
Recommendations
This is the second tab of a question, in which the Evidence to Decision framework can be found. This also where PanelVoice results are presented.
Presentations
This is the third tab of a question, in which Presentations can be found.
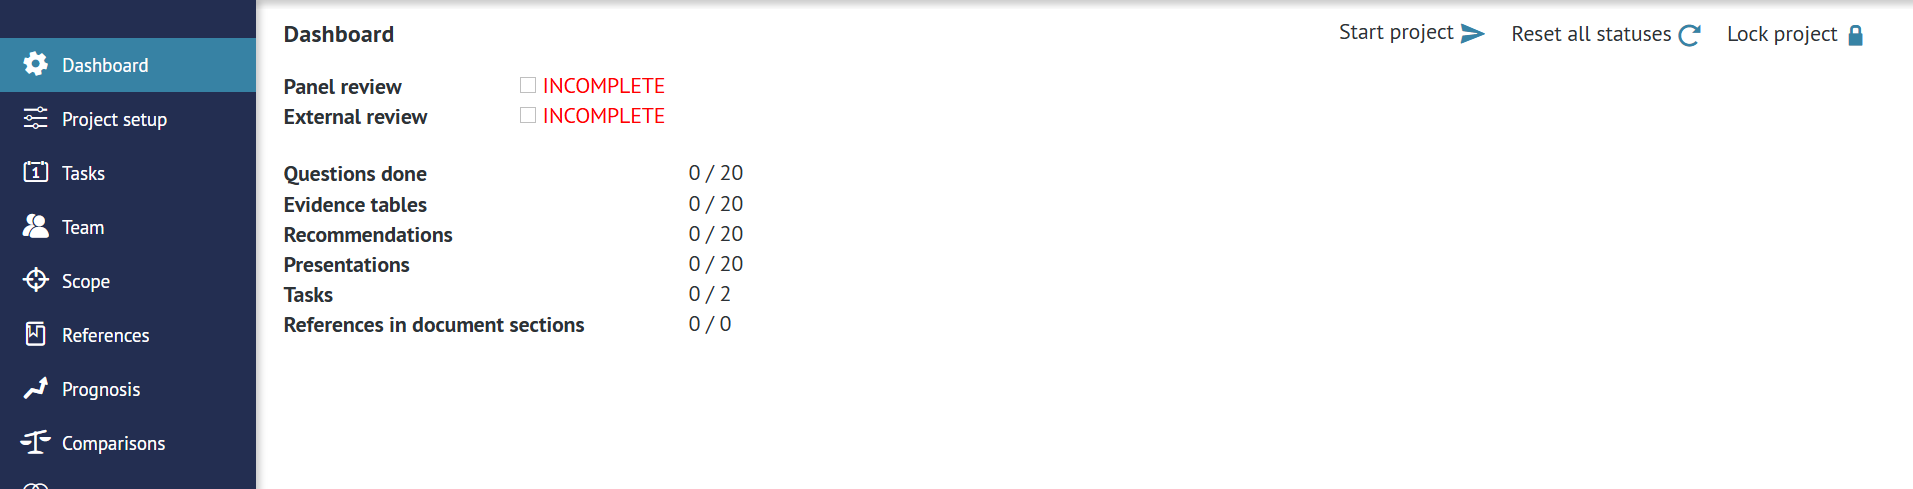
Dashboard*
Dashboard is a module in which you can check the overall project progress, start recording the progress history, reset progress history, or lock the project from editing.
Note: The Dashboard feature is currently still considered experimental and is only enabled for paid subcriptions after earlier discussion.
Project setup
Project setup is a module in which overall project settings can be managed.
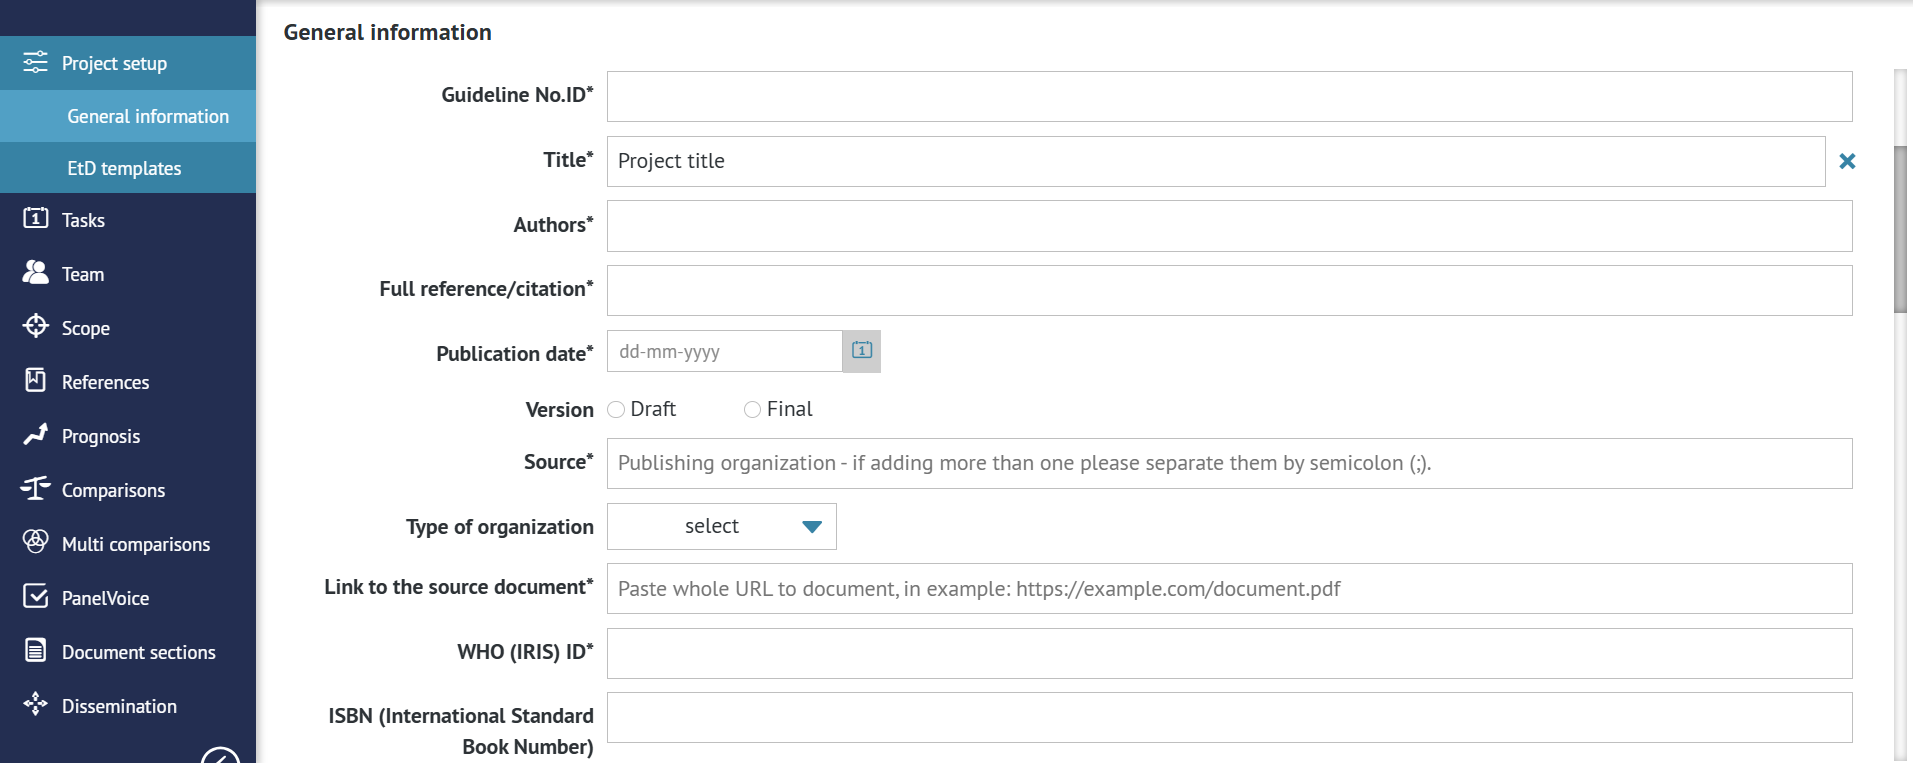
General information*
General information, also known as guideline metadata, is a module in which details needed for publication on a dedicated online publication platform can be added.
Note: The General information feature is only enabled for paid subcriptions for which a dedicated Publication Plaform or a Recommendation Map were requested. The exact content and variables entered in this section can be agreed on during the subscription discussions.
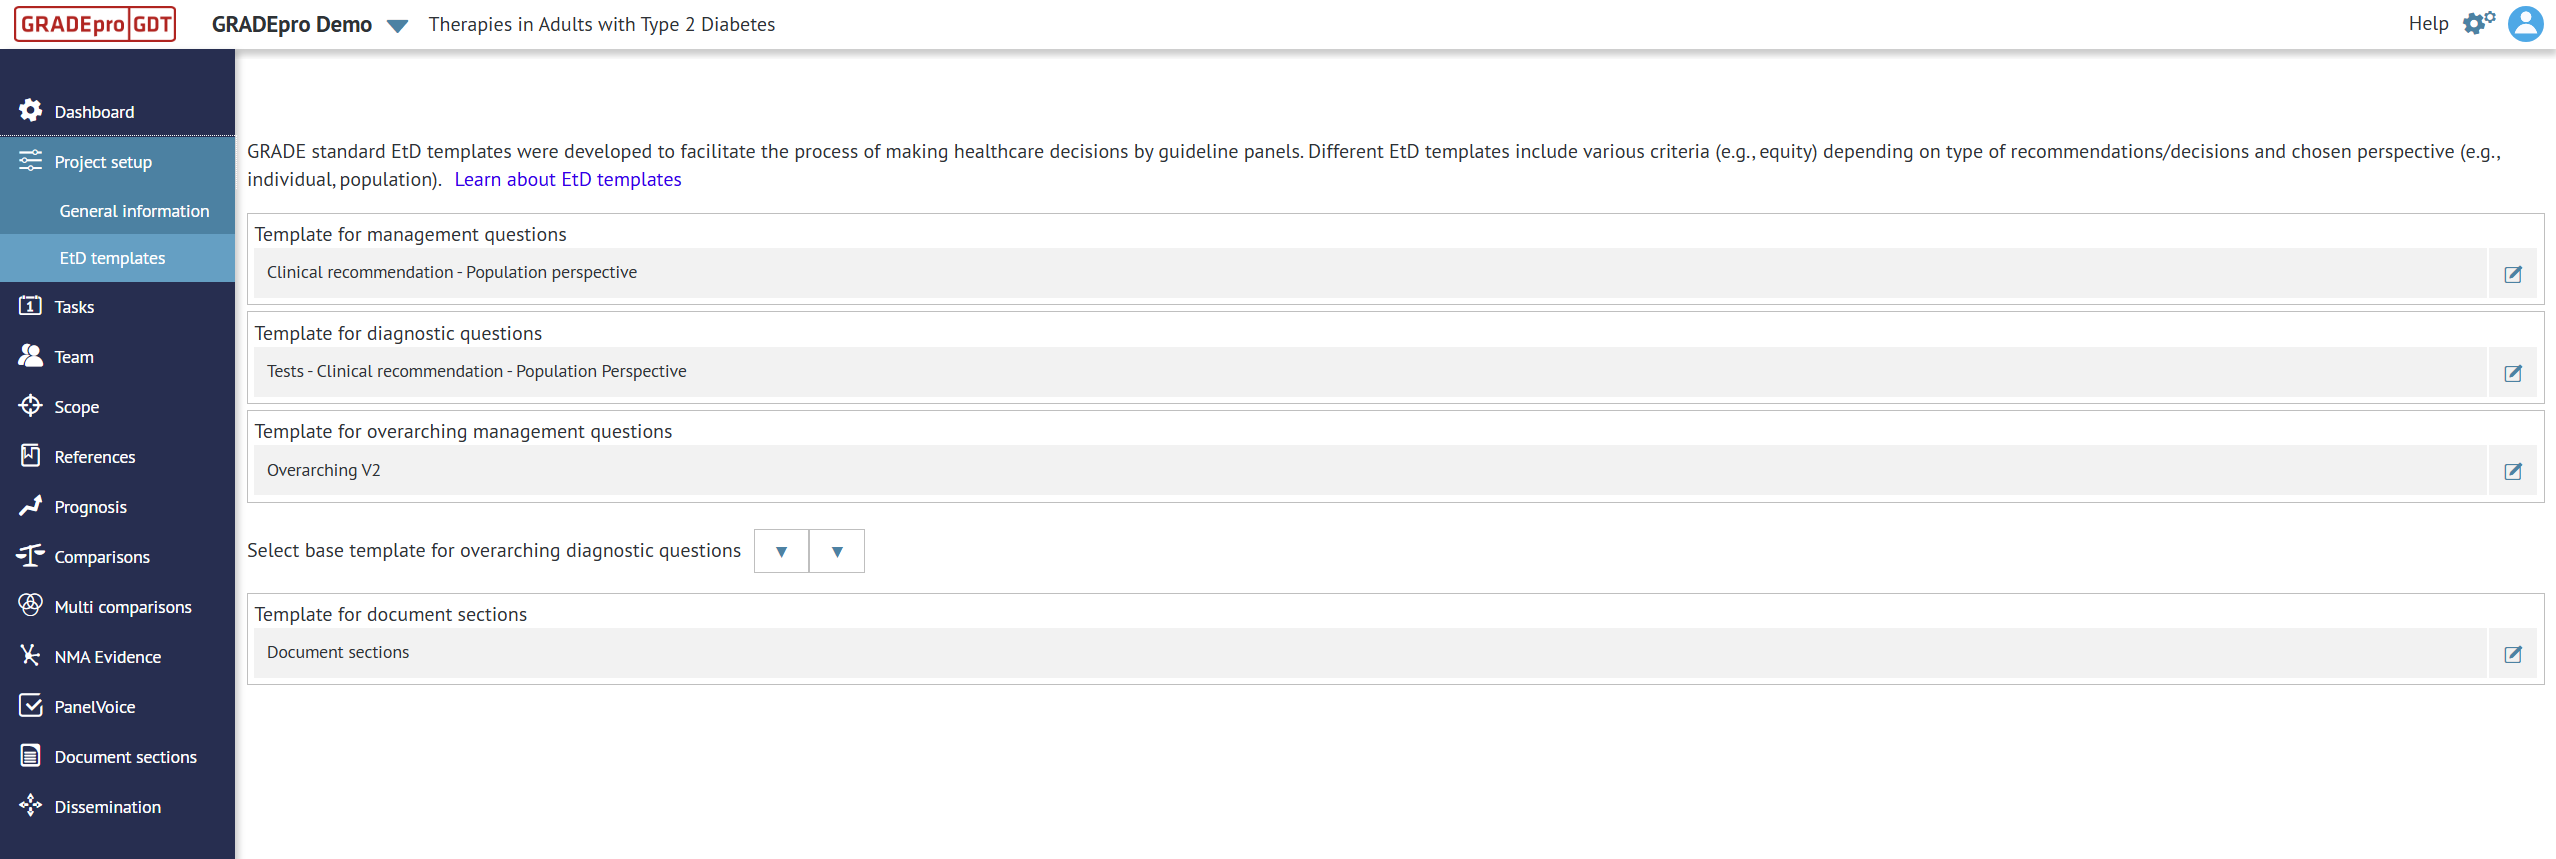
EtD templates
In this section, you can determine the templates for Evidence to Decision tables in your project.
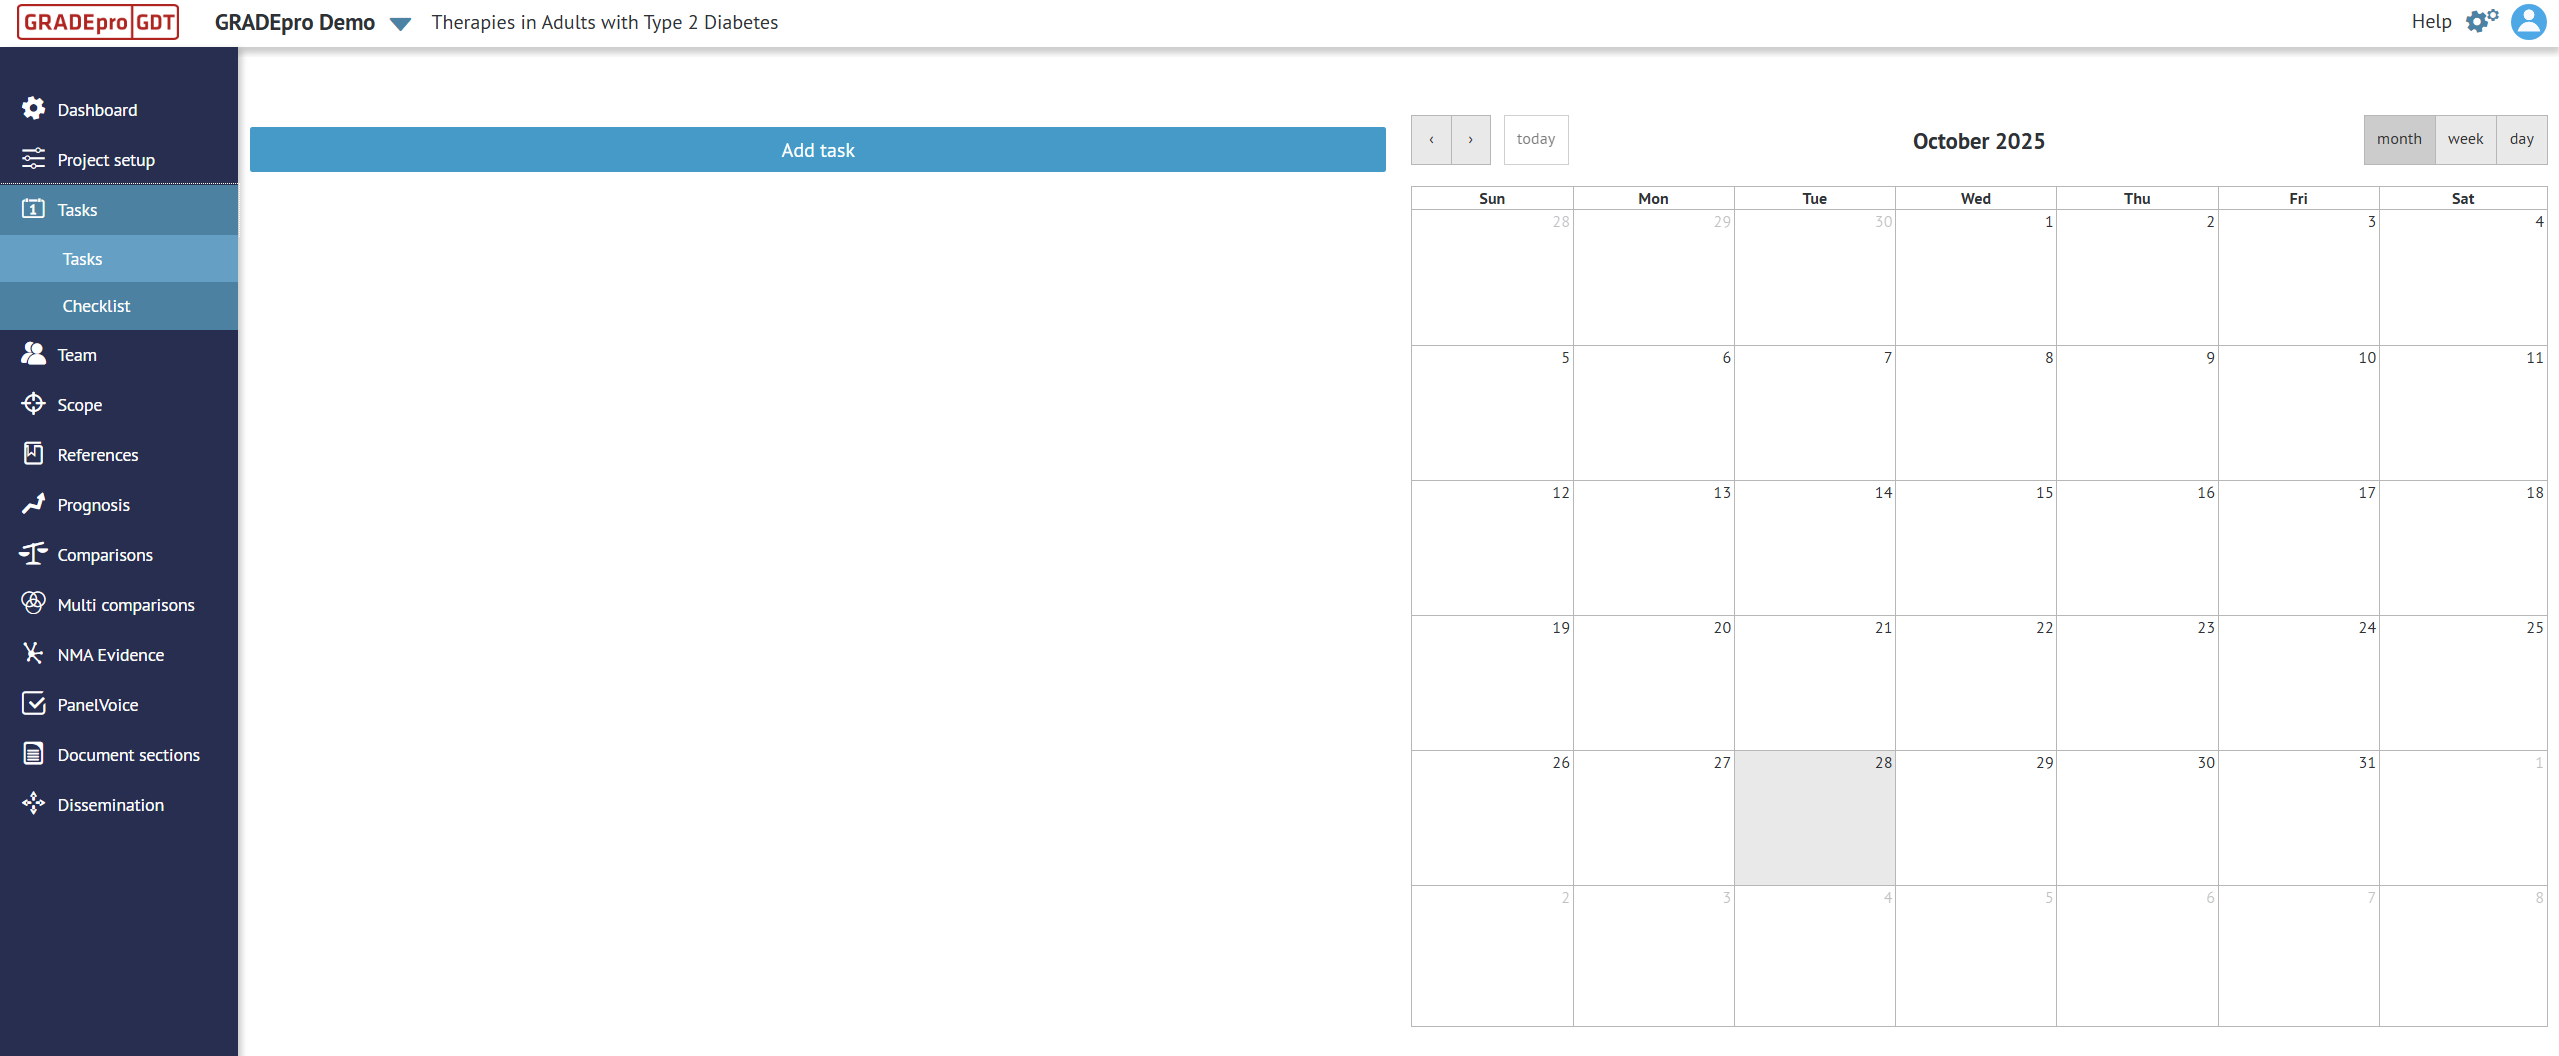
Tasks
In this section, you can create various tasks and add them to a calendar to keep track of the project.
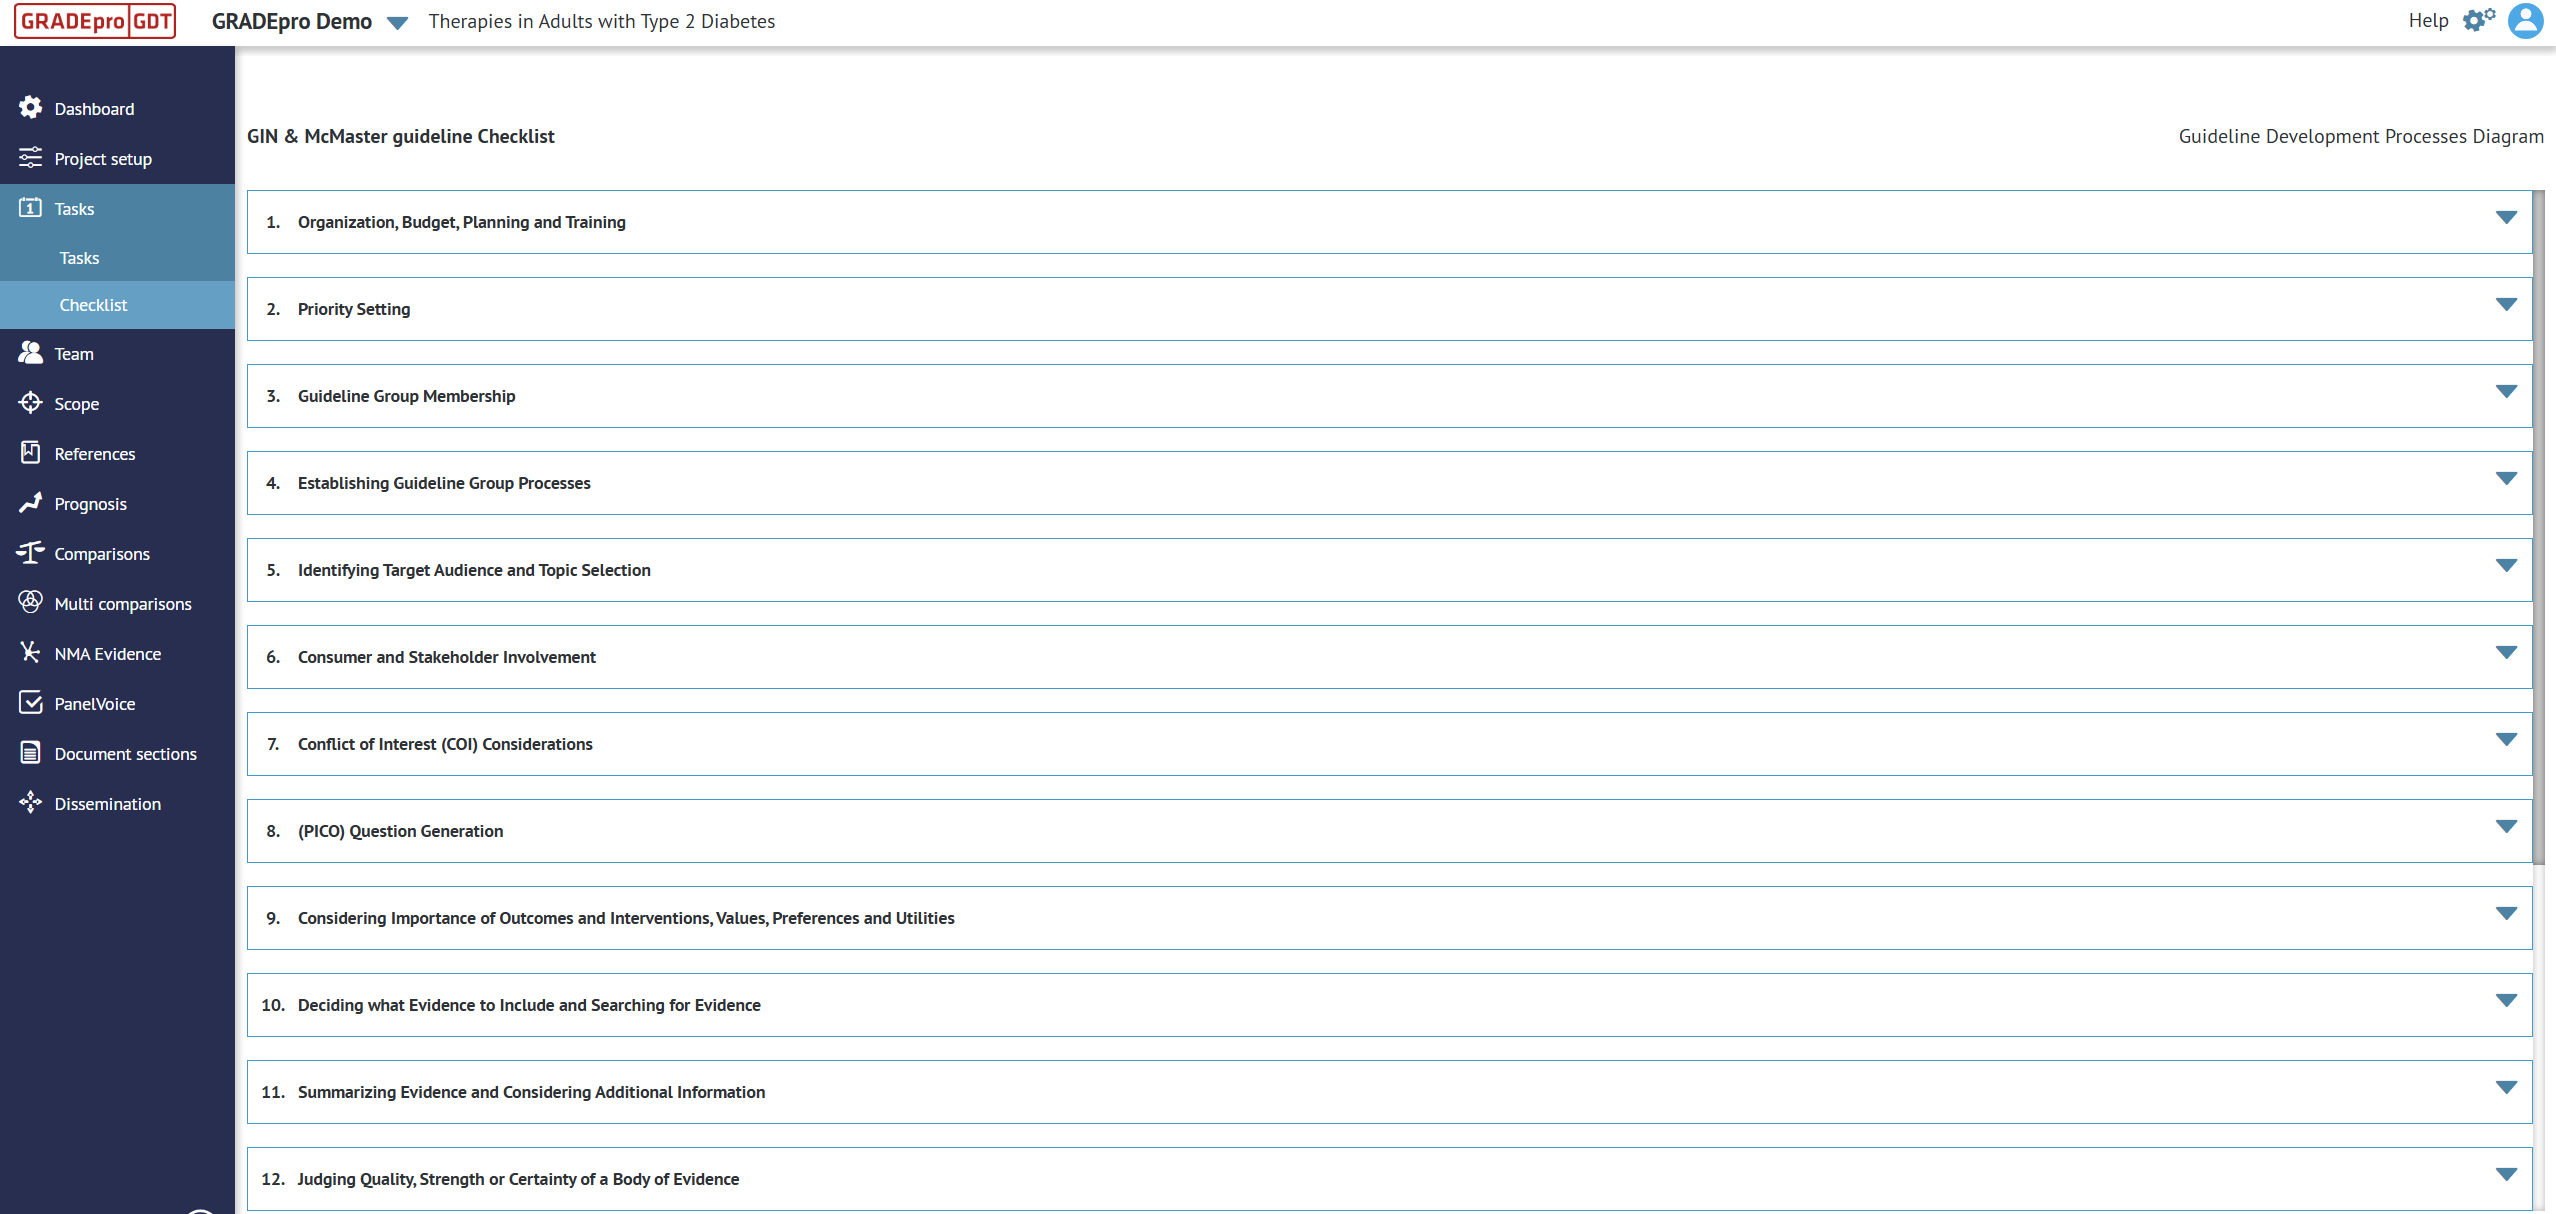
Checklist
The checklist is a project-embedded version of the GIN-McMaster guideline checklist, which describes all the necessary steps for guideline development, together with helpful materials.
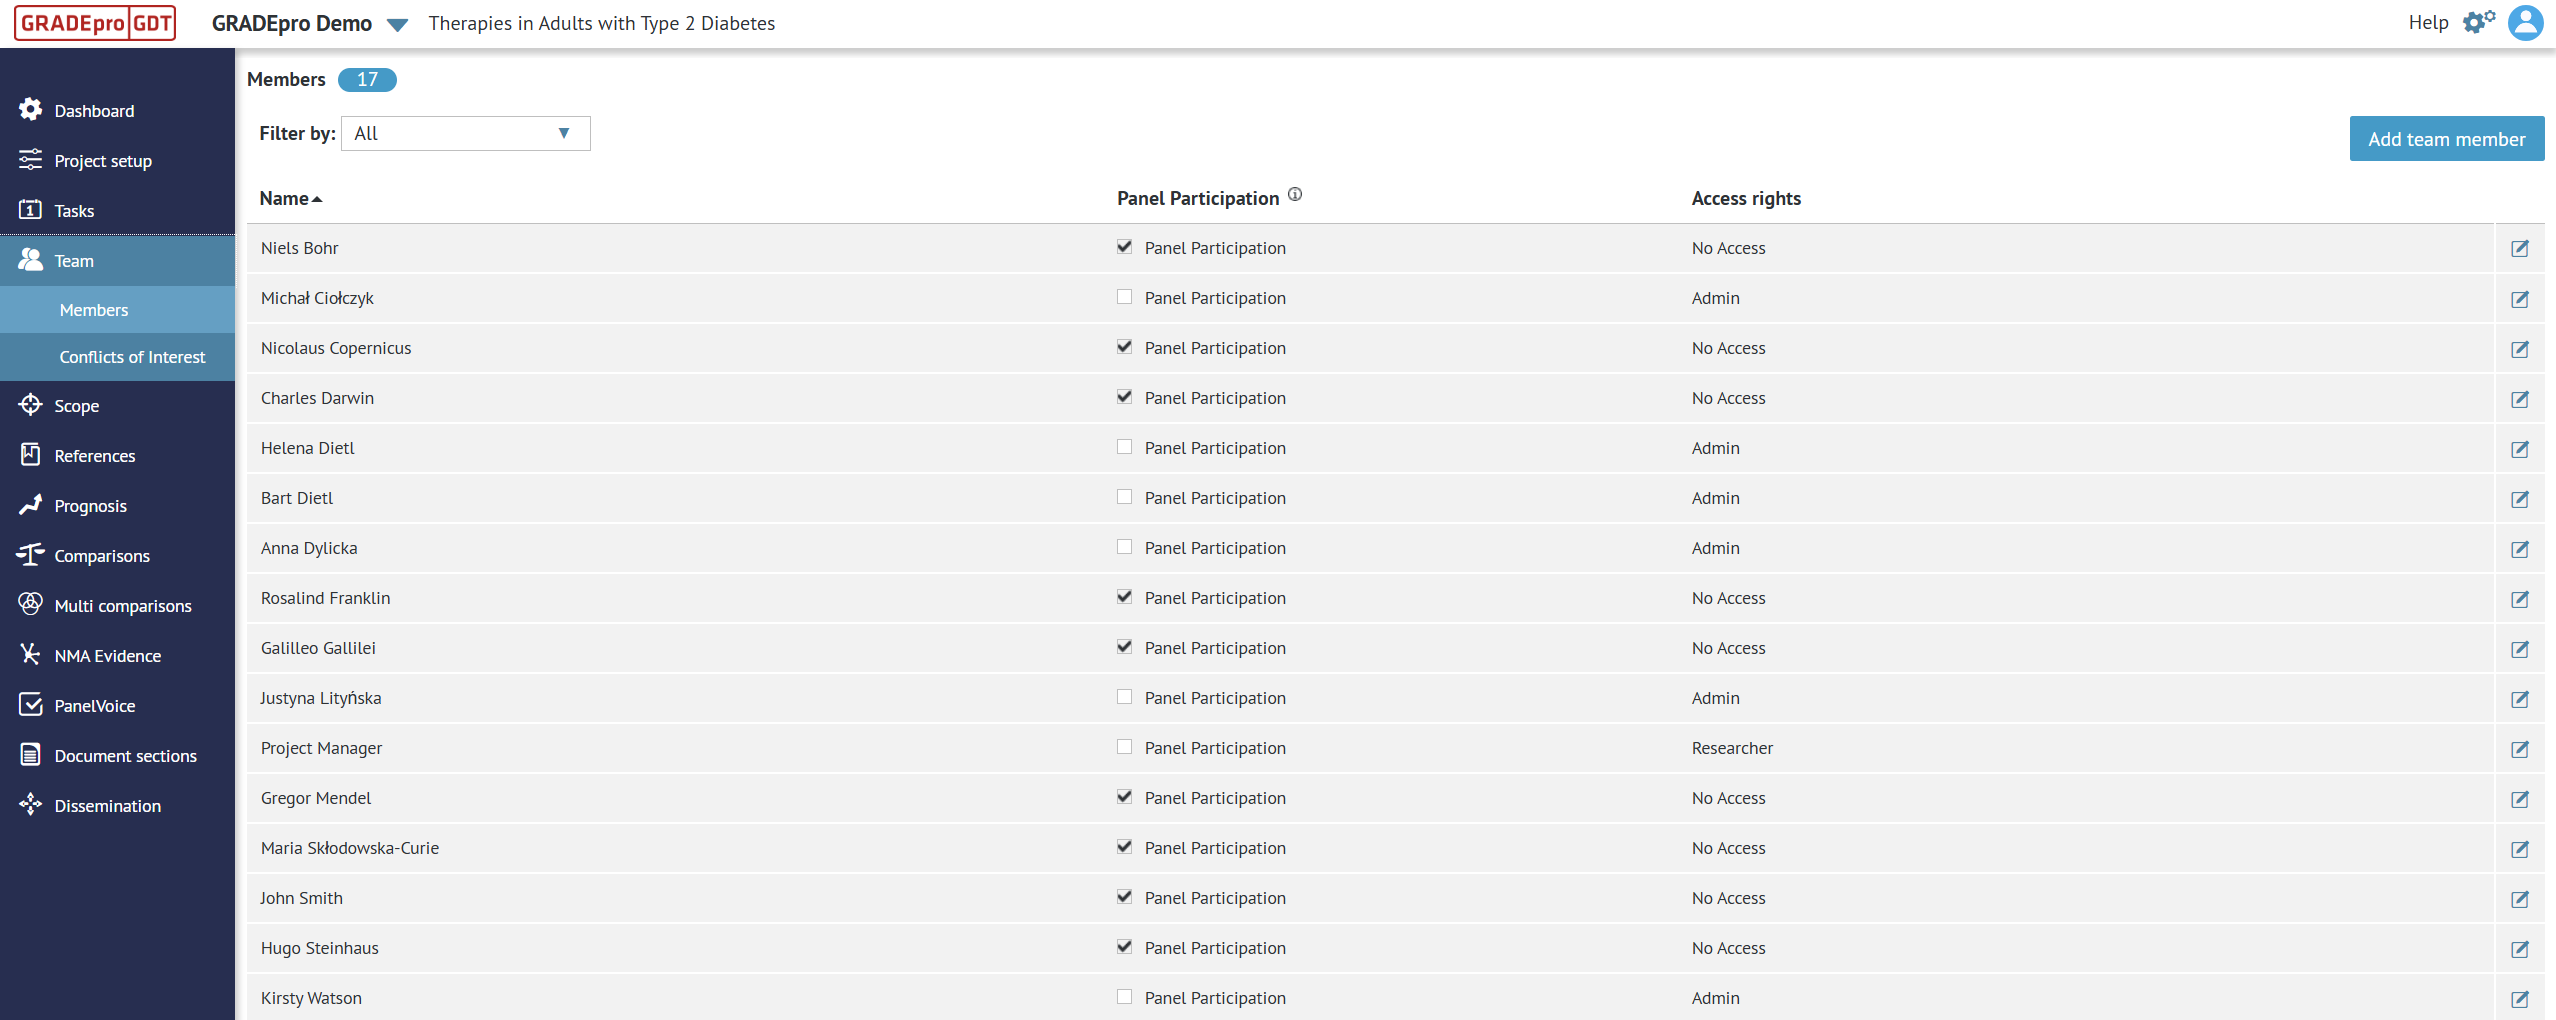
Team
In the Team module, project members and their permissions can be managed.
Members
In the Members section, you can see the list of all project members and their access rights. Members can be removed or added as needed, as described here.
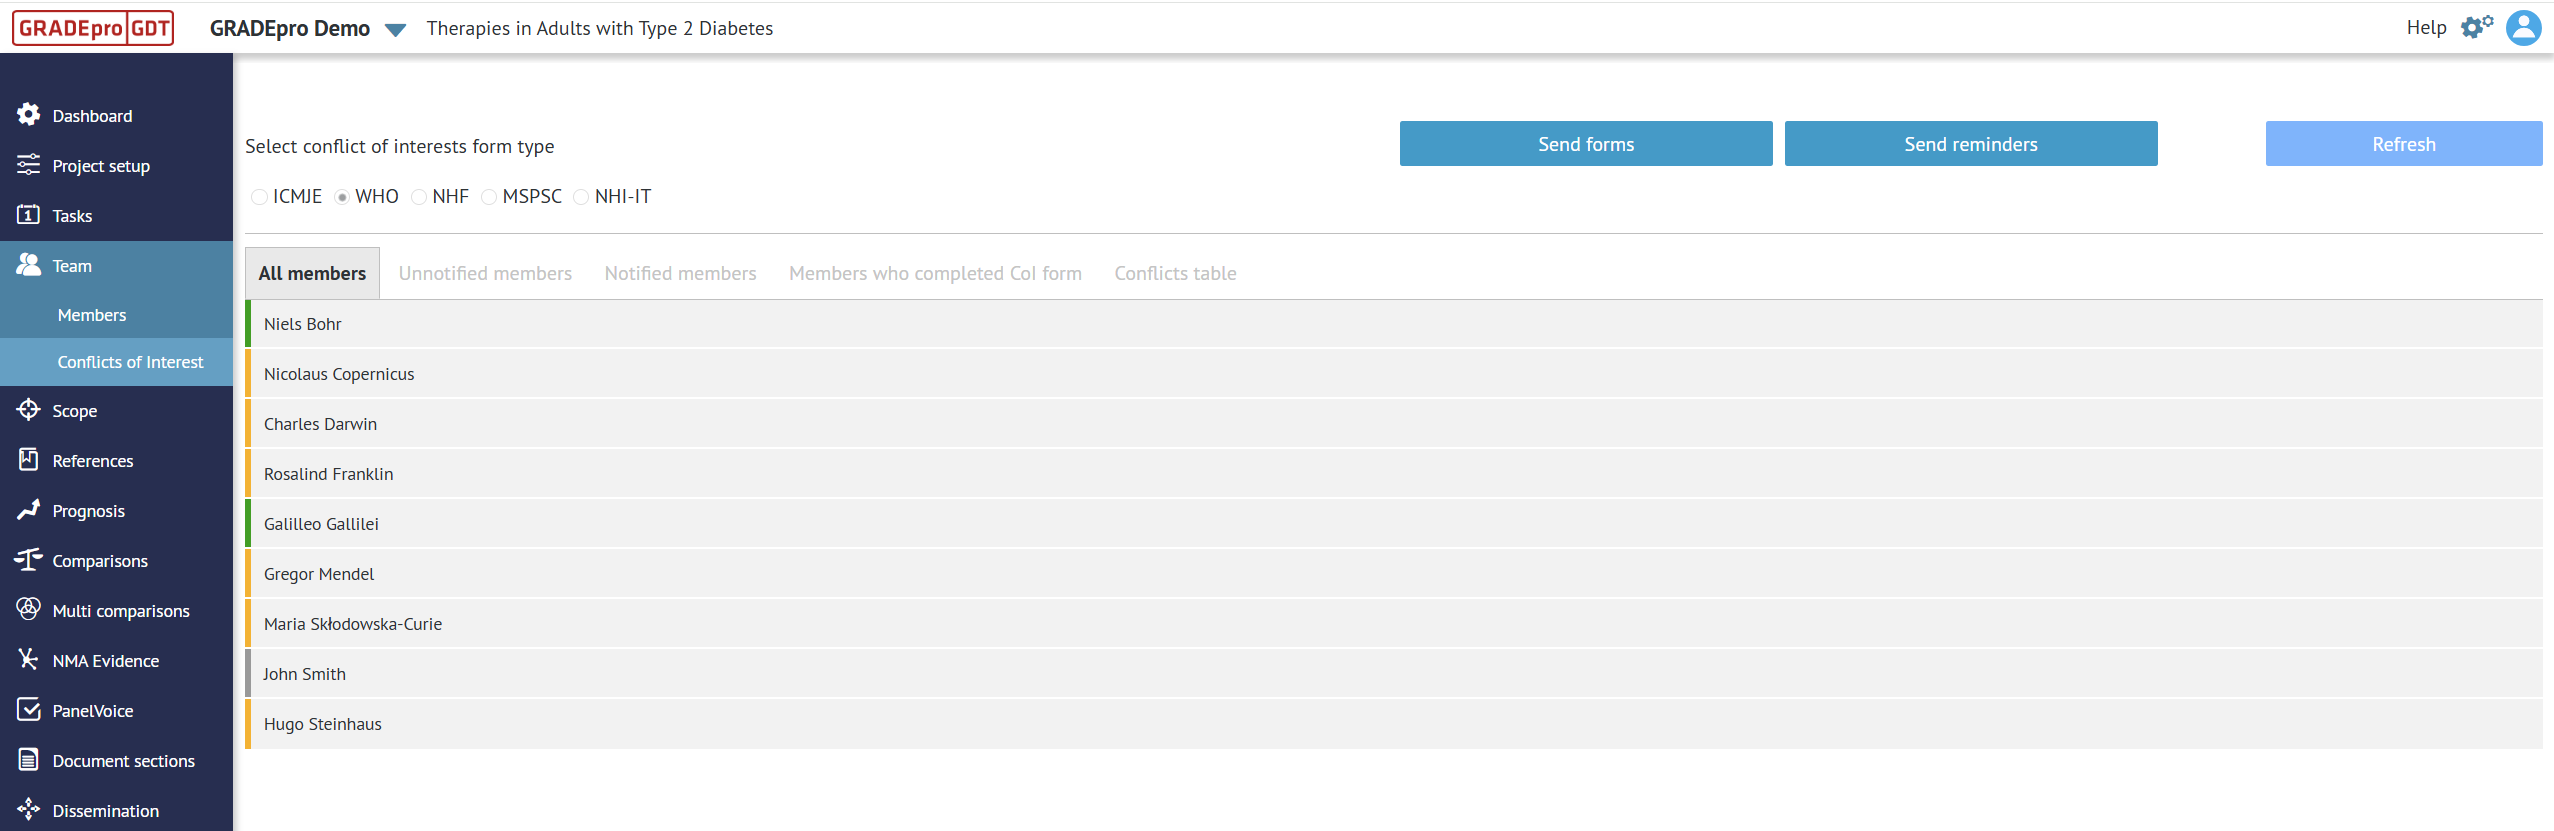
Conflicts of interest
In the Conflicts of Interest tab, you can manage the Conflicts of Interest of project panel members.
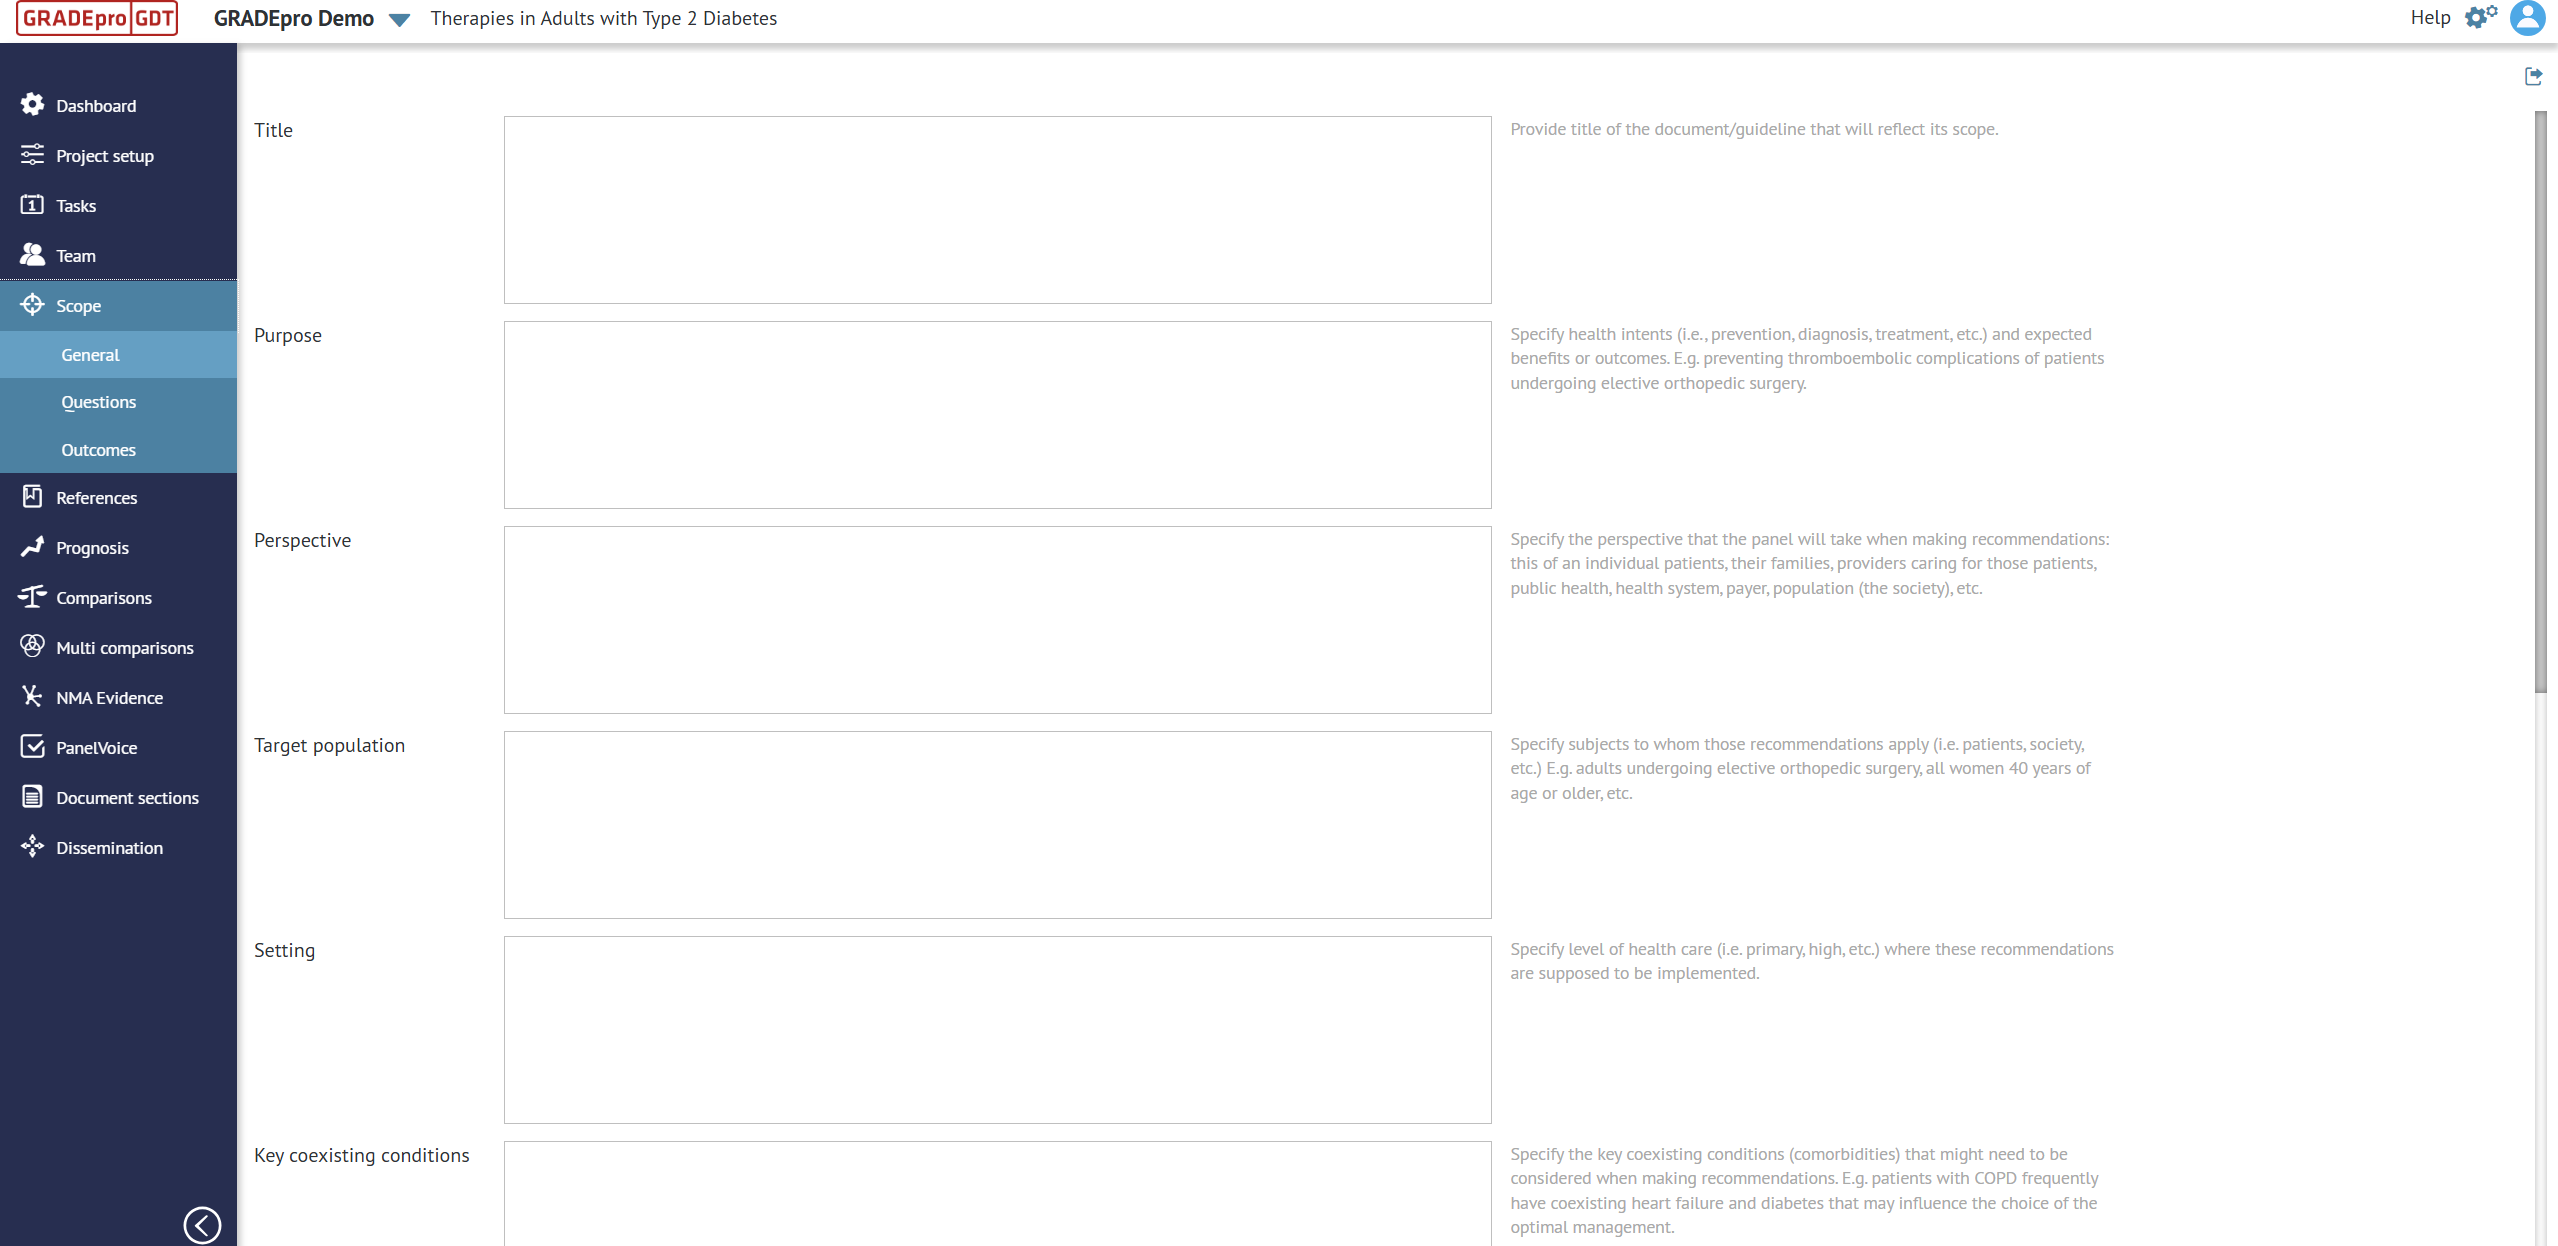
Scope
In the Scope module, you can determine various aspects of the guideline scope.
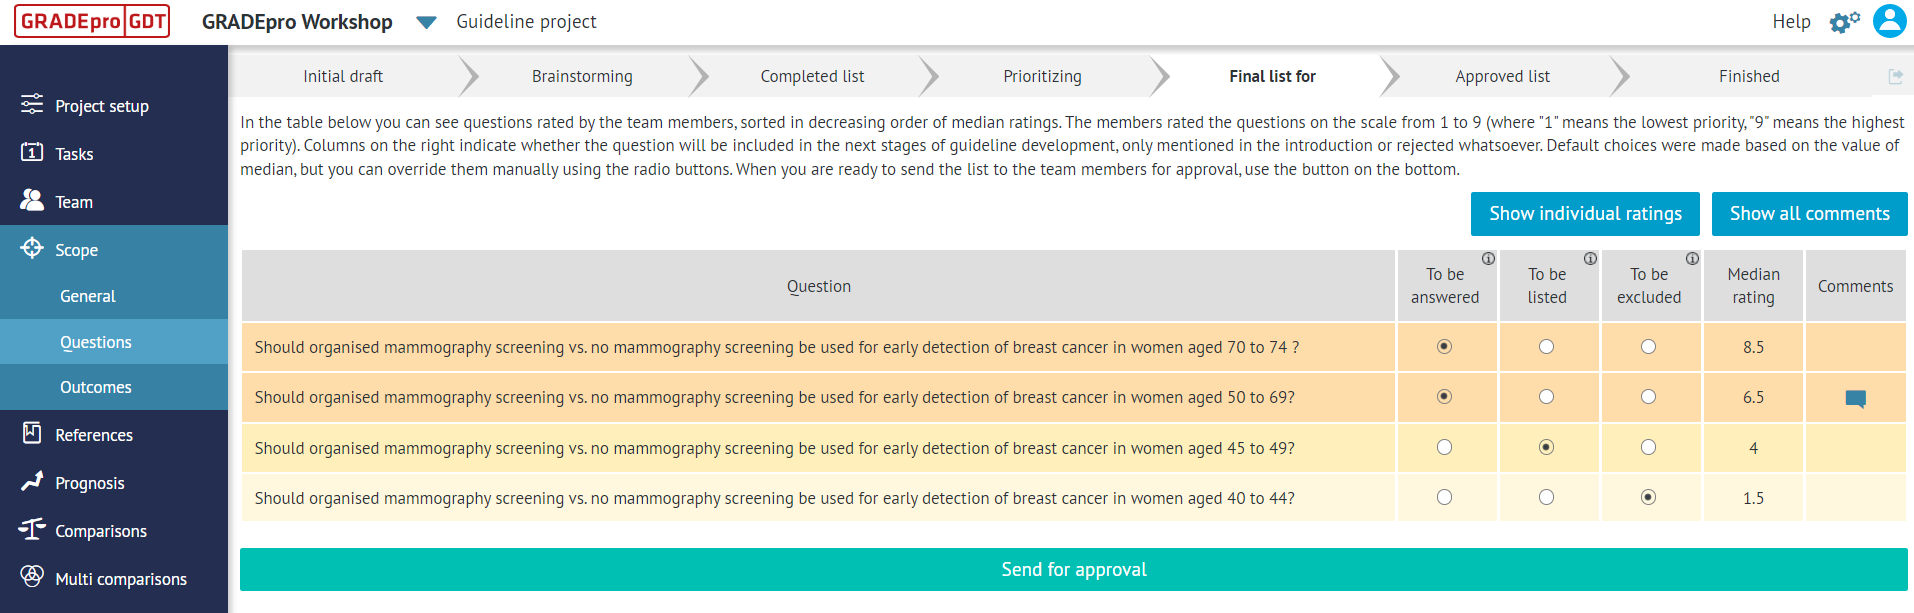
Questions
Questions tab is where you can run the Questions generation process in order to brainstorm and prioritise guideline questions with your panel of experts.
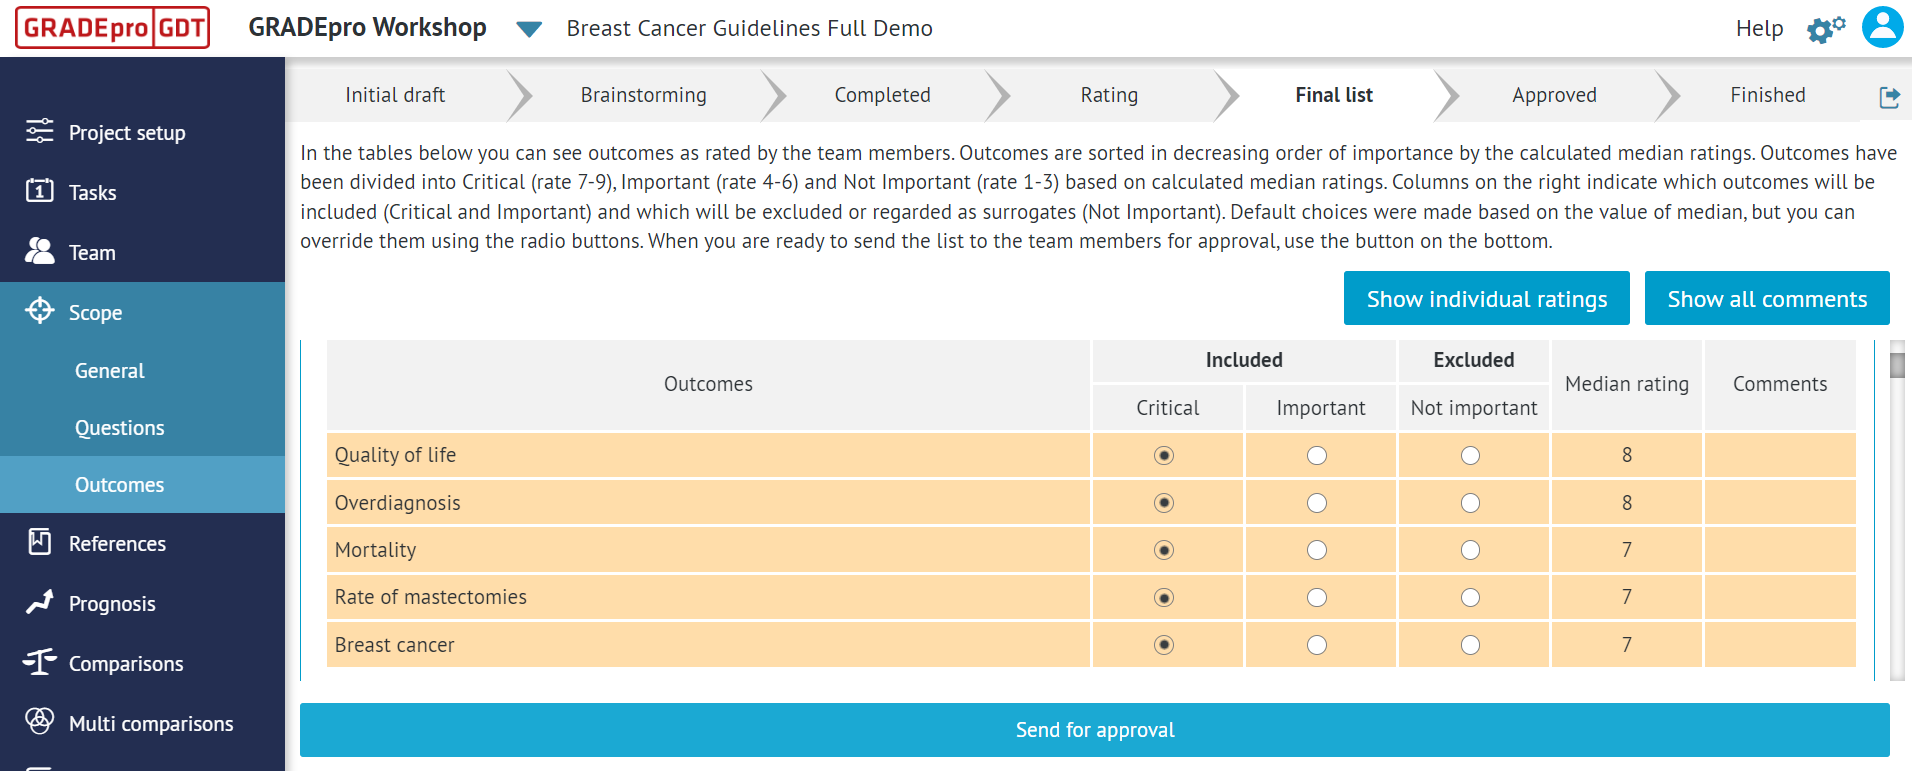
Outcomes
Outcomes tab is where you can run the Outcomes generation process in order to brainstorm and prioritise outcomes with your panel of experts.
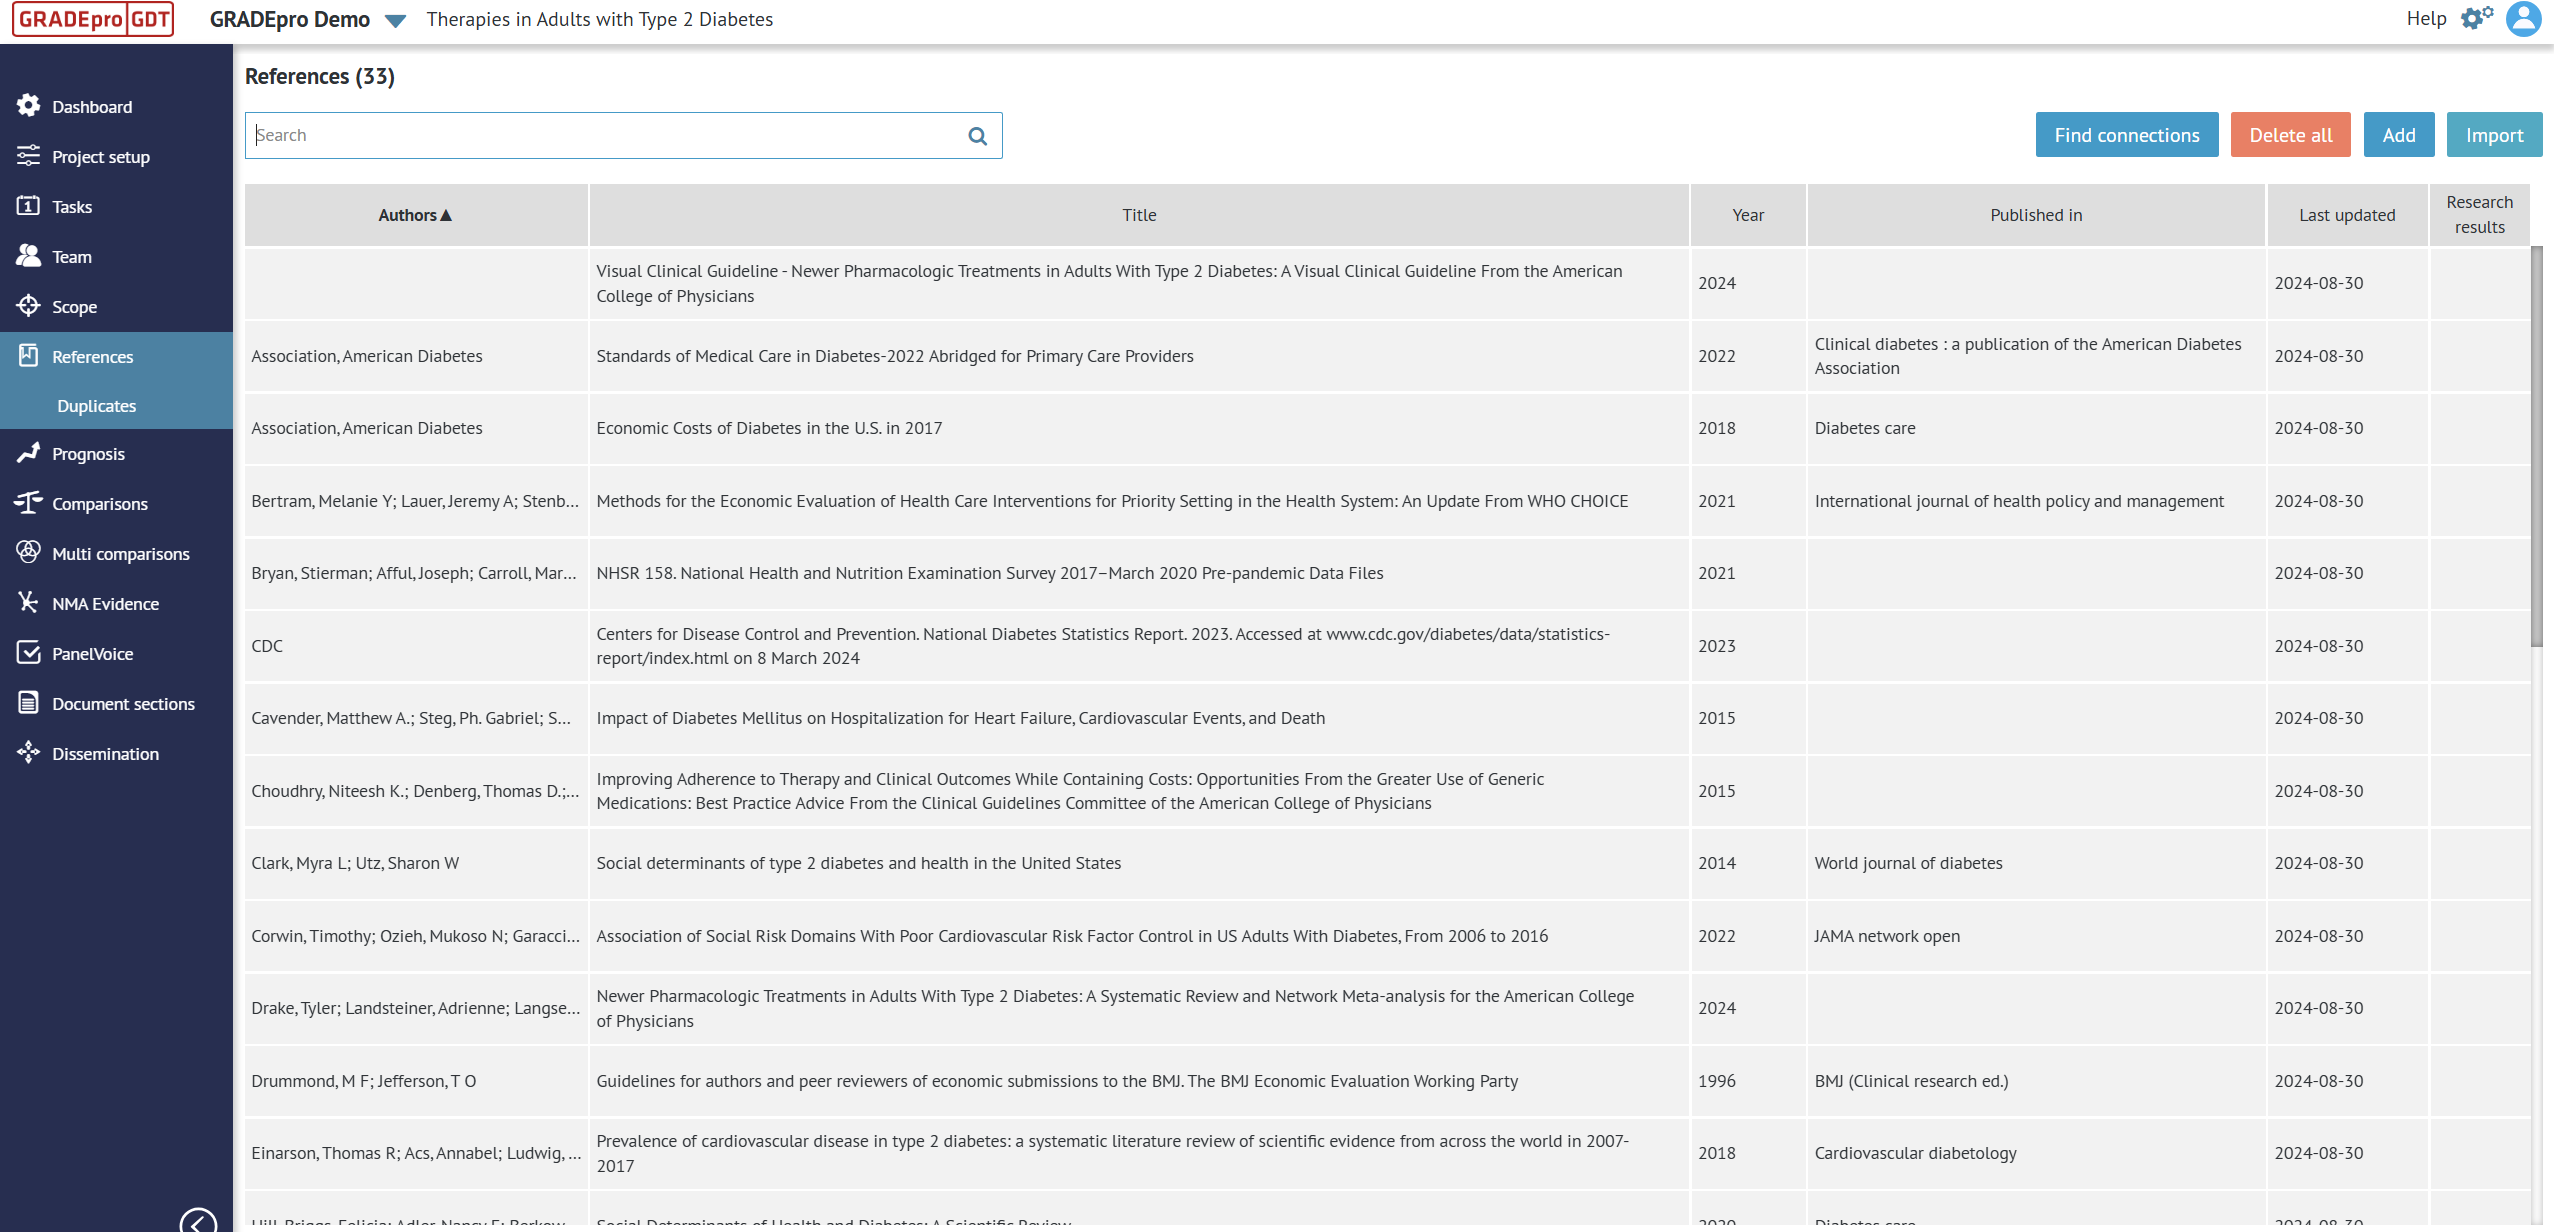
References
In the References module, you can upload and manage the sources for the evidence.
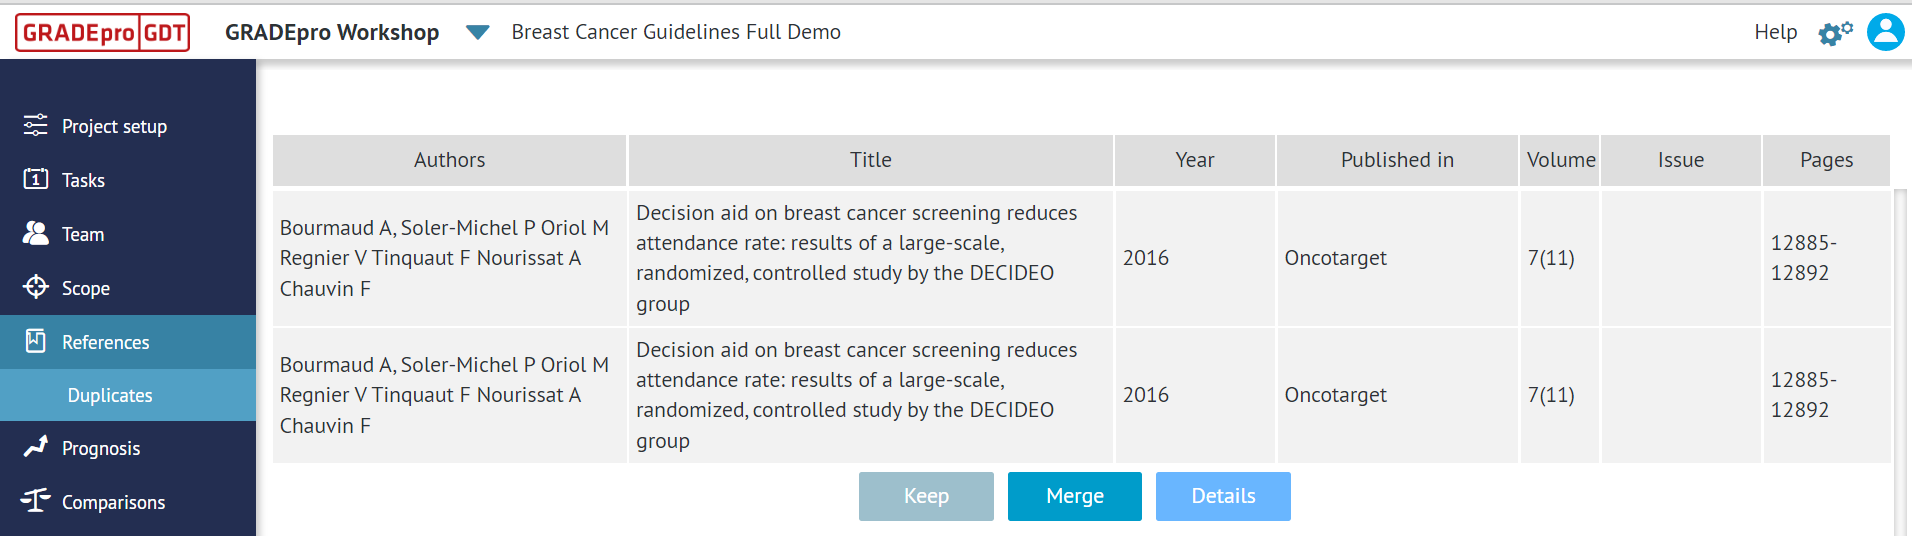
Duplicates
In the Duplicates tab you can manage the duplicates among your references.
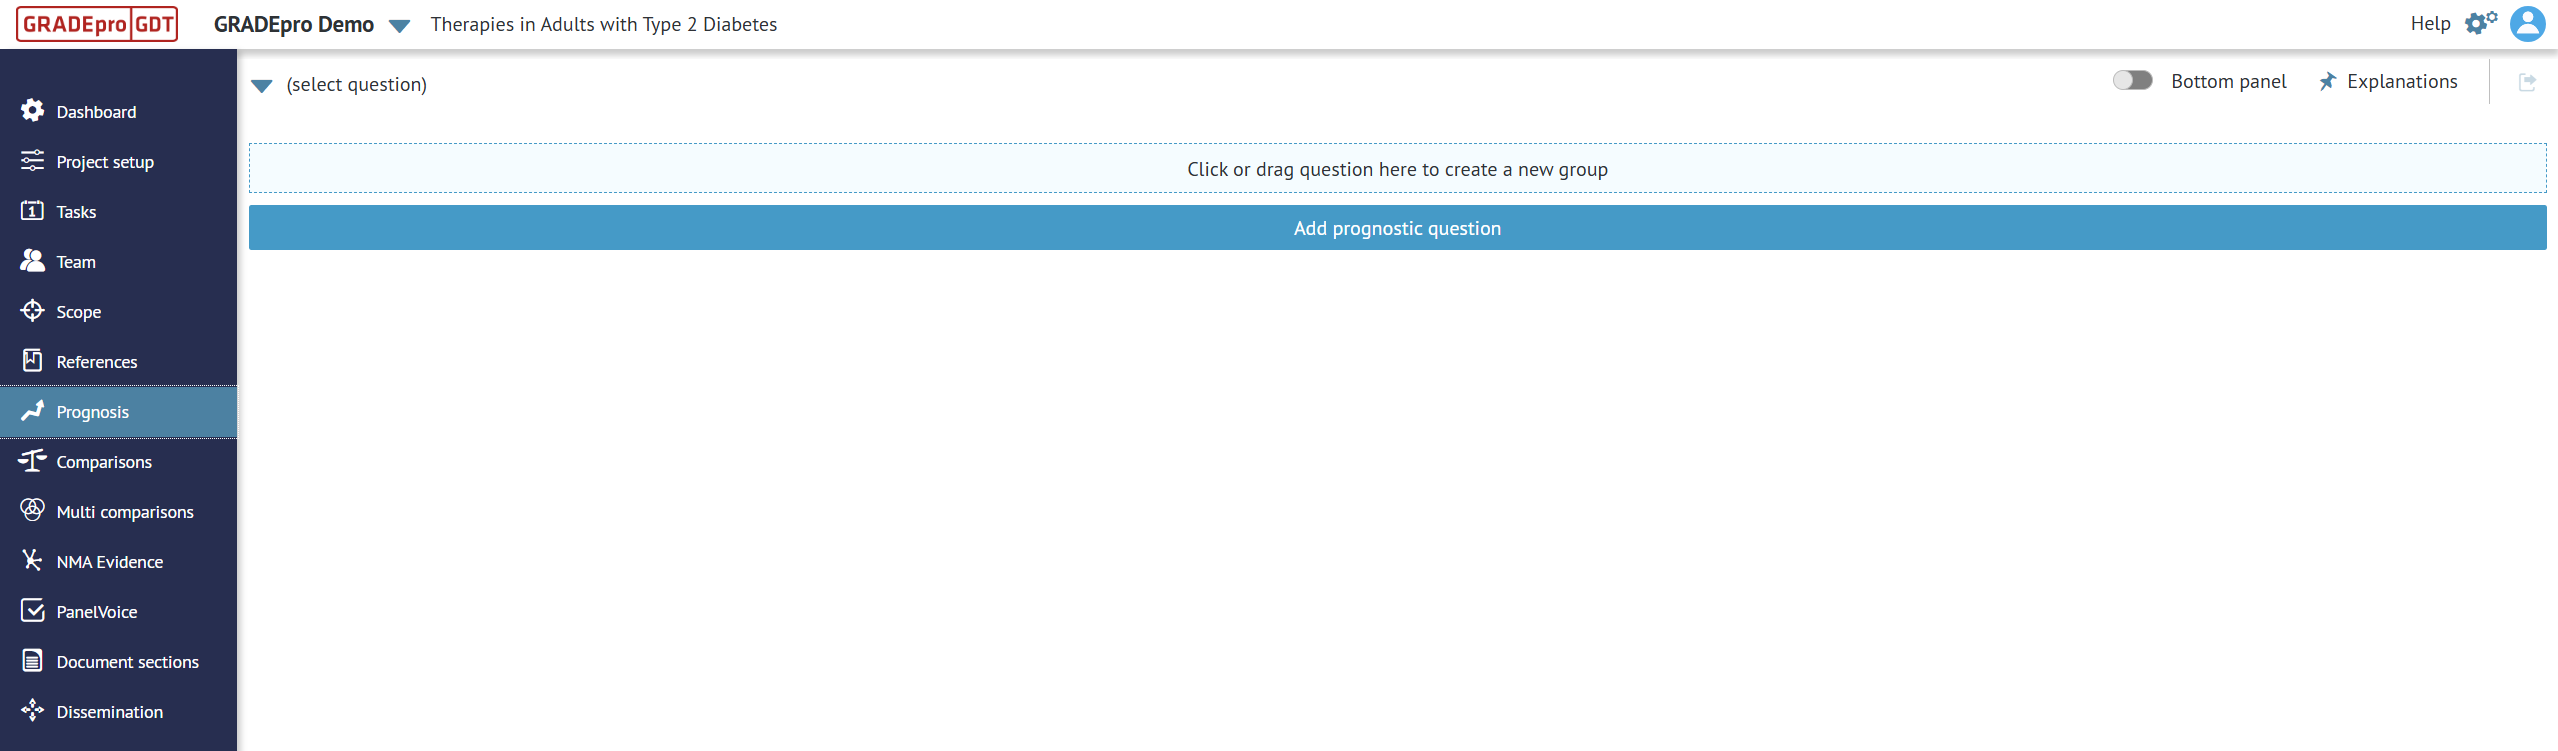
Prognosis
In the Prognosis module, prognostic questions can be managed.
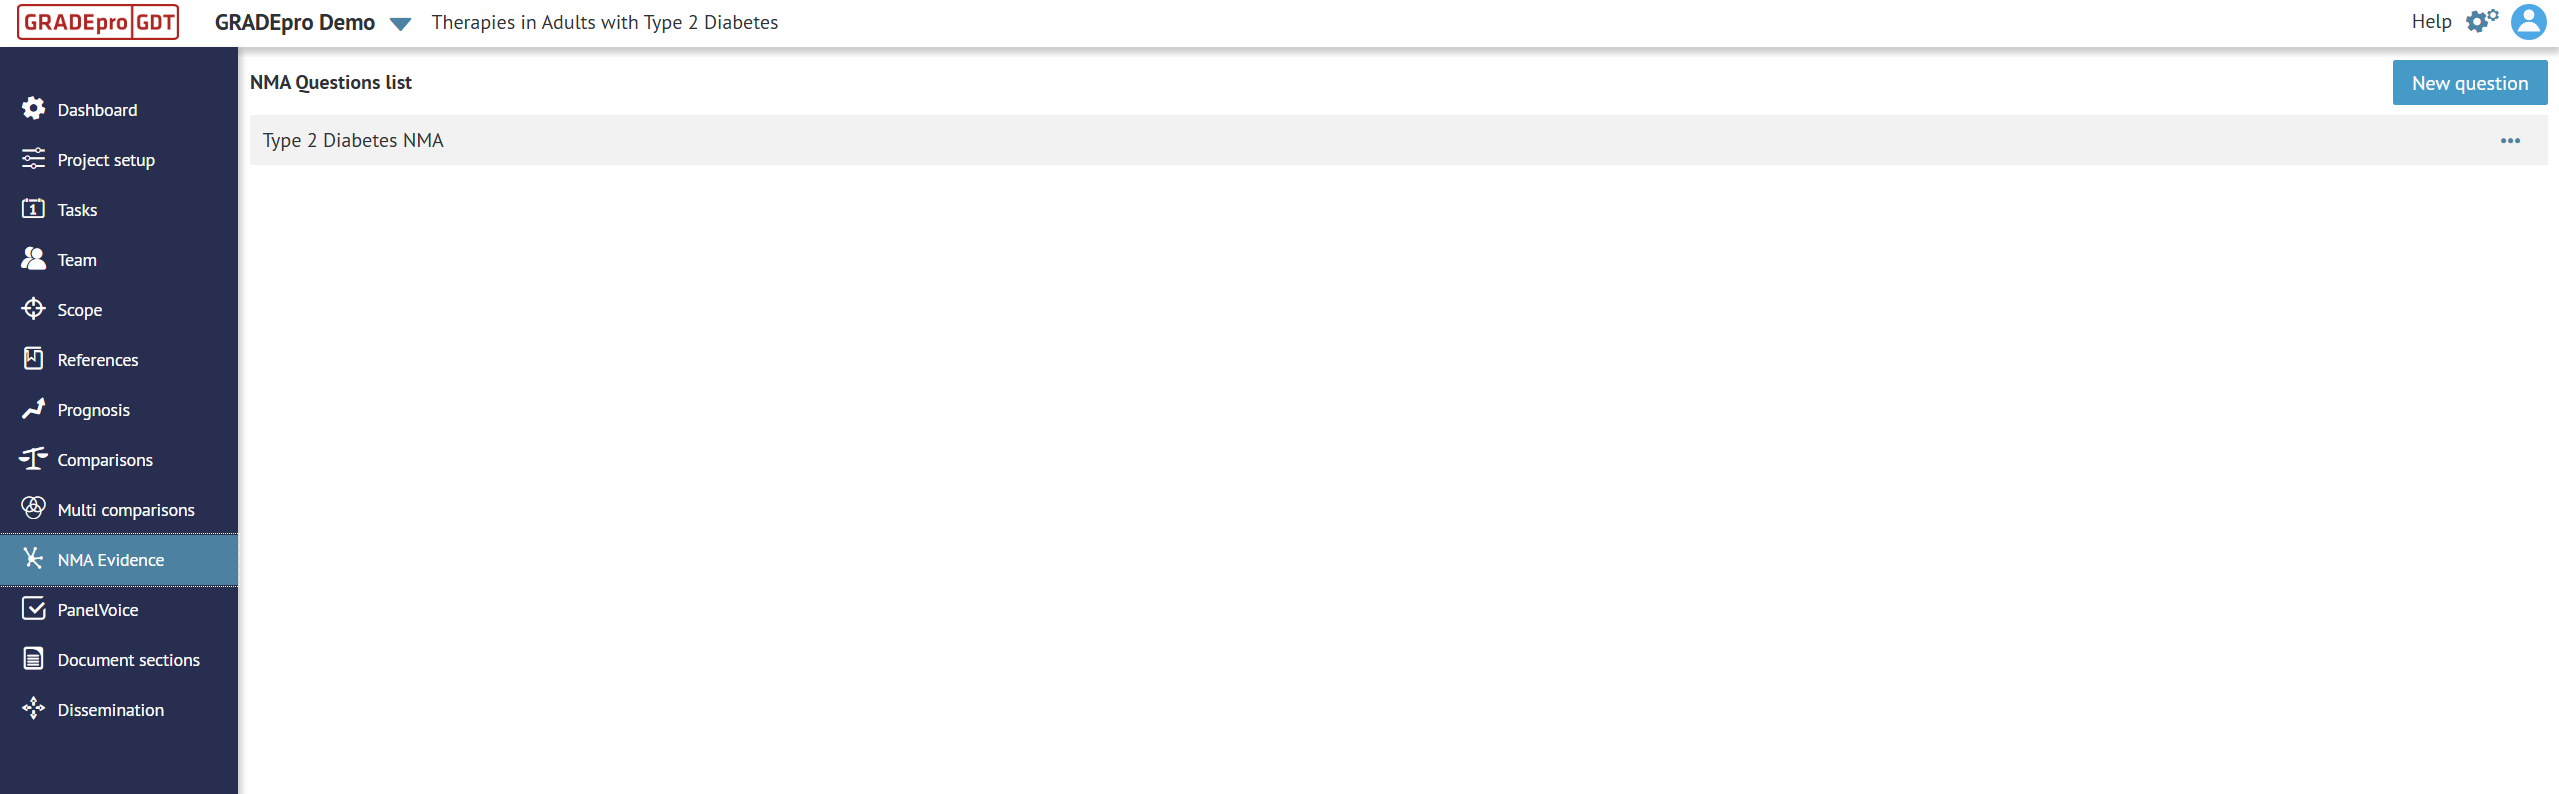
NMA Evidence*
In the NMA evidence module, you can enter and manage the Network Meta-analysis evidence.
Note: The NMA evidence feature is only enabled for paid subcriptions. Additionally, for the purpose of consolidating evidence, it is possible to import data from multiple pair-wise SoF tables into the NMA module to present the evidence together, even without conducting an NMA.
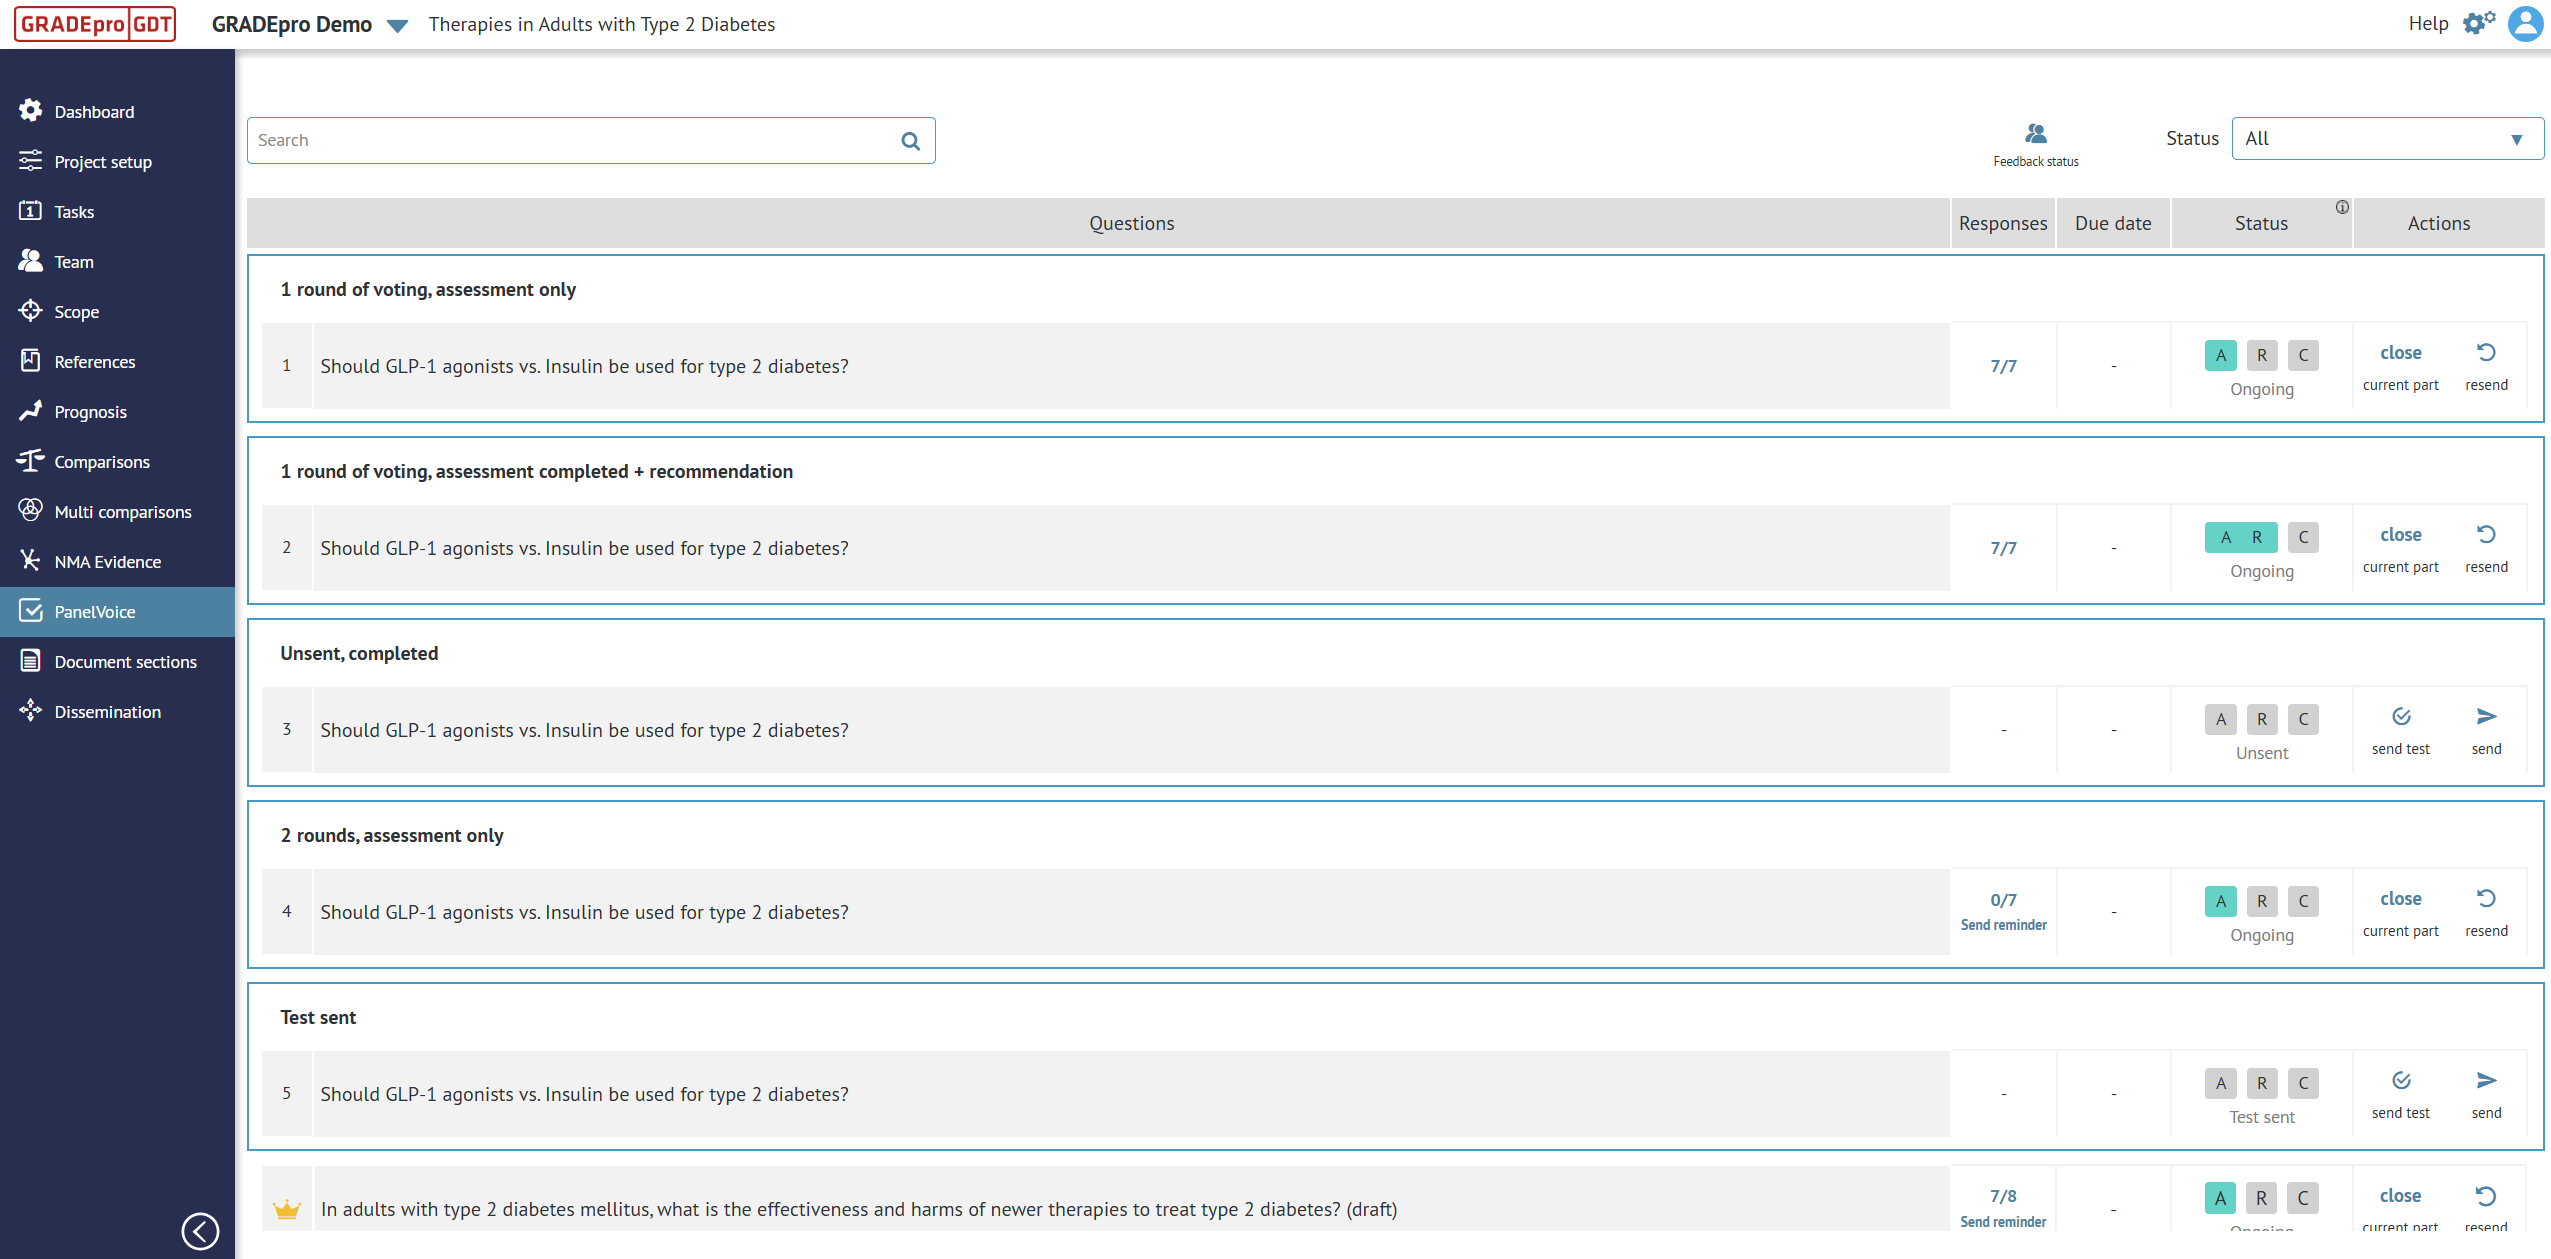
PanelVoice*
In the PanelVoice module, you can send online forms to your panel of experts in order to vote on the EtD criteria and the recommendations.
Note: The PanelVoice feature is only enabled for paid subscriptions.
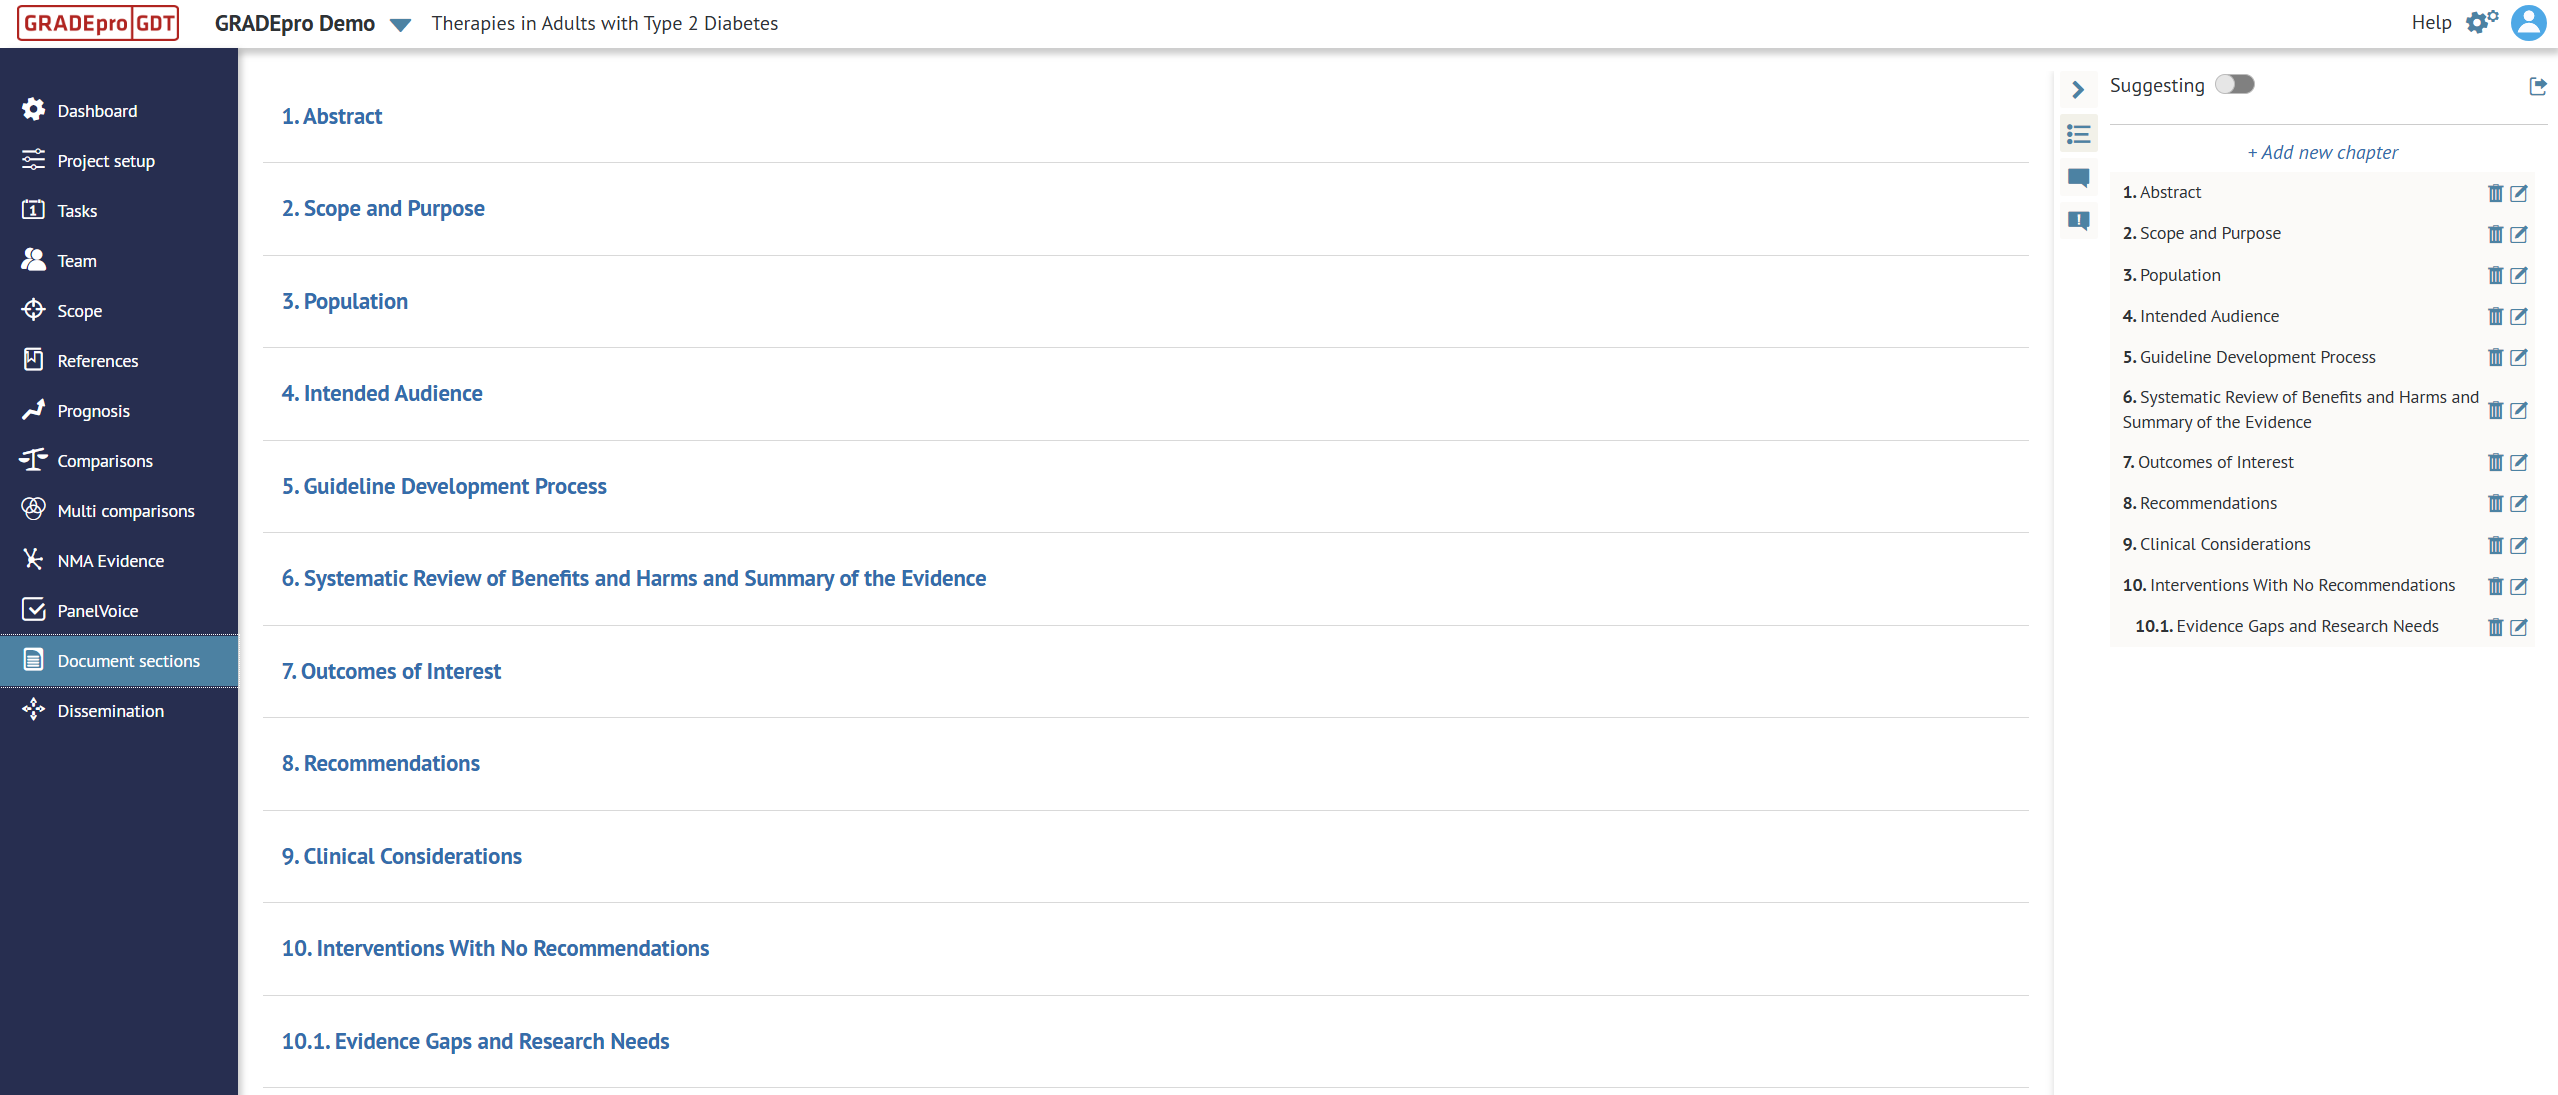
Document sections
In the Document sections module, you can create and collaboratively edit a guideline document.
Dissemination
The dissemination module is where GRADEpro's publication solutions are available.
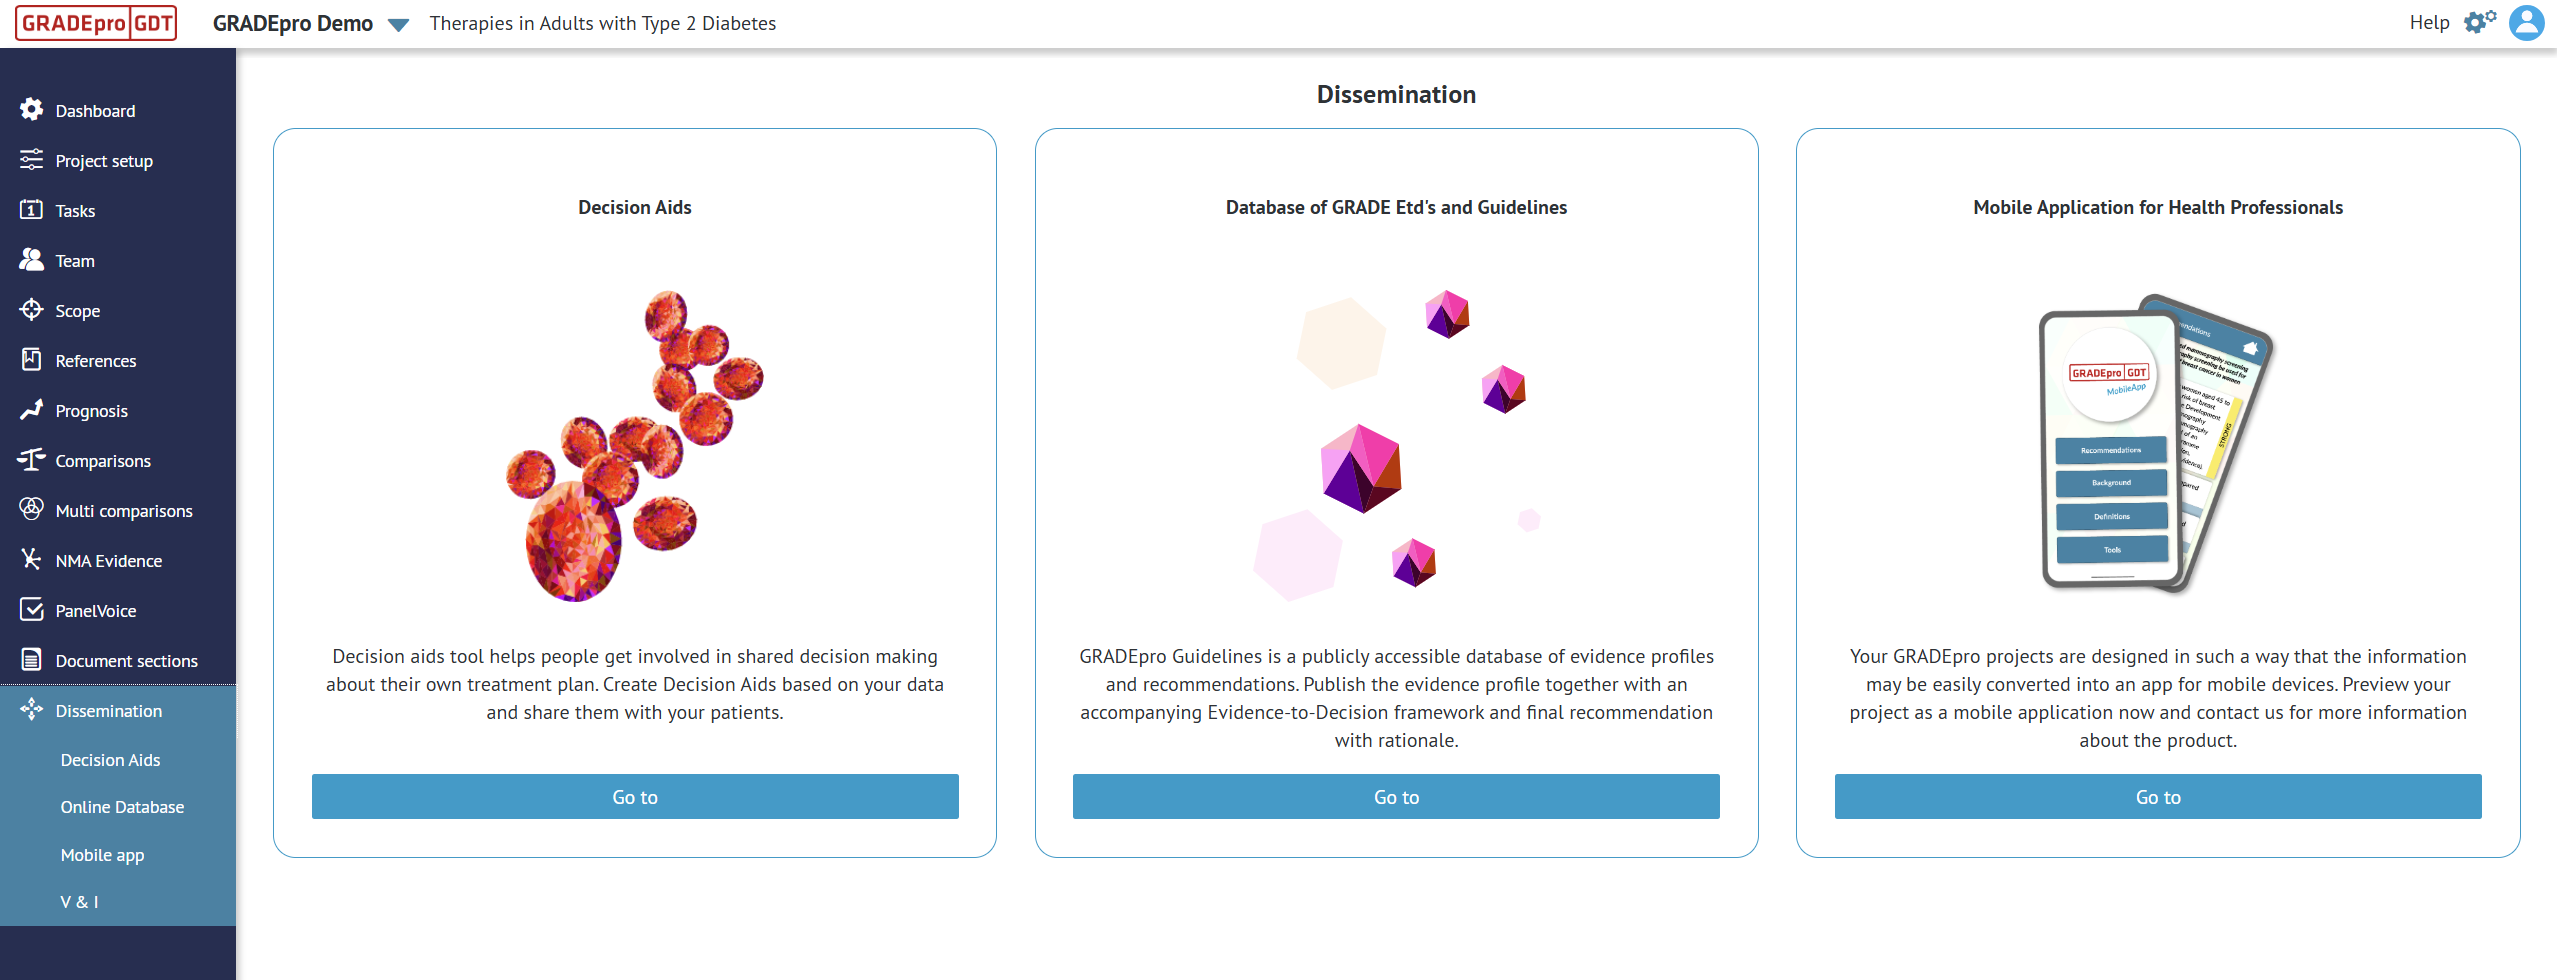
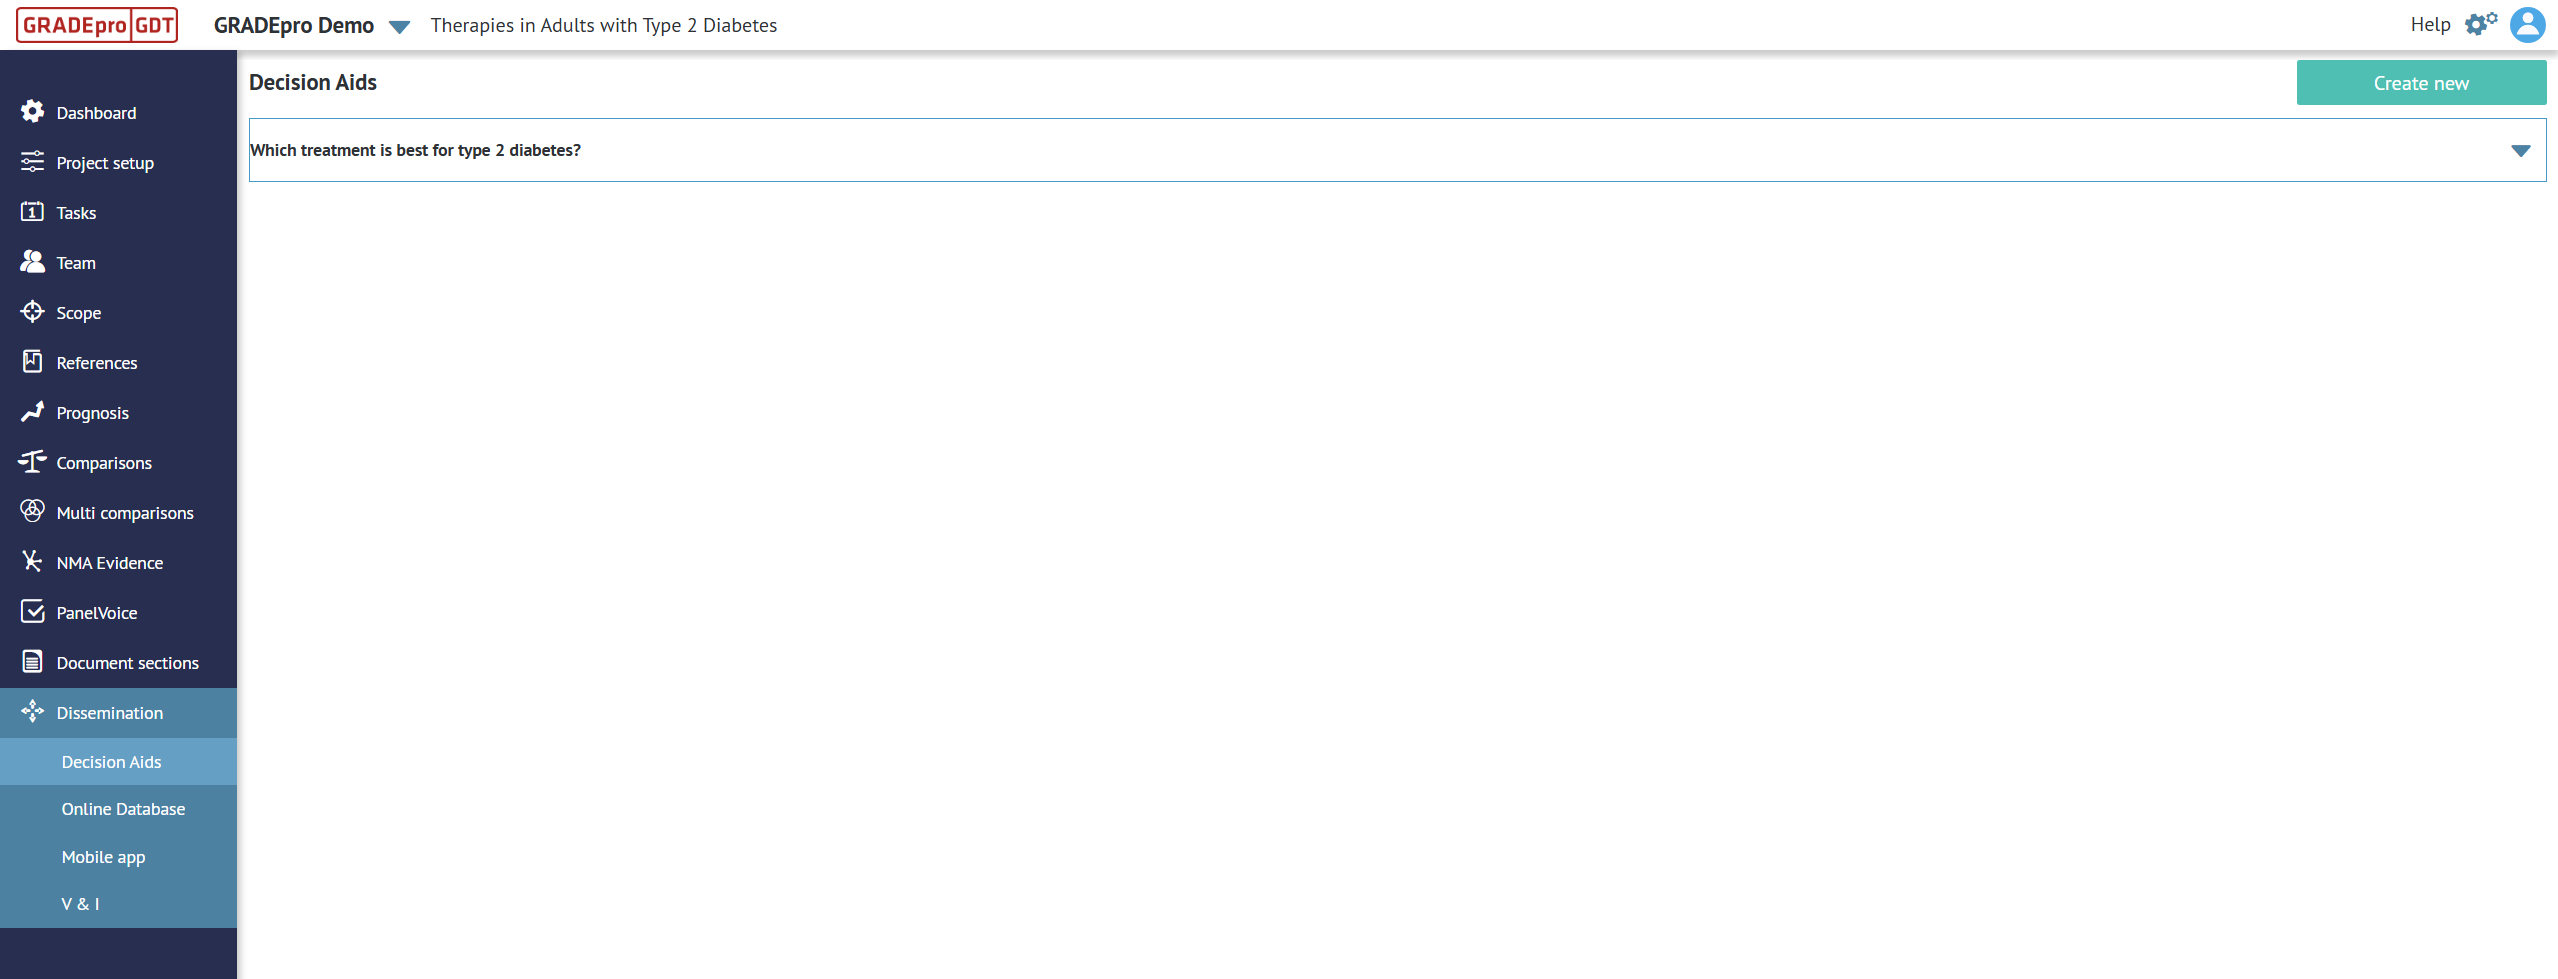
Decision Aids*
Decision Aids module is where users can prepare online forms for shared decision-making for patients and healthcare providers.
Note: The Decision Aids feature is only enabled for paid subscriptions. Additionally, tailor-made Decision Aids can be prepared by the GRADEpro design and development team.
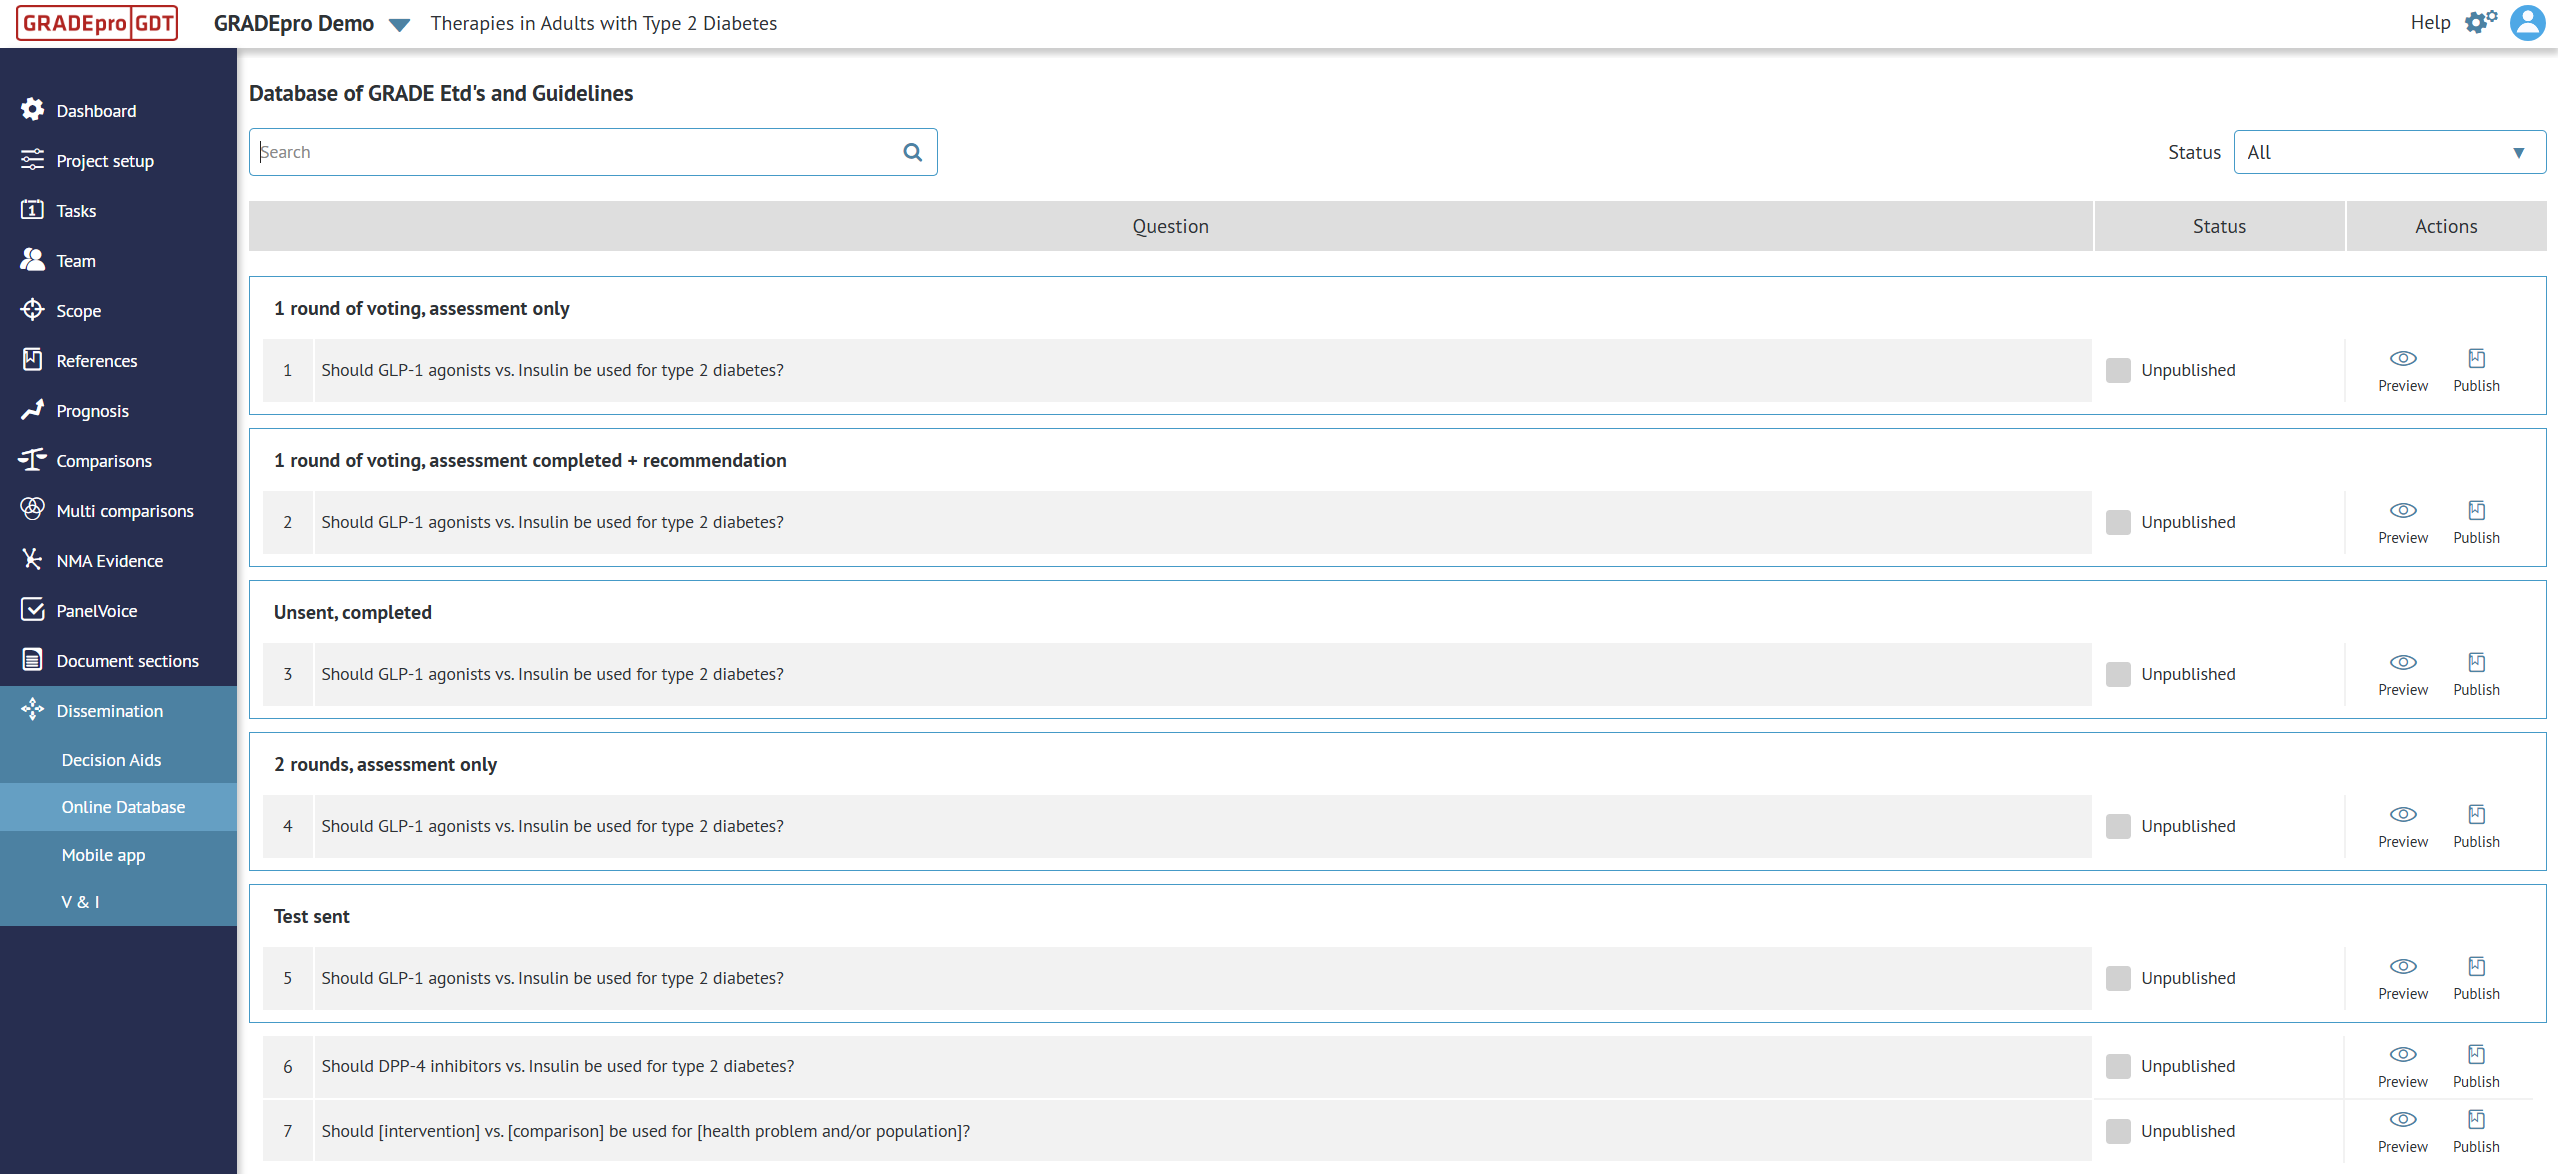
Online Database - GRADEpro's Database of EtDs and Guidelines (DBEP) (free version)
Any GRADEpro user can publish their work into GRADEpro's Database of EtDs and Guidelines (DBEP). This is where the publication process is managed.
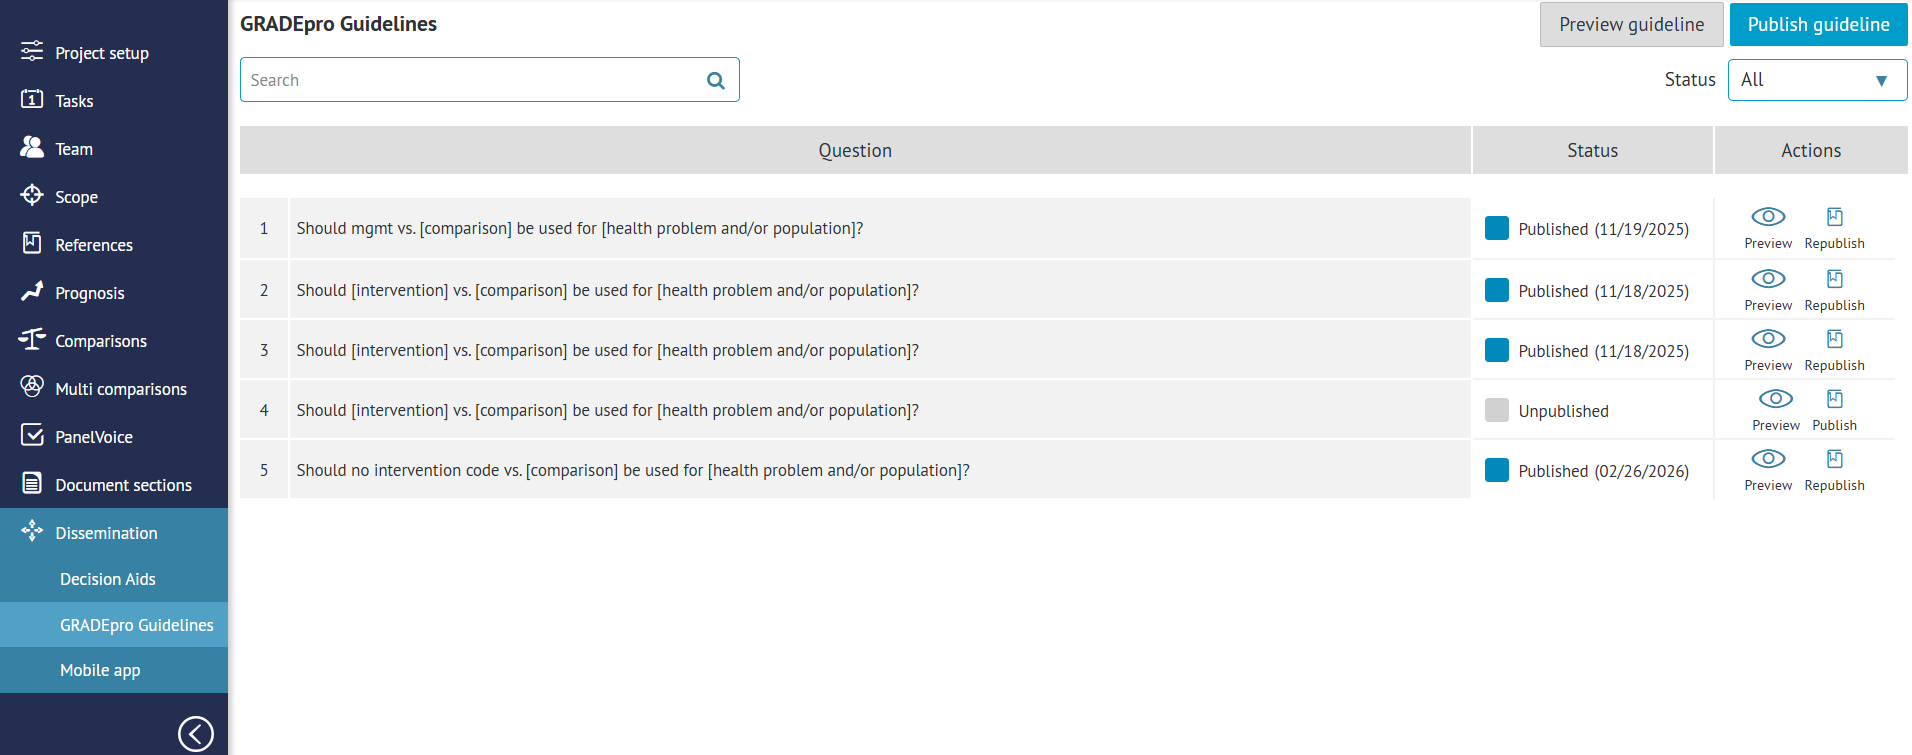
Online Database - Publication Platform*
In case of subscribers who purchased the Publication Platform solution, the DBEP dashboard will be replaced by the Publication Platform (GRADEpro Guidelines) module. It enables publishing not only single recommendations, but also entire guideline documents.
Note: The Online Database - Publication Platform feature is only enabled for paid subscriptions.
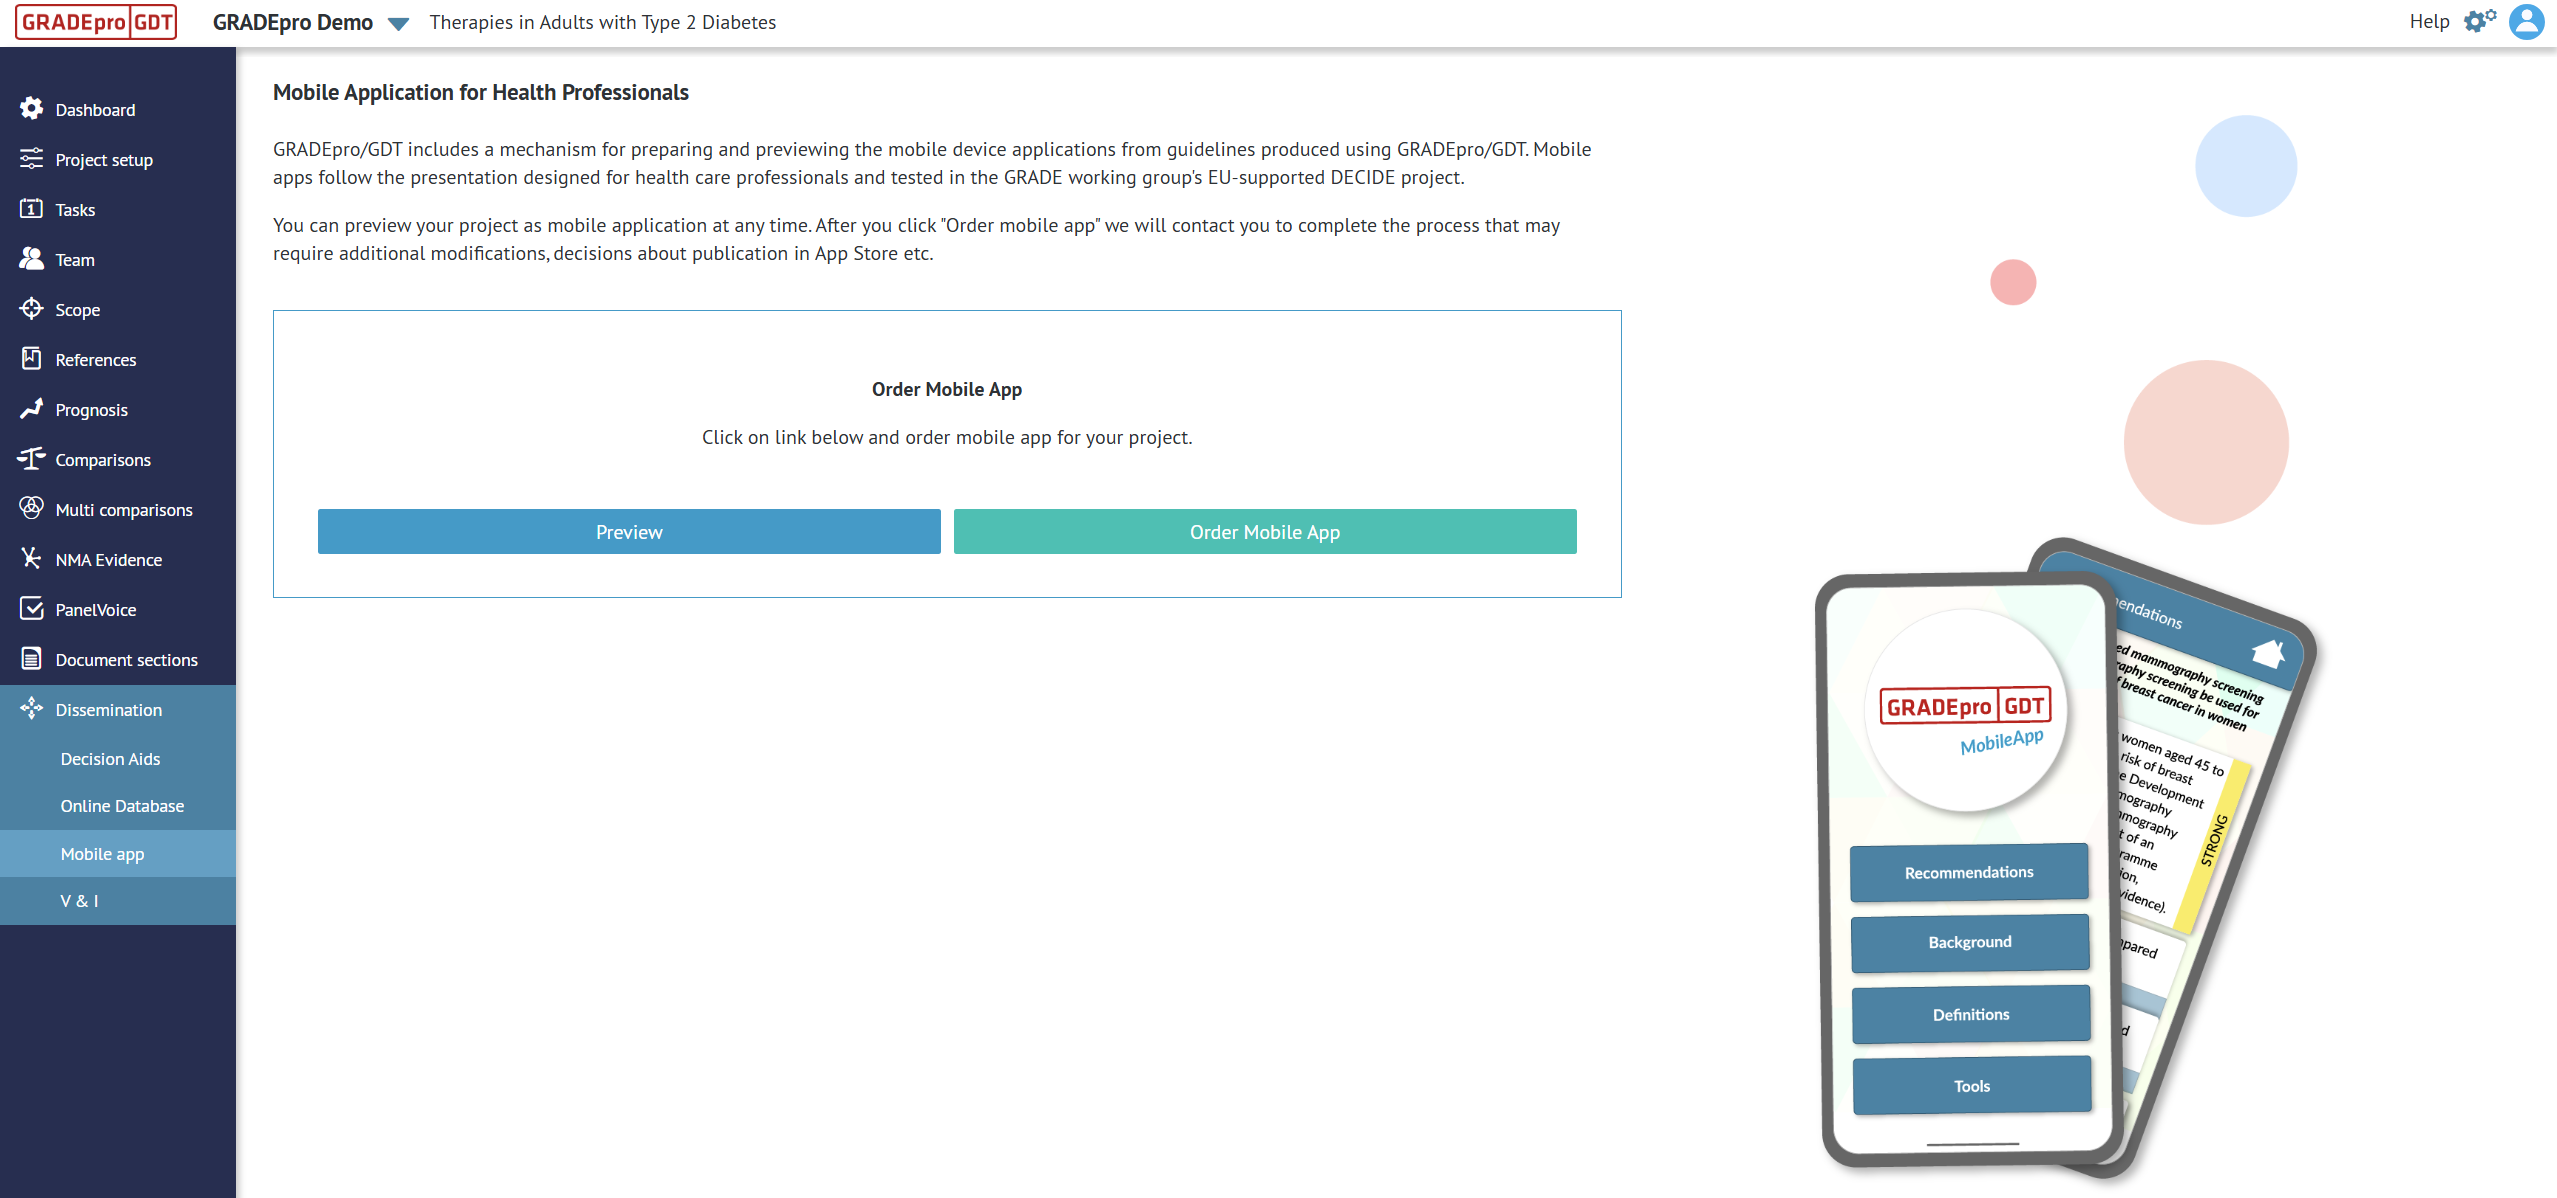
Mobile app
GRADEpro Team can develop a mobile application version of your published guidelines. In this module, you can preview a simplified version of your evidence. An example of an existing mobile app can be found here (in a desktop version, the app can be downloaded on your mobile from app stores).
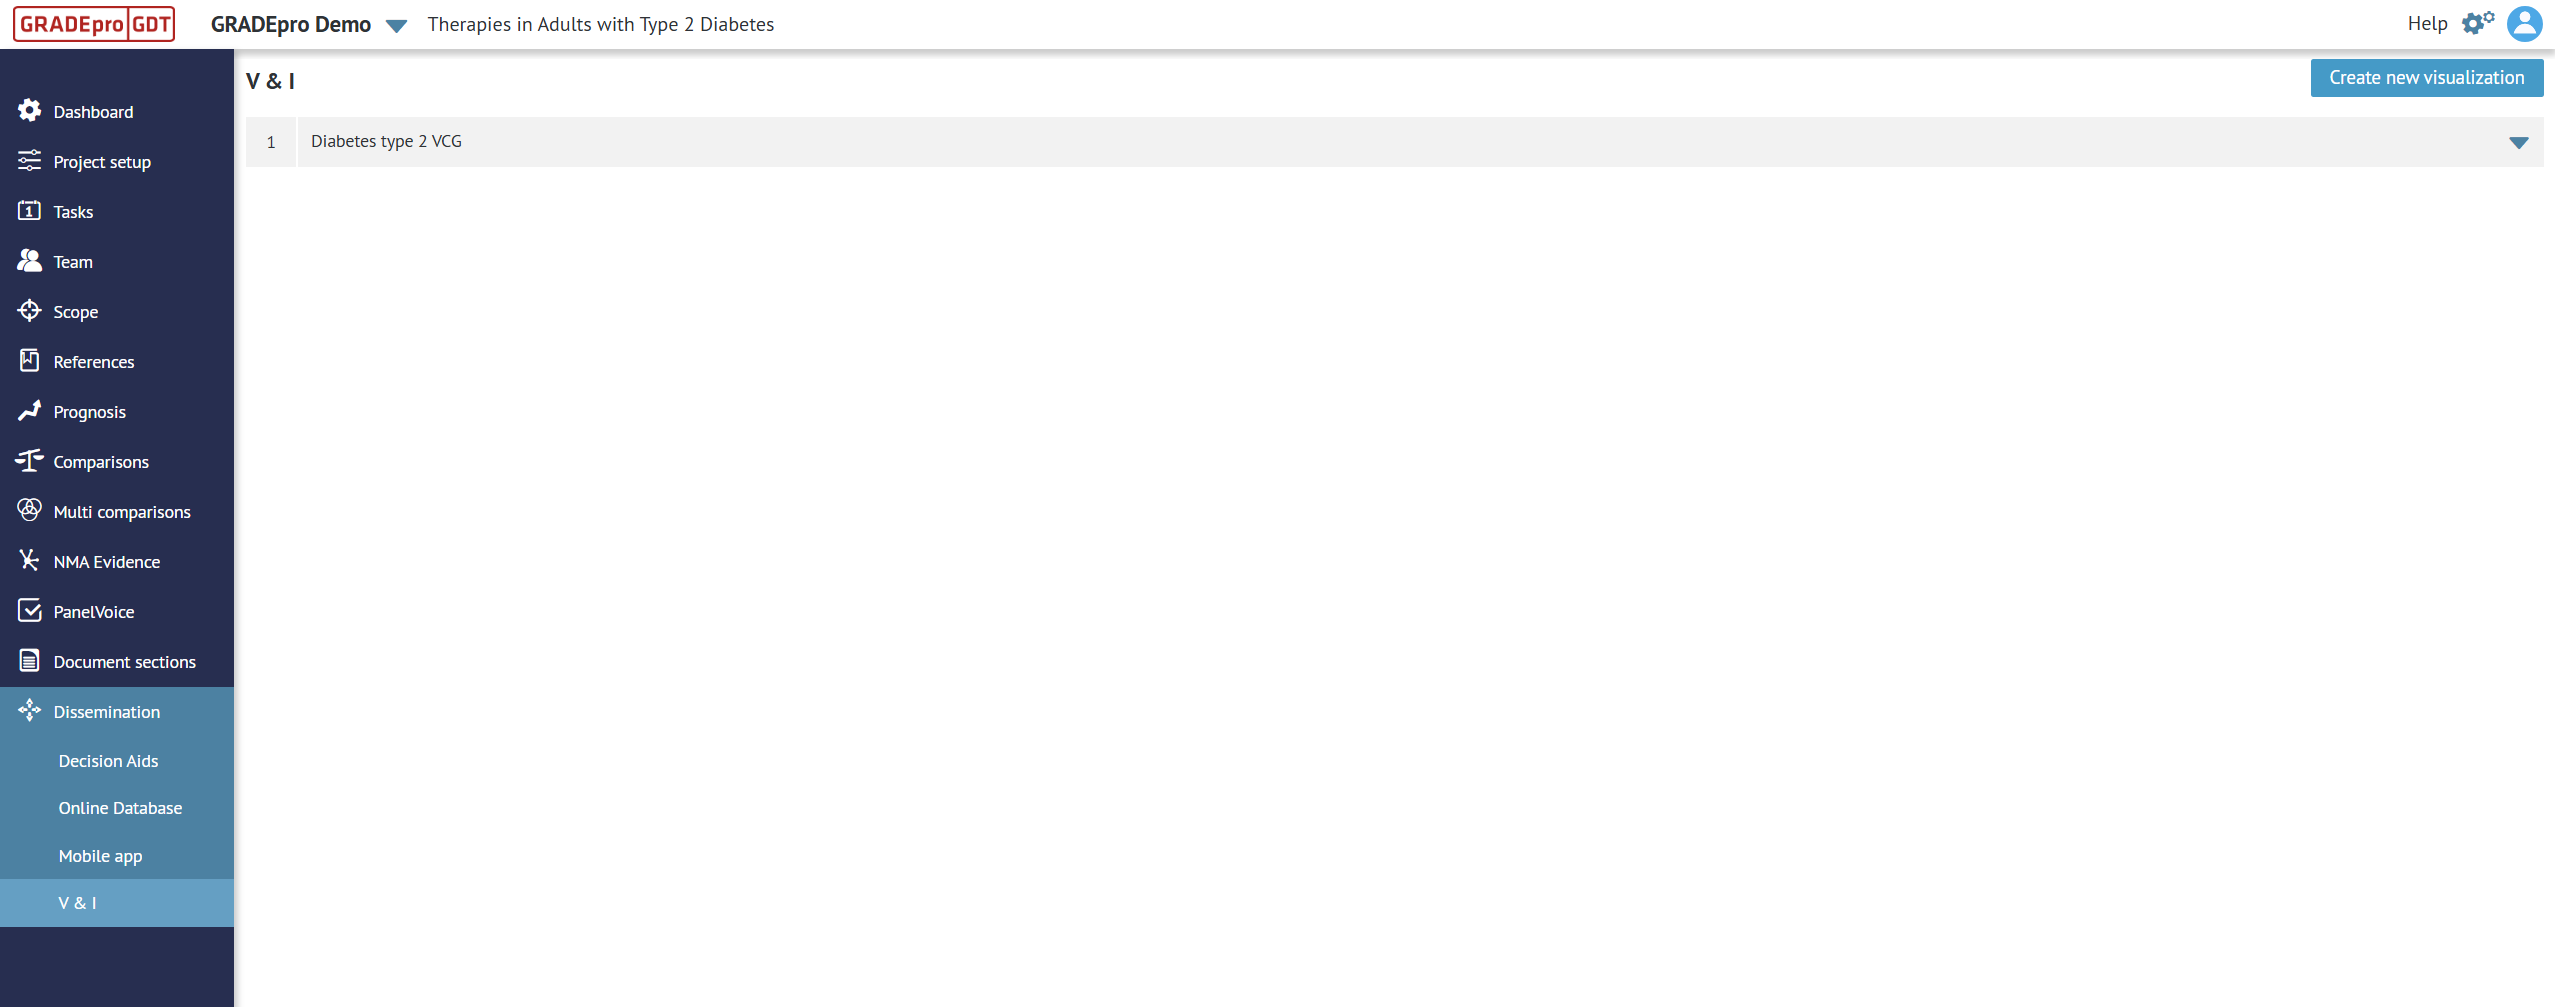
V&I*
V&I, which stands for Visual and Interactive, is a module in which a Visual Clinical Guideline presentation can be prepared.
RELATED ARTICLES
Was this article helpful?
That’s Great!
Thank you for your feedback
Sorry! We couldn't be helpful
Thank you for your feedback
Feedback sent
We appreciate your effort and will try to fix the article